DIY(do it yourself)- let's see your creativity in various DIY skills week 31
14 comments
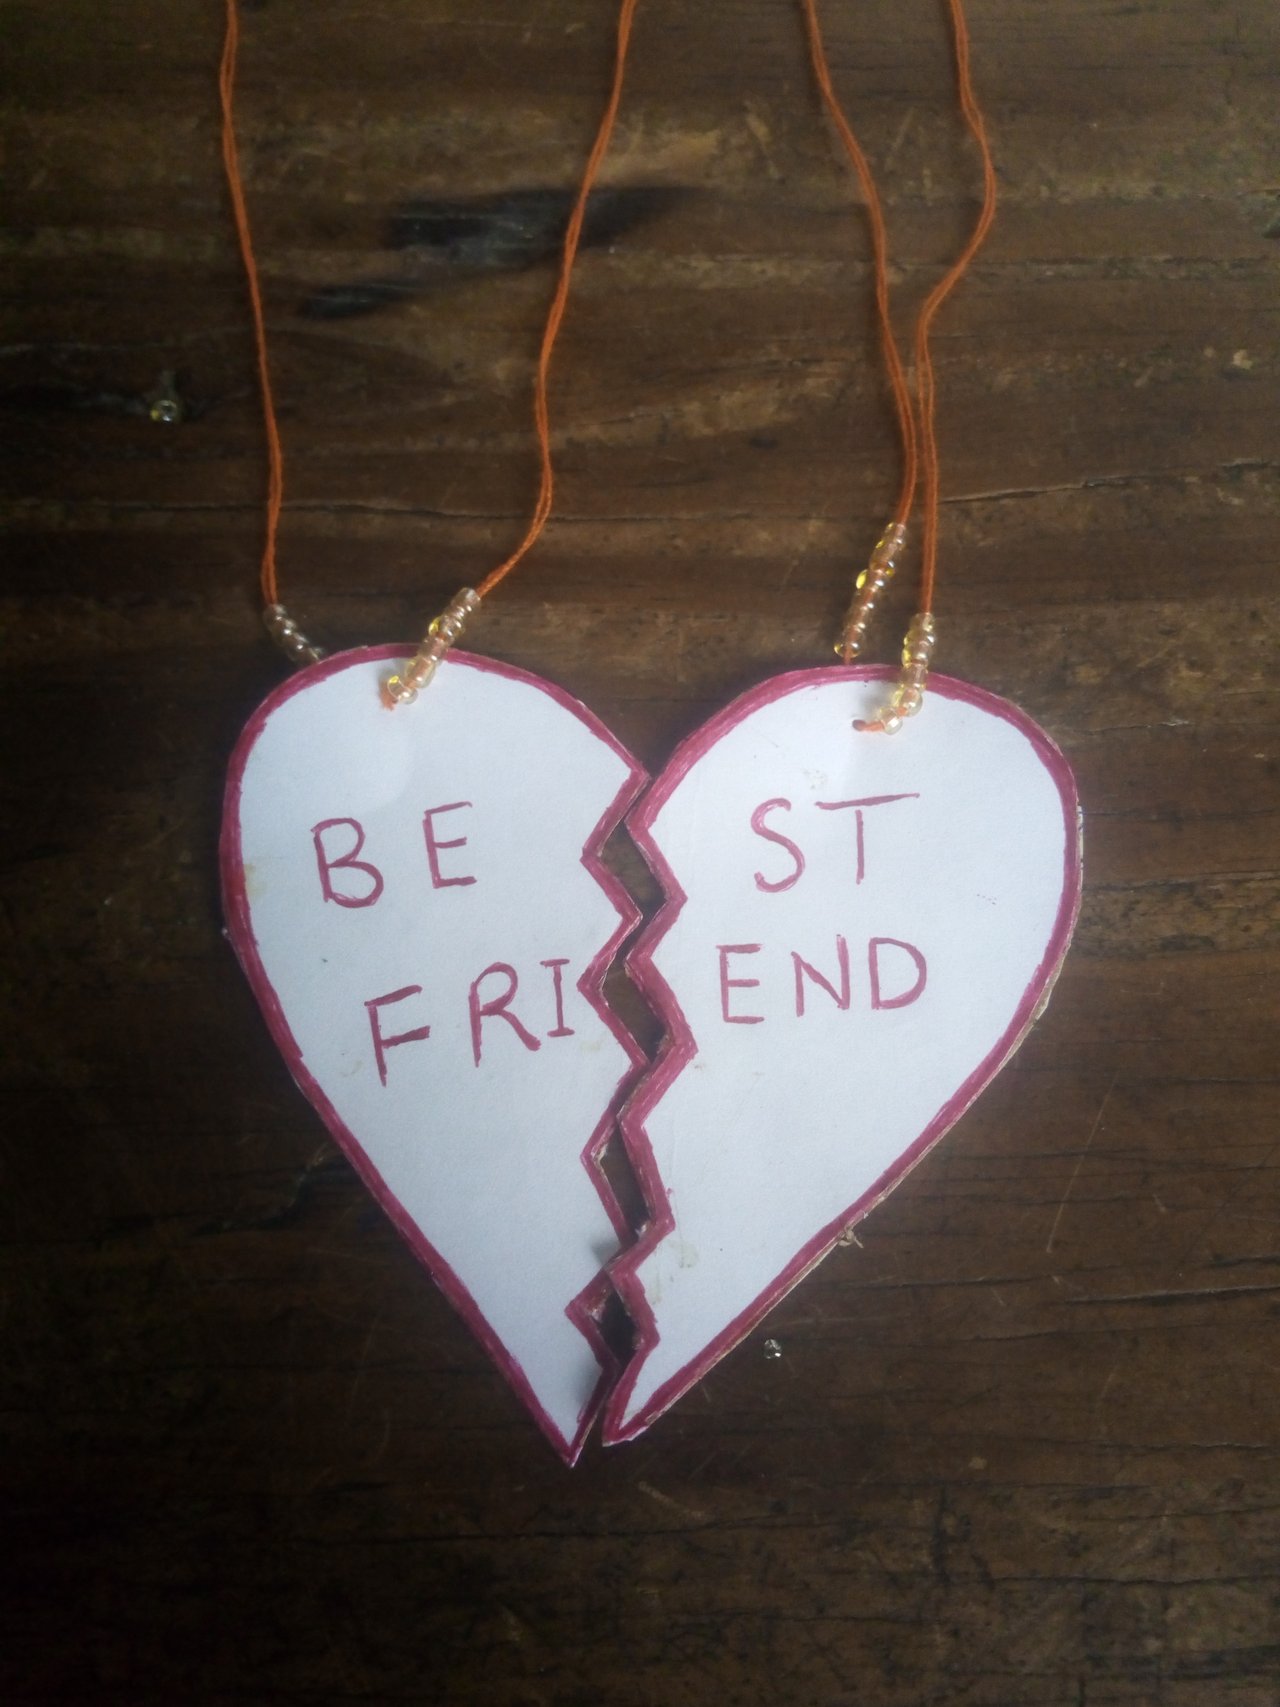
Greetings to my fellow beloved steemians, hope your having a blessed week and you are all doing well. Its always fun to be creative, as a young boy I find being creative a very good skill and something to hold onto to and thanks to steemit and @mesola which always brings up an amazing contest like this every week to enable us show how creative we are through diy, indeed i am thankful. without much ado I will be showing you guys with pictures to prove on how I made a friendship necklace.
MATERIALS NEEDED
The materials required for me to create this diy include:
1 paper
2 cardboard
3 red maker or pen
4 gum
5 a thread.
Here's how I created this craft.
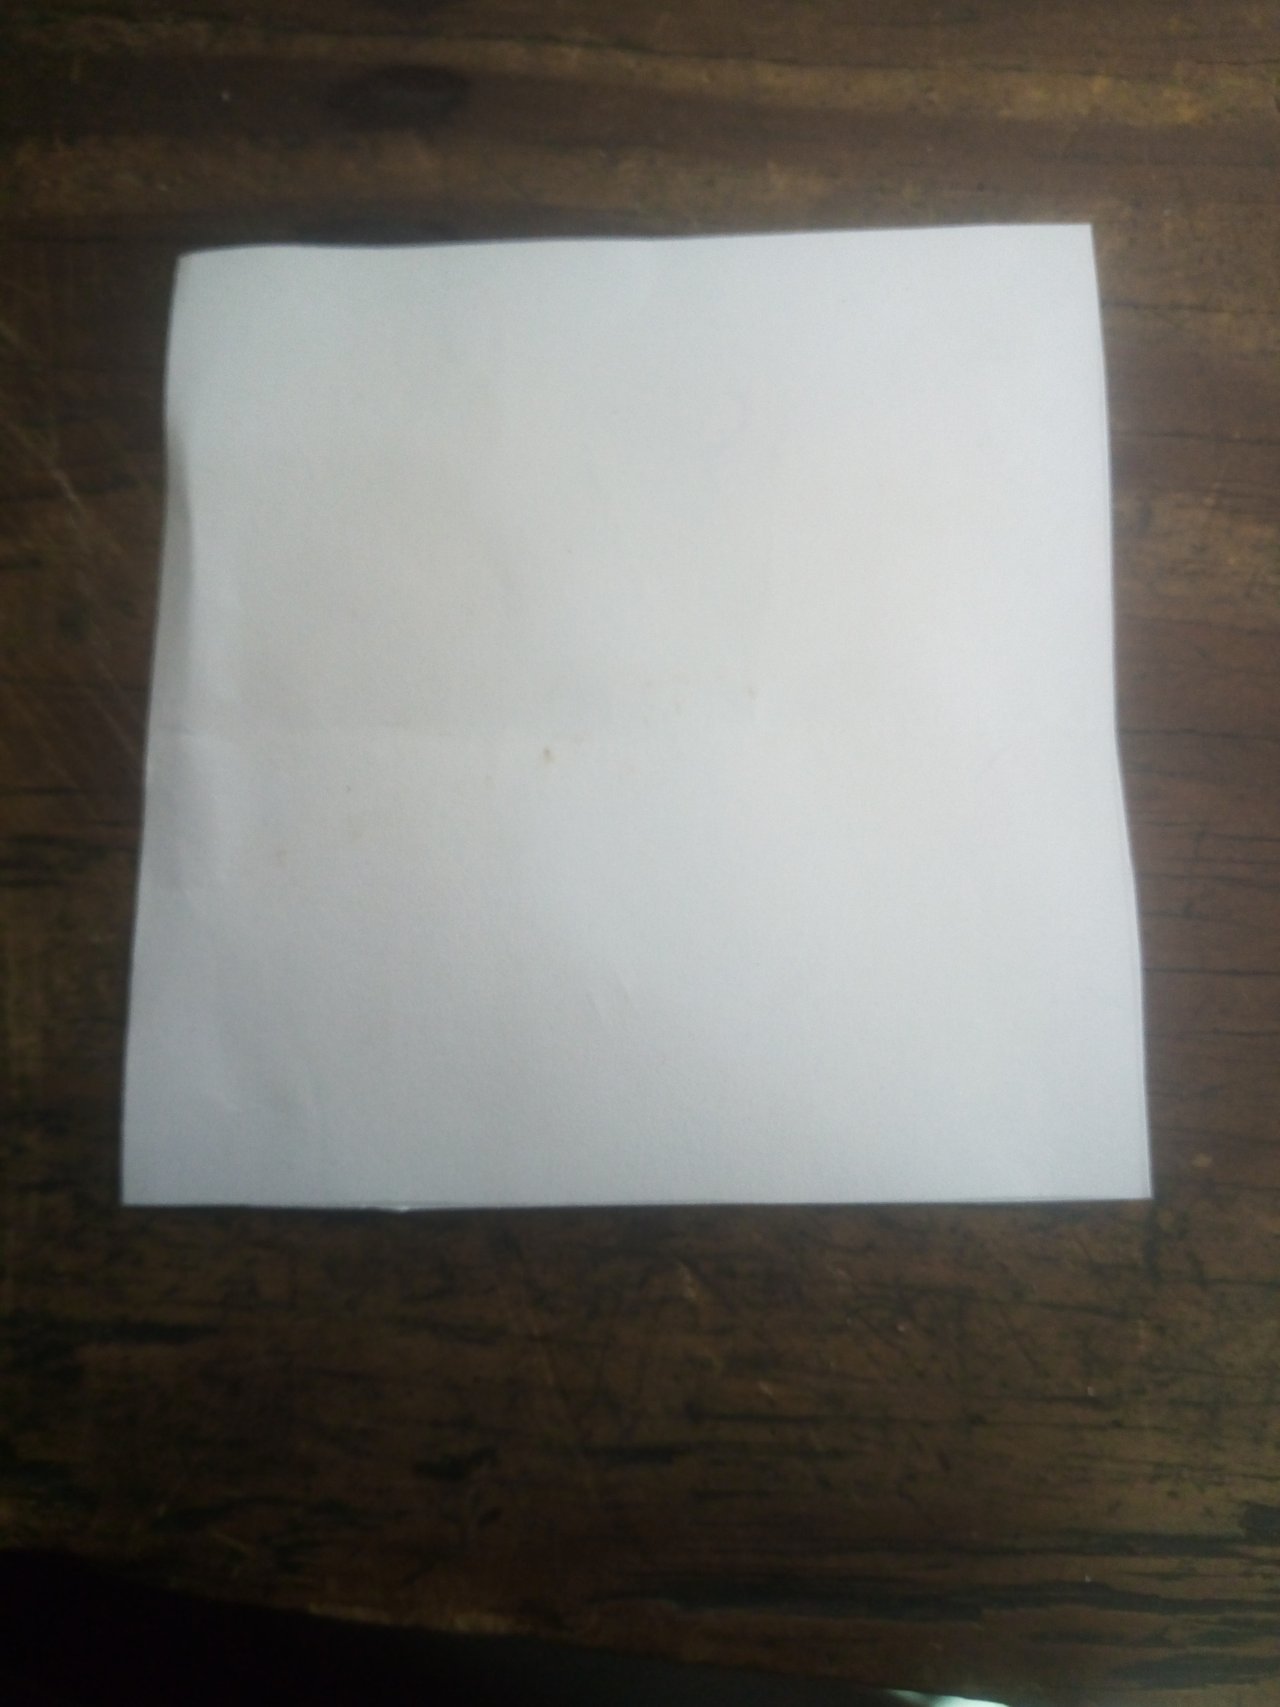
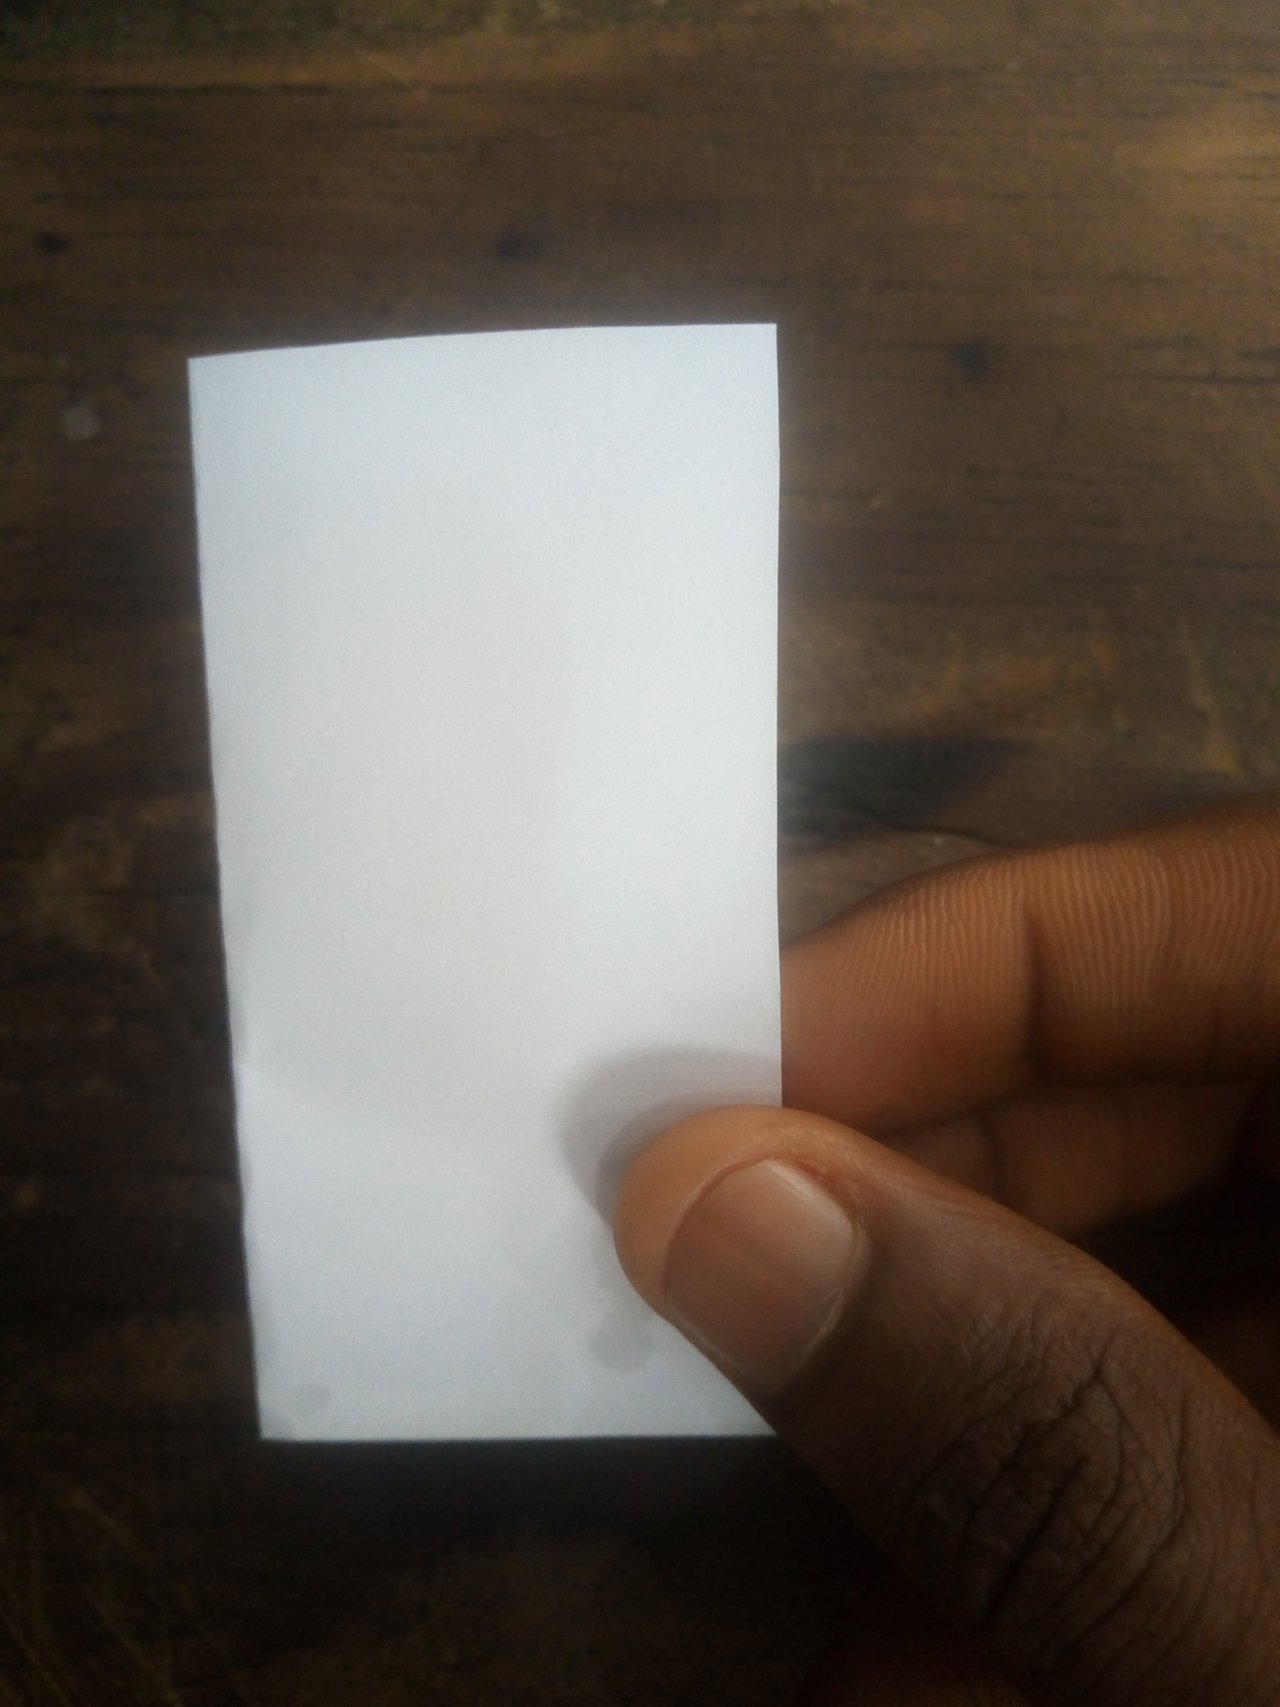
step 1
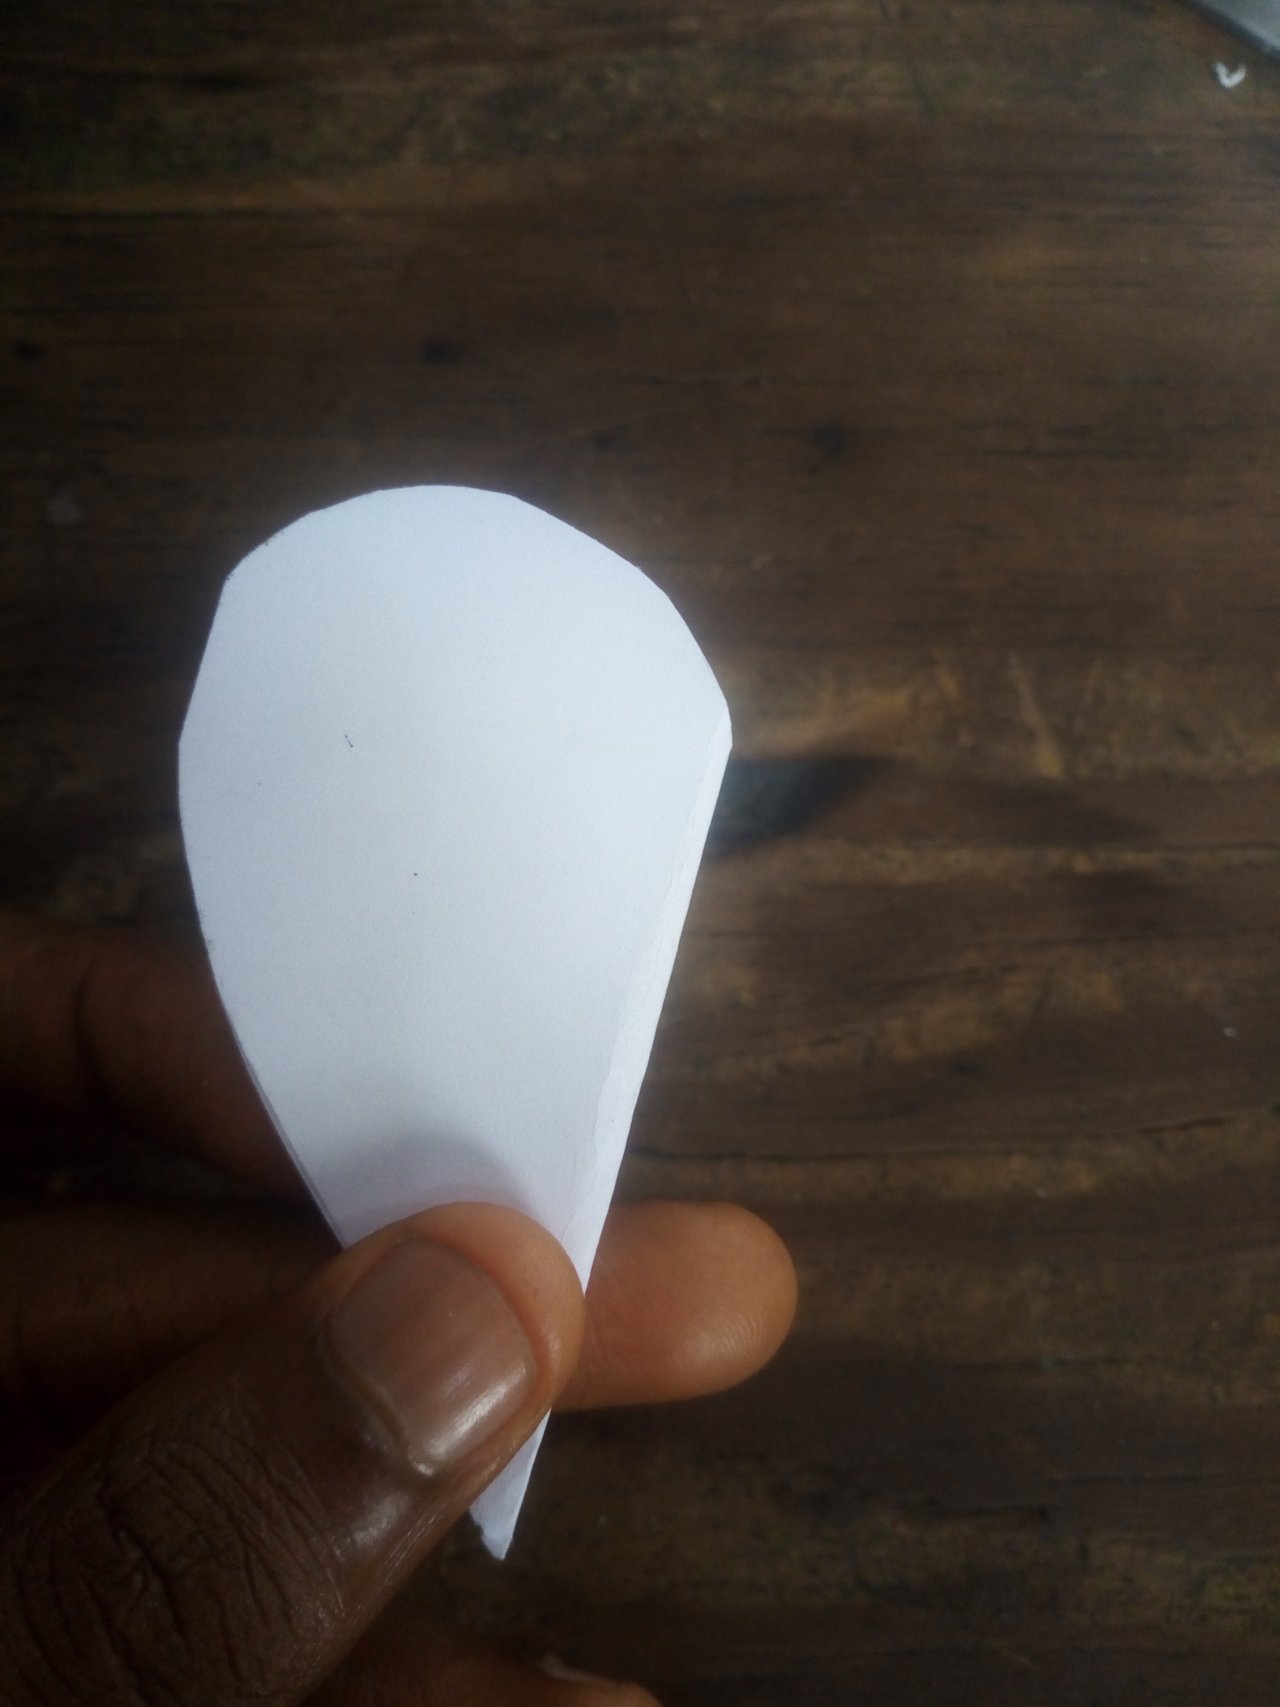
First of all I started by getting a piece of paper in which its width and breath is 8 cm, and then i folded it into two equal part.
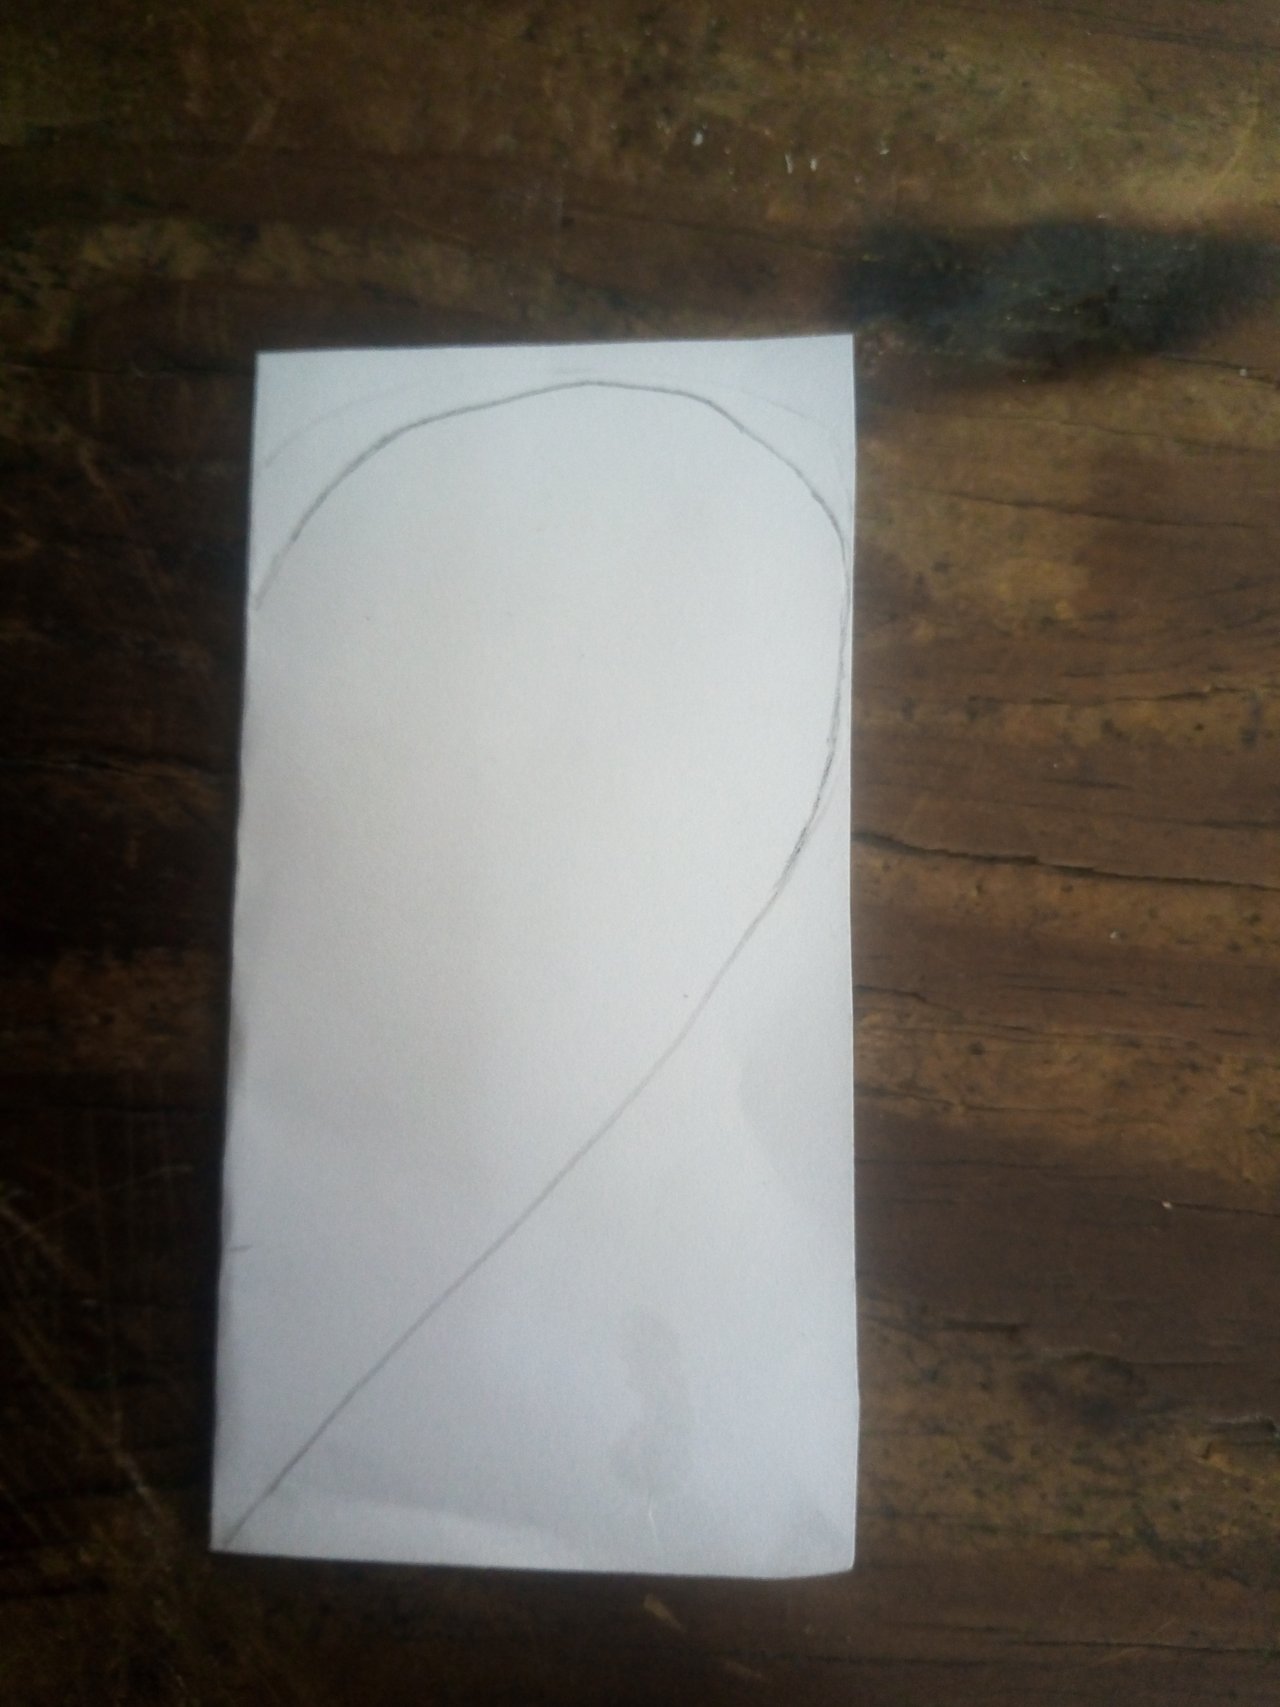
step 2
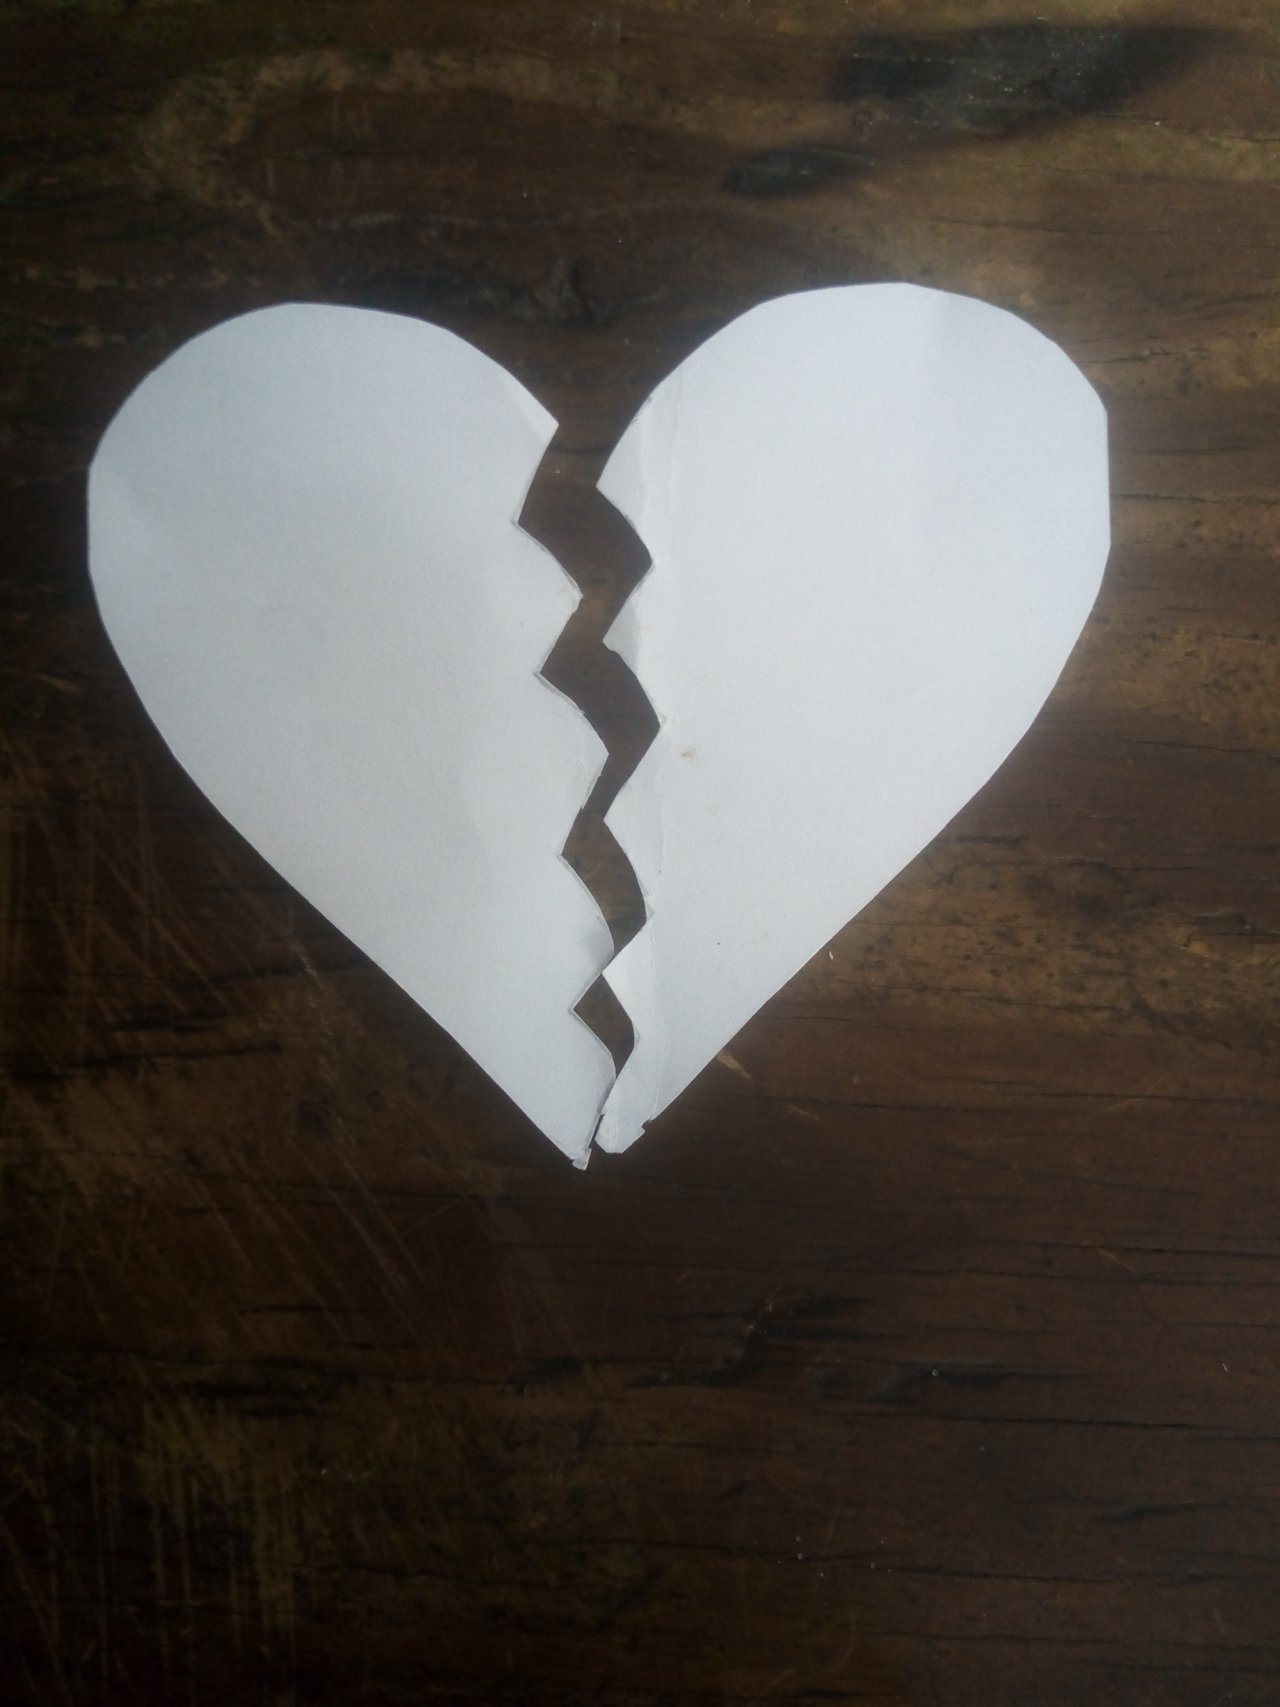
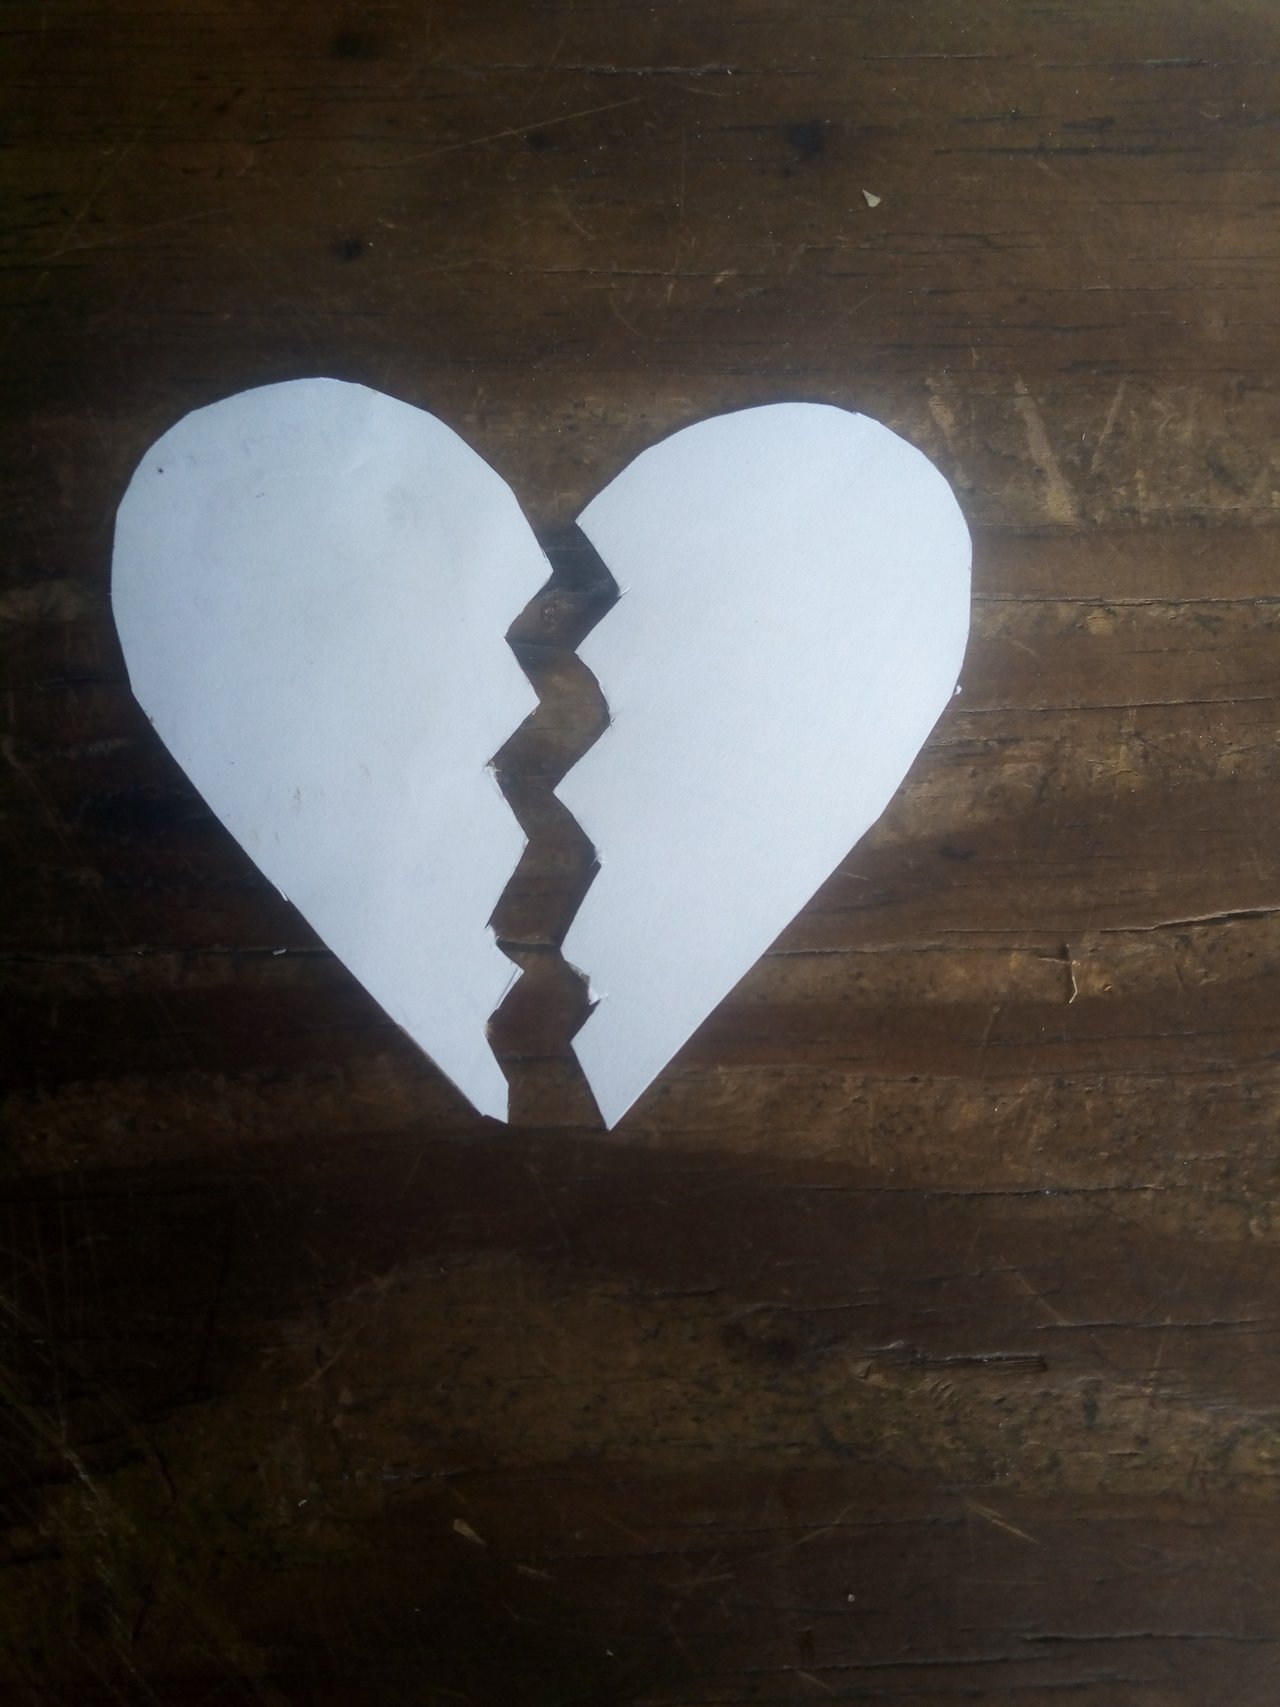
After doing that, I then drew the shape of love on the folded paper and carefully cut it.
step 3
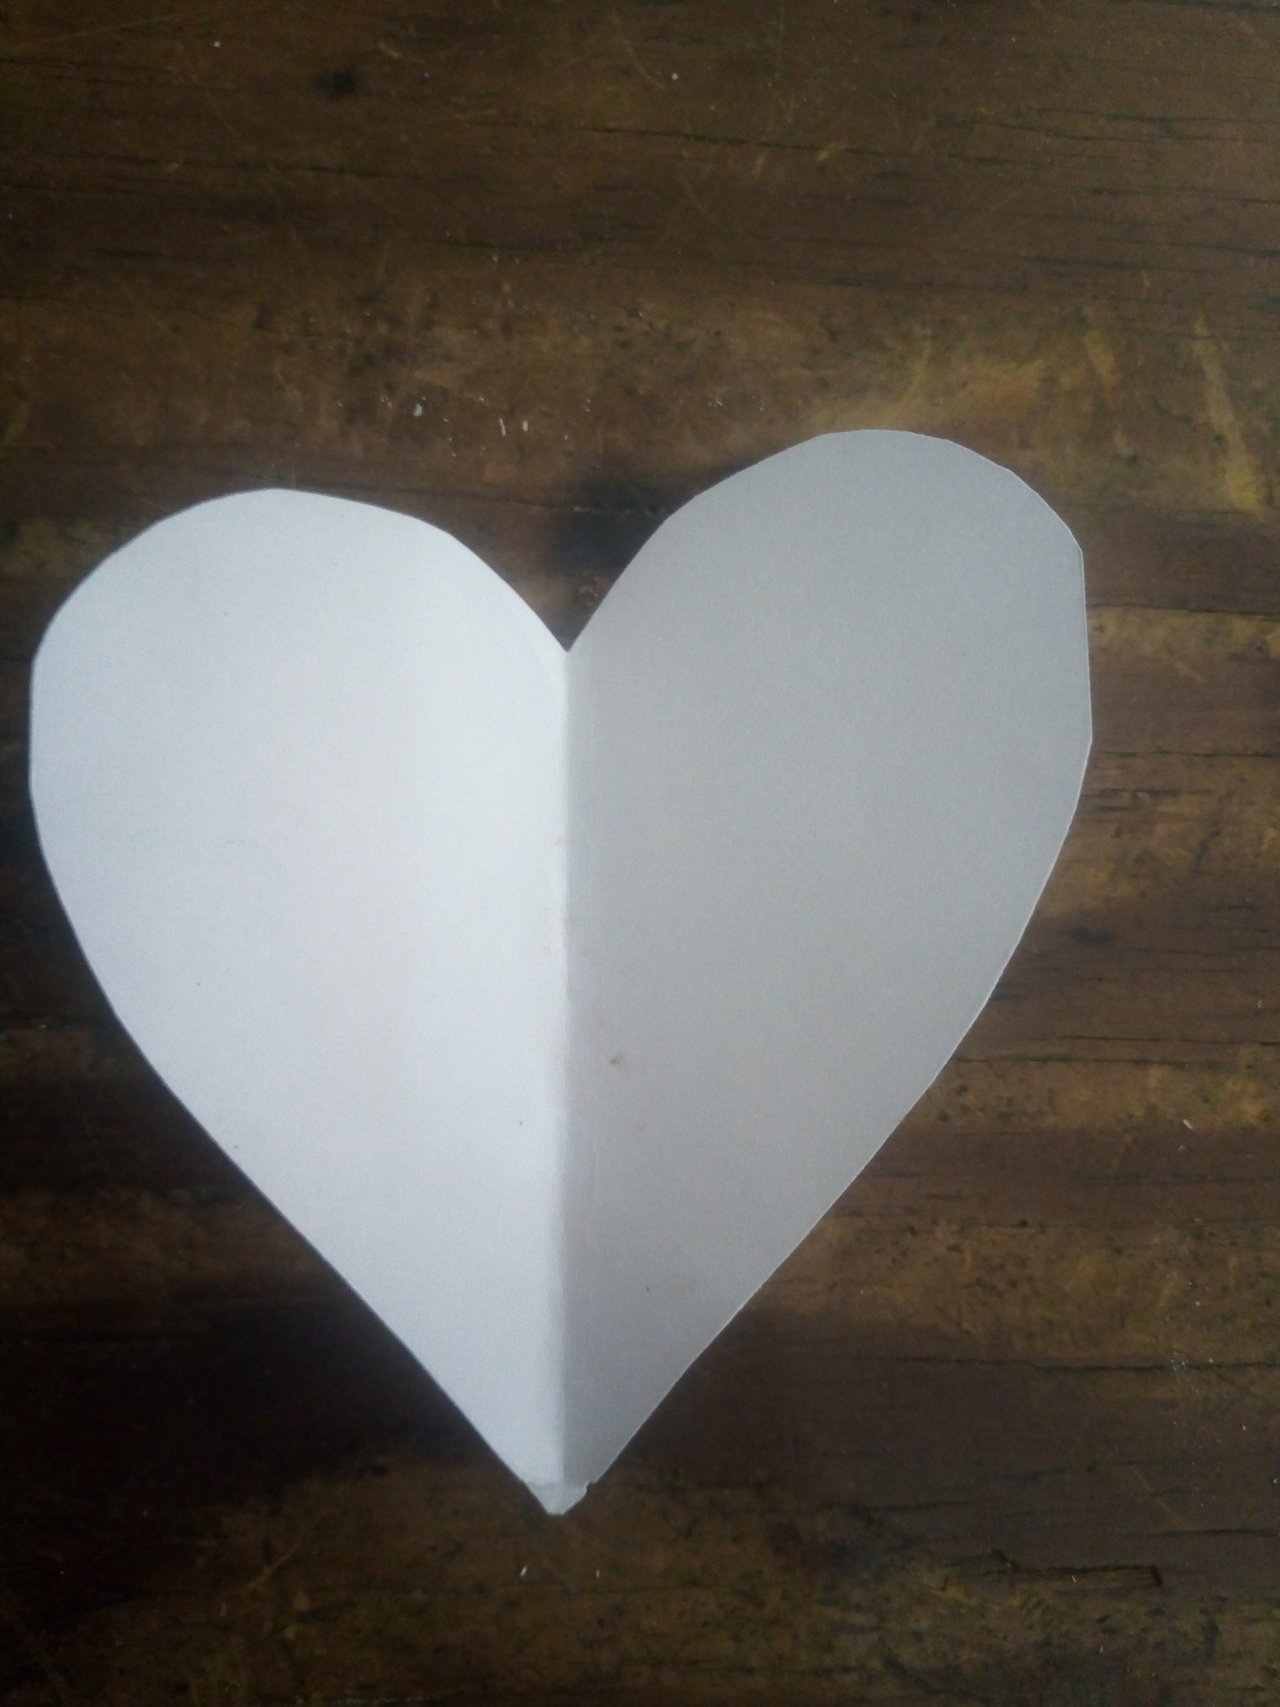
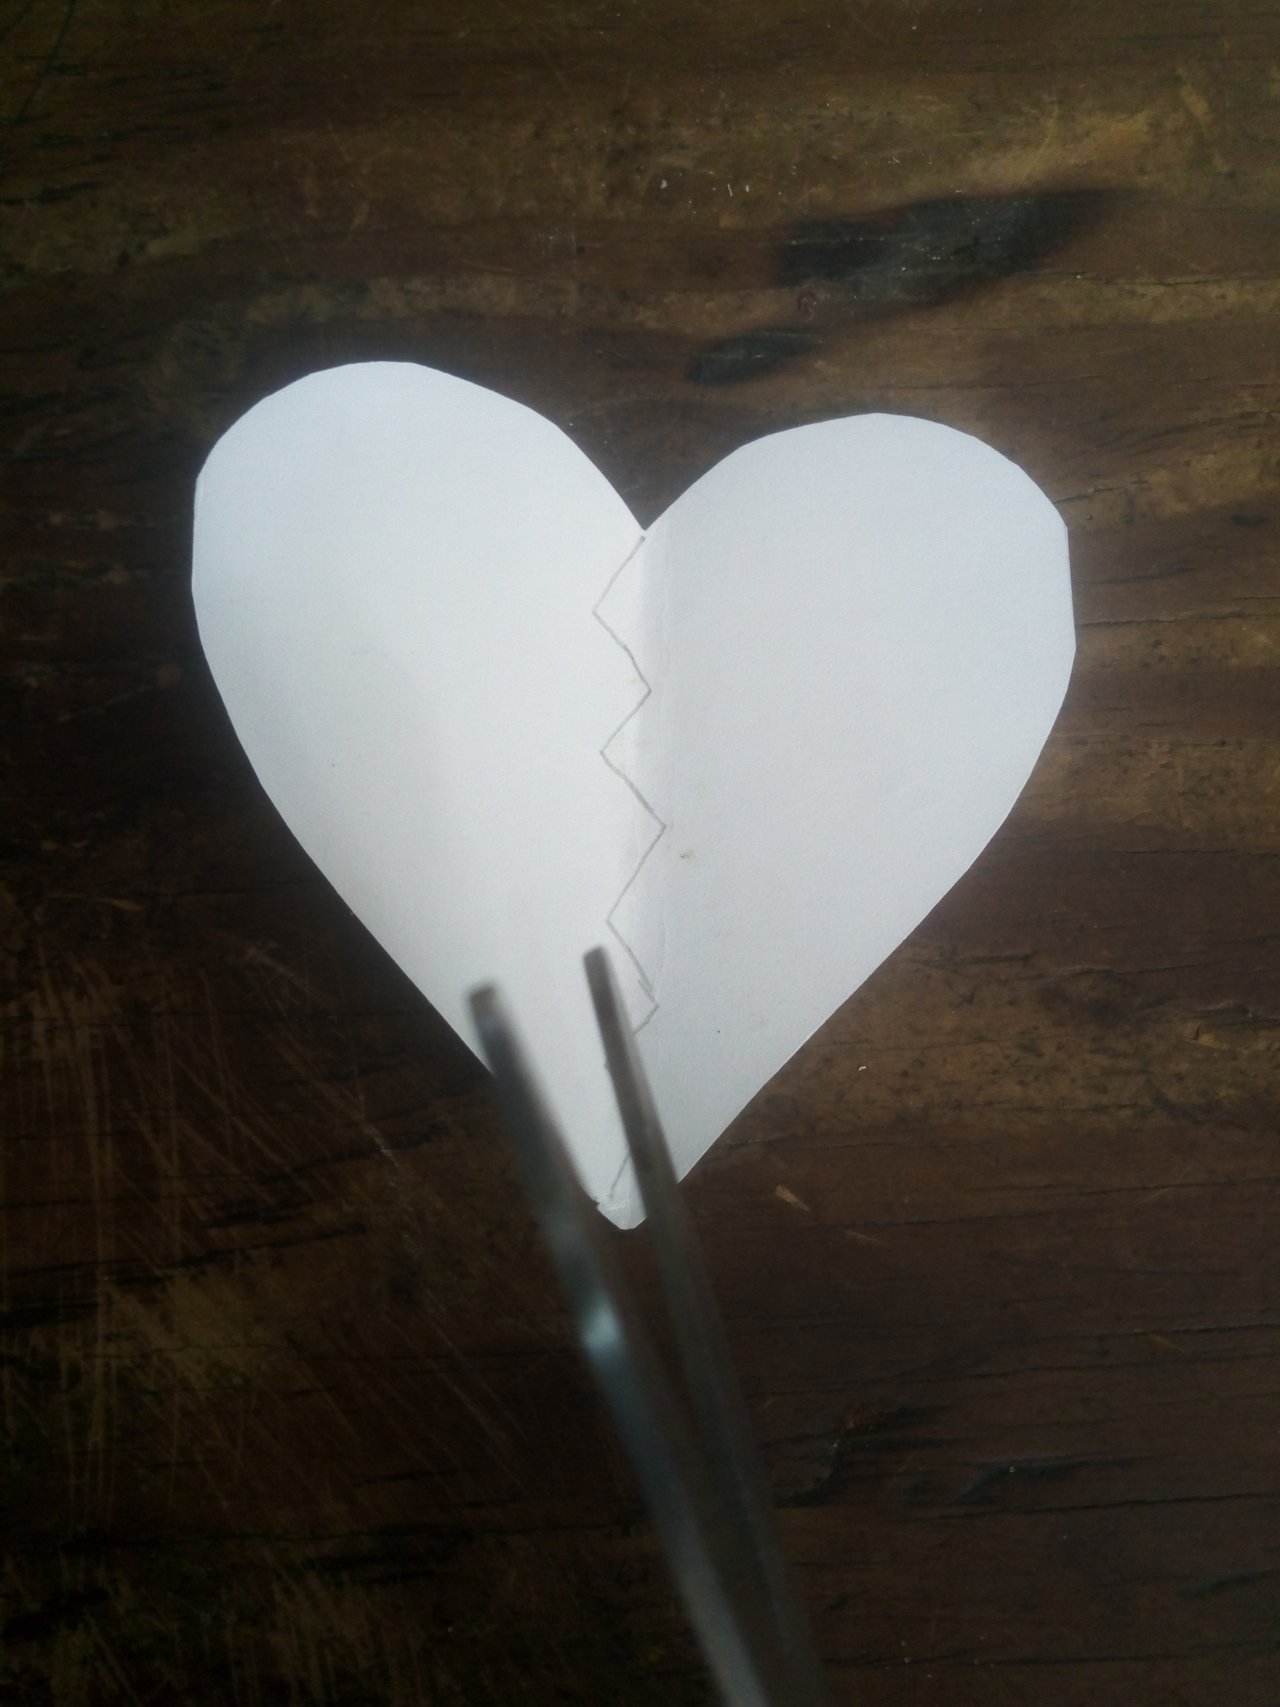
After cutting it, when you open it it will be like a complete love shape and then I draw a zigzag line in the center of the love shape and cut it.
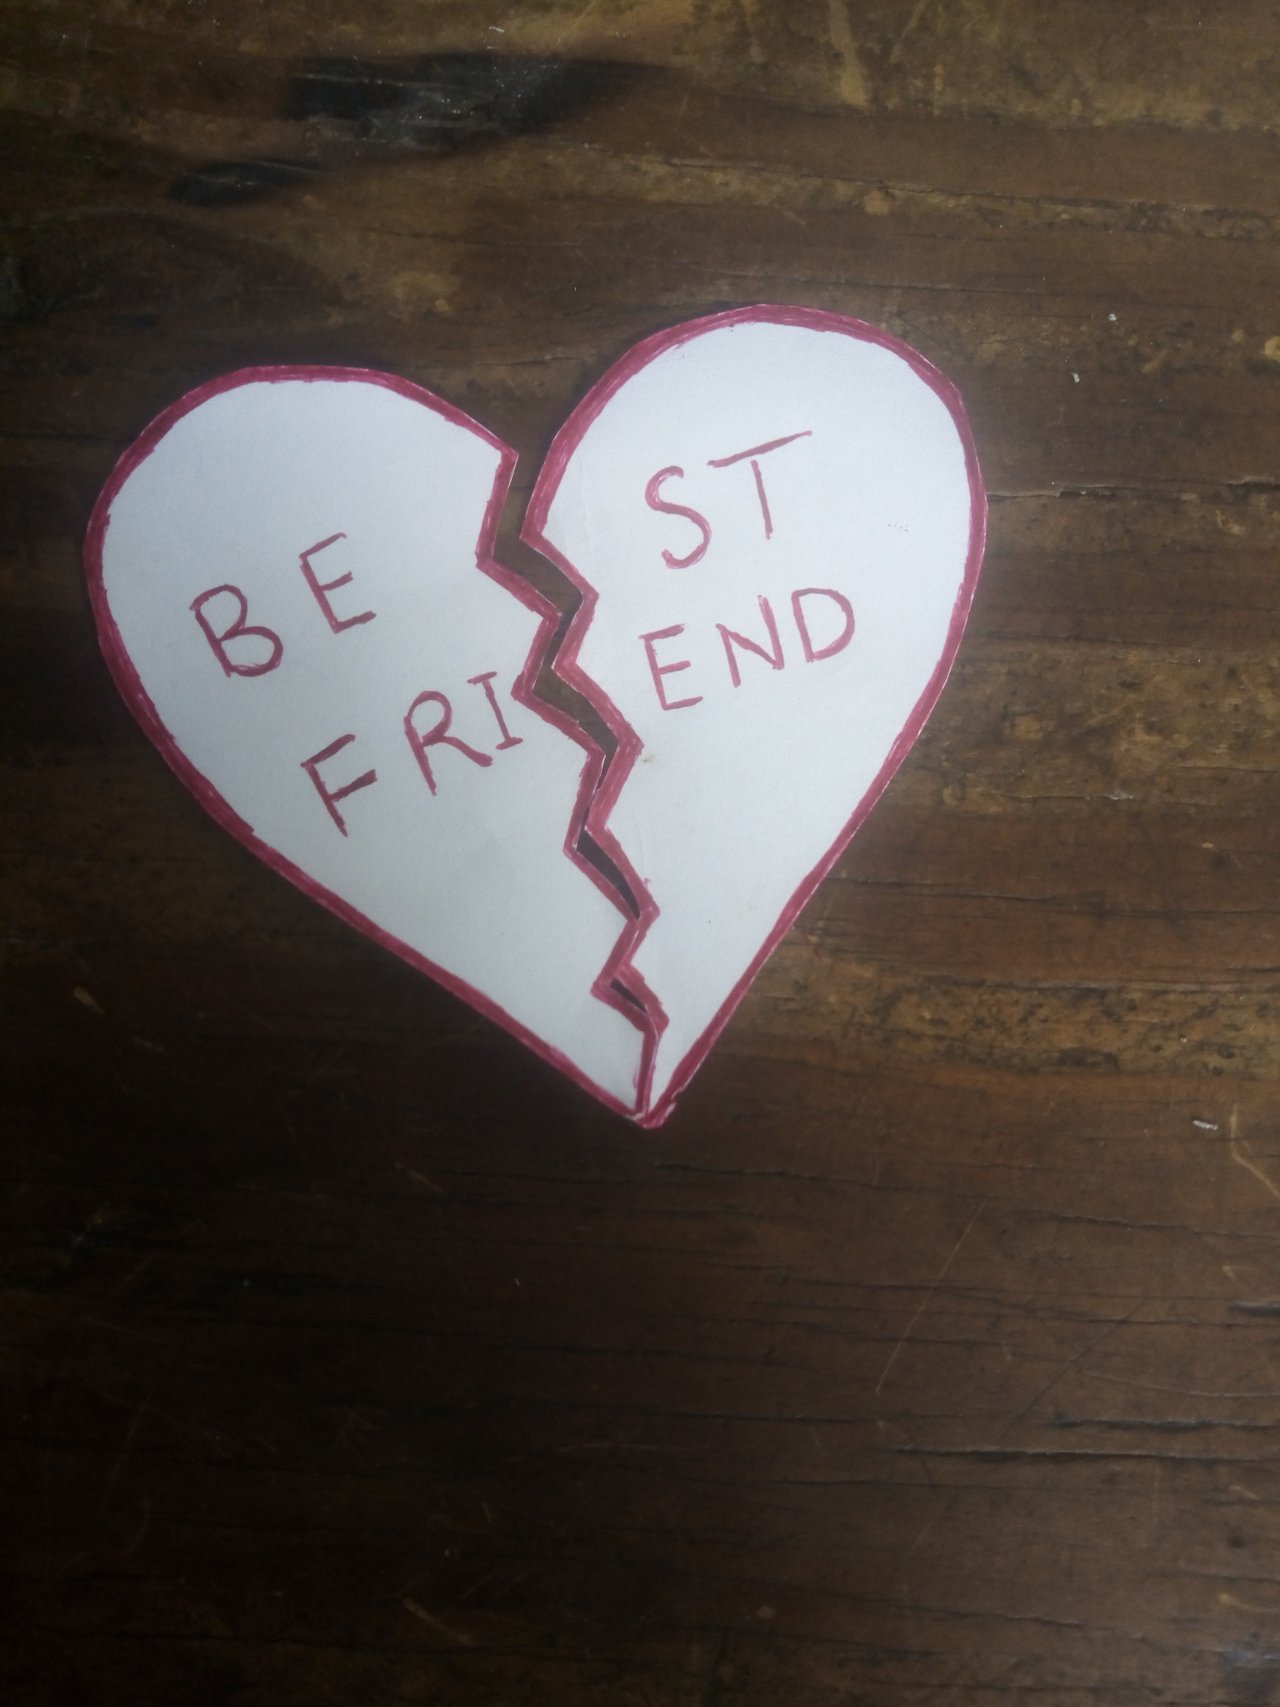
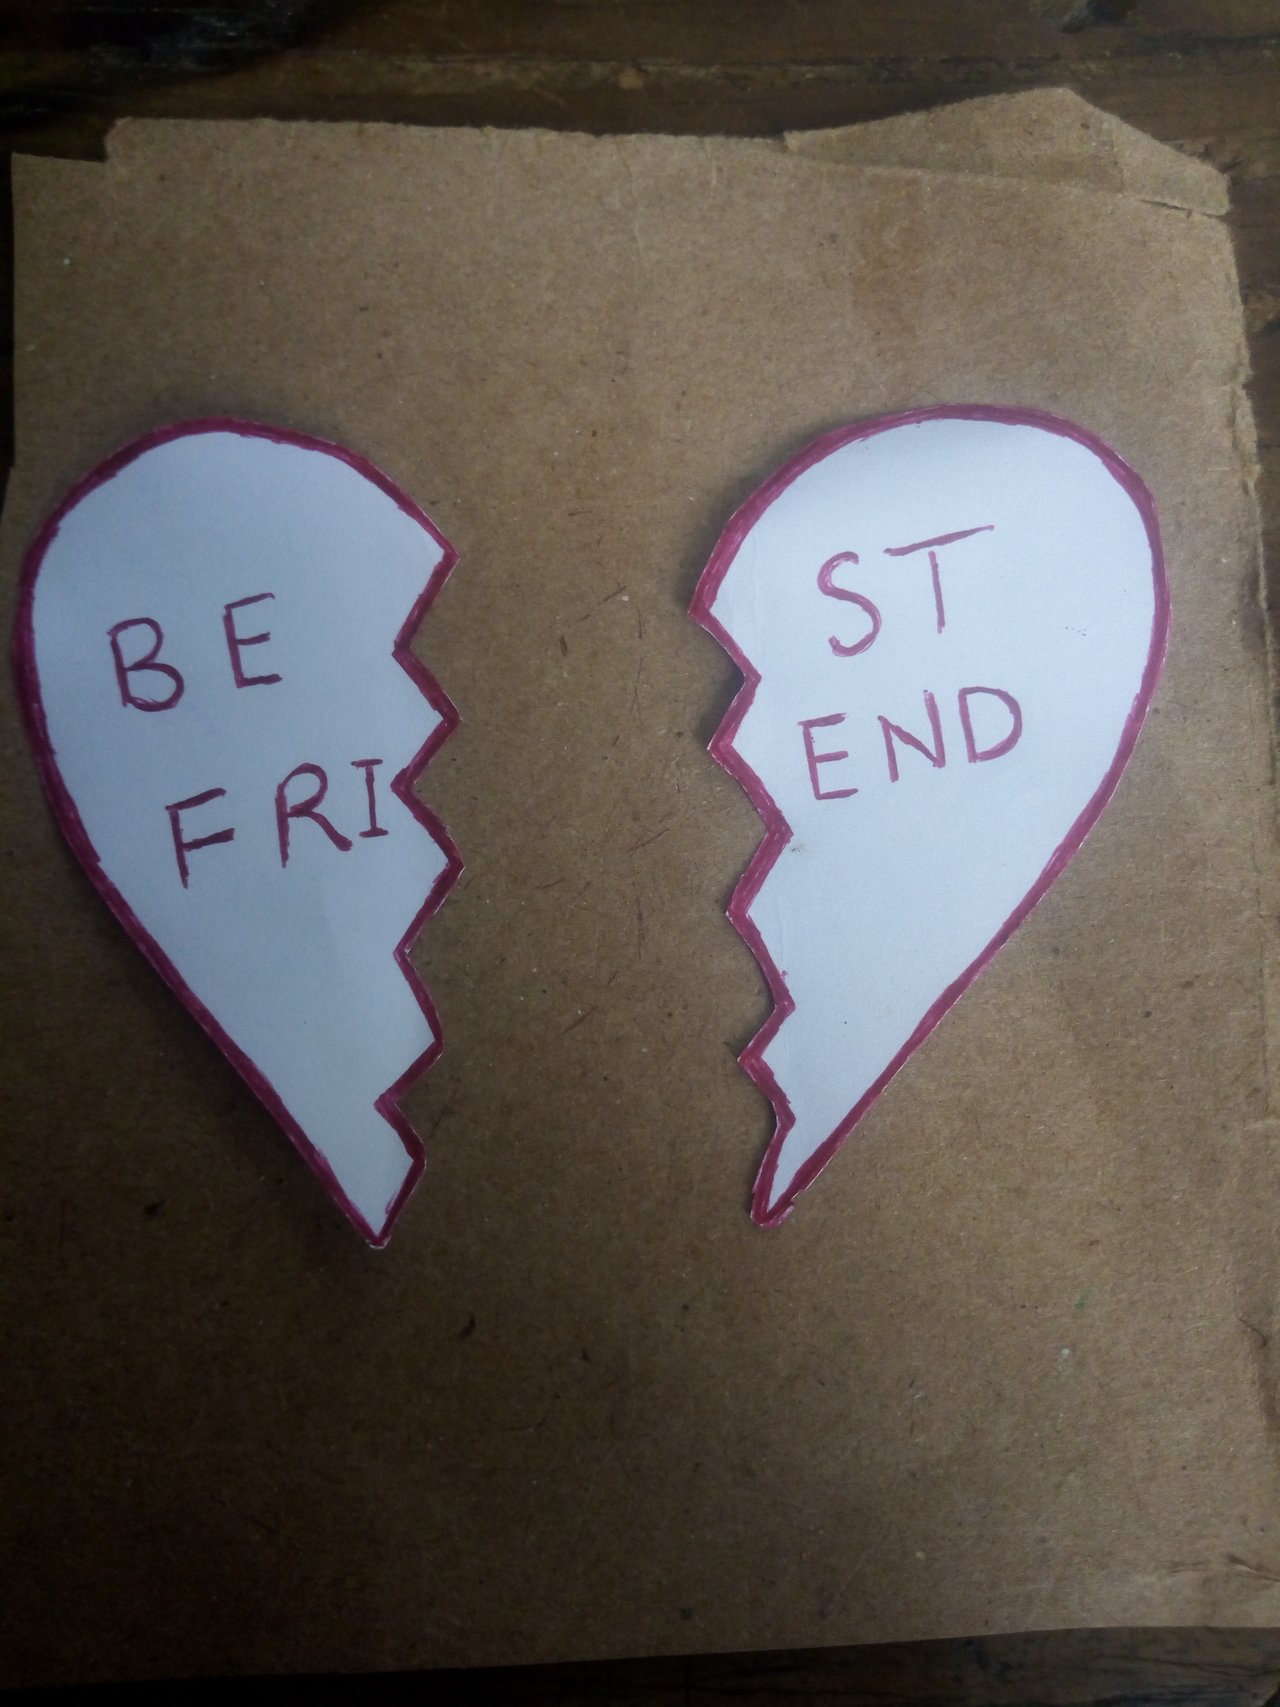
step 4
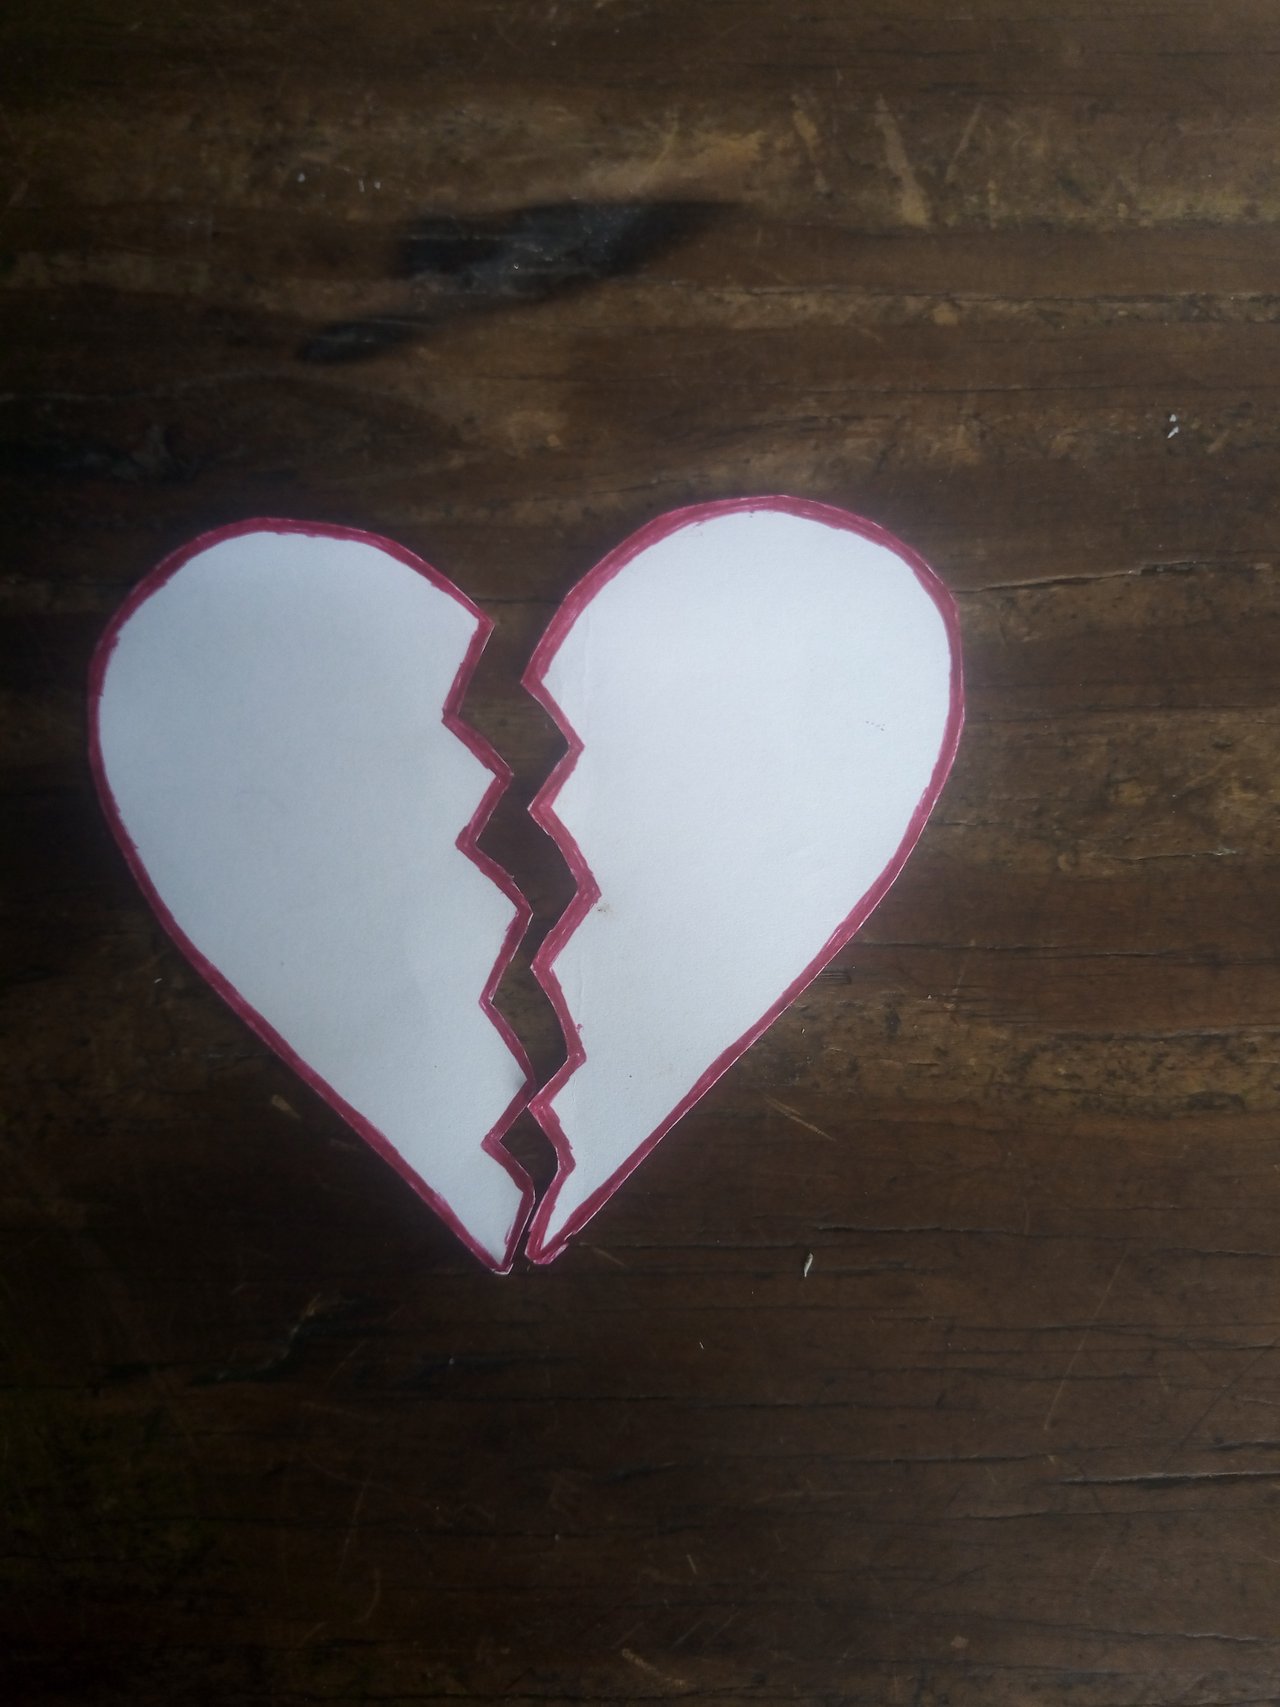
After cutting it into two equal parts I then began to colour the edges of the love craft.
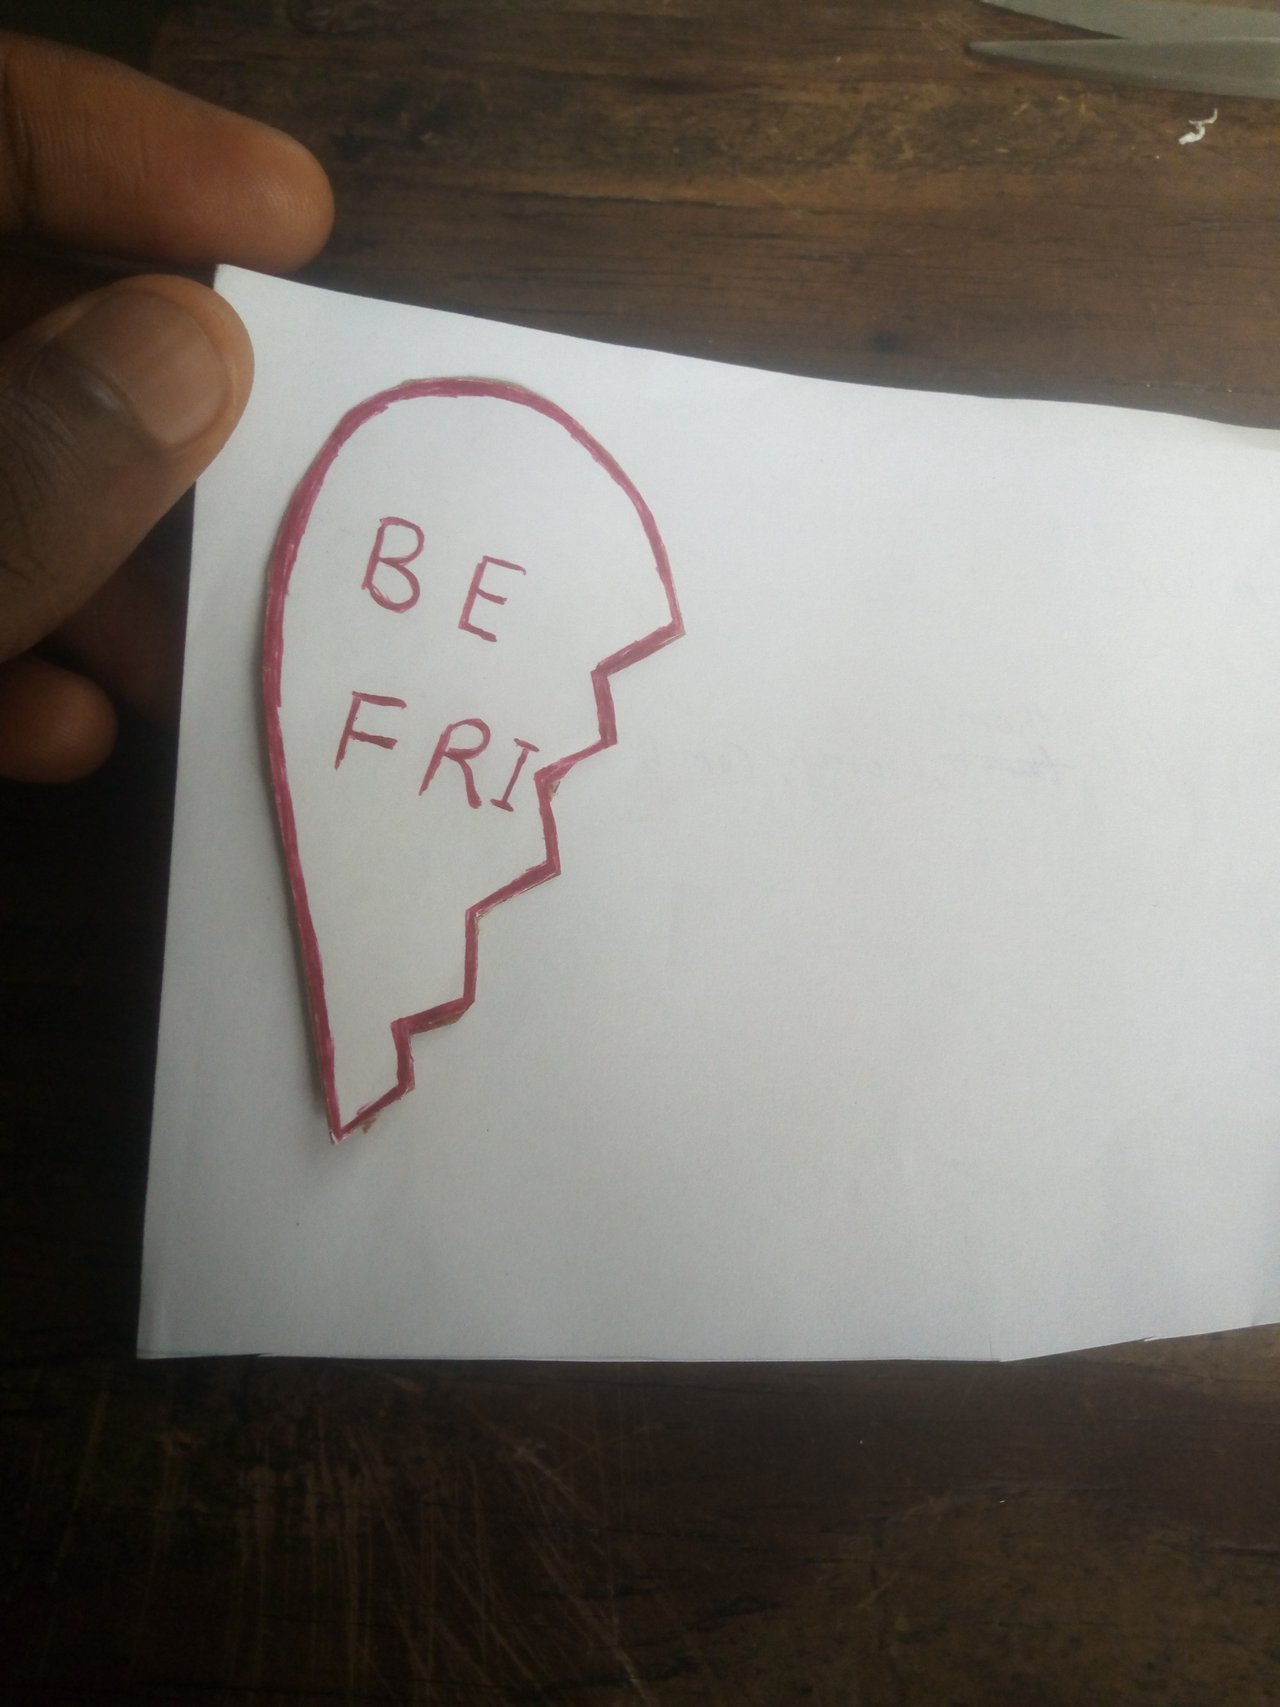
step 5
After doing the colouring, I then wrote something on the both of the half to make it more colorful.
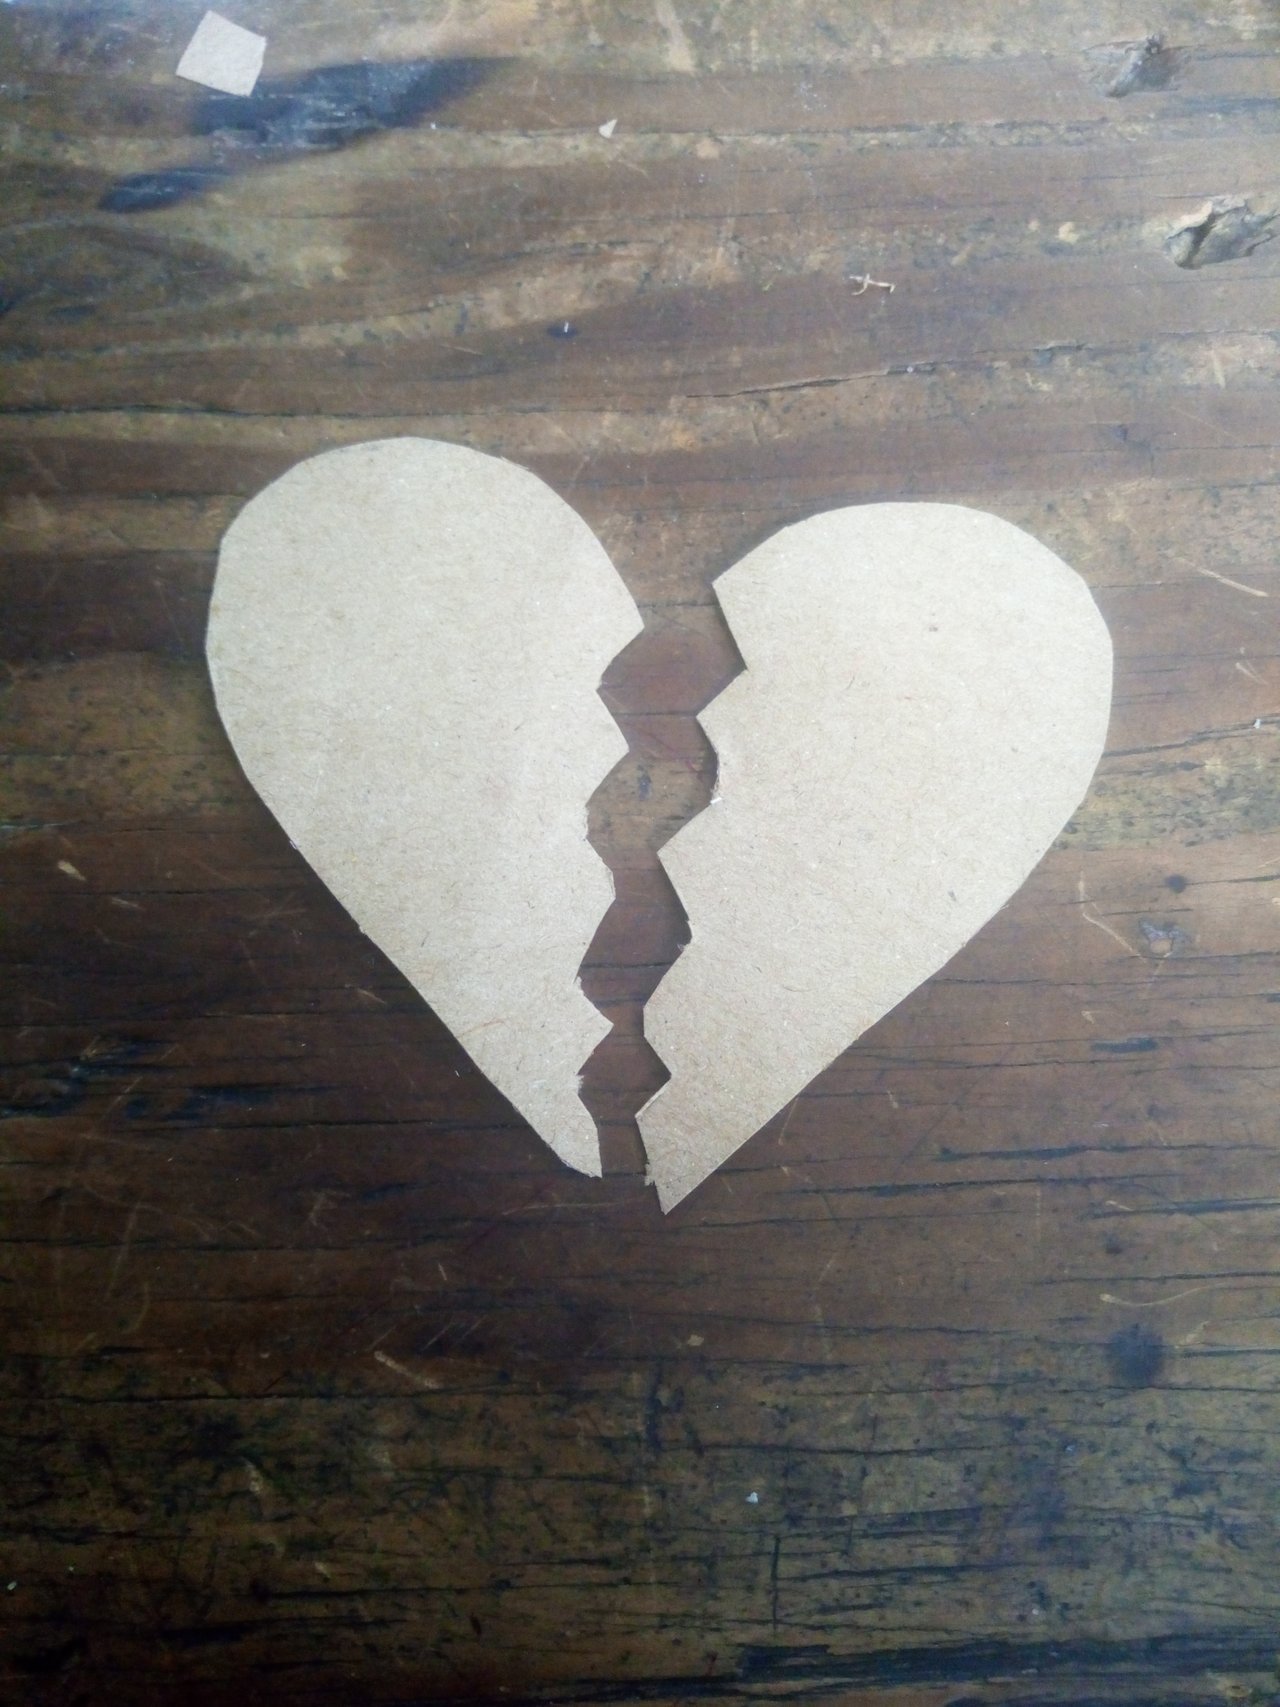
step 6
After achieving the first part of this craft, I also continued by getting a cardboard paper and gum them together And cut it.
step 7
I also got another piece of paper and also gum them together and cut it, so that the back be like this.
step 8
After doing that, I then opened a hole in one of the half and passed a thread into it and began to decorate the thread with beads of different kinds.
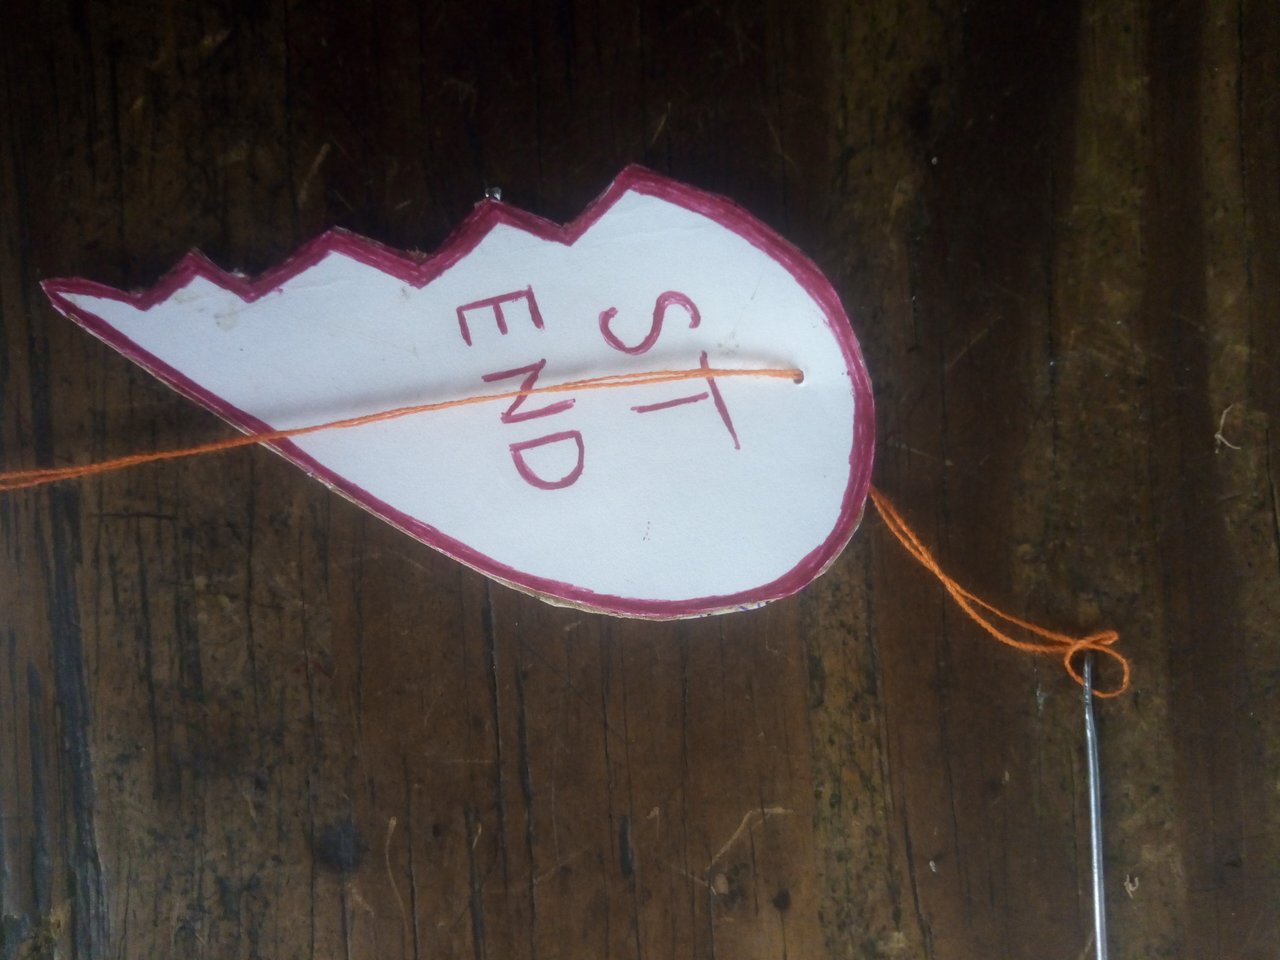
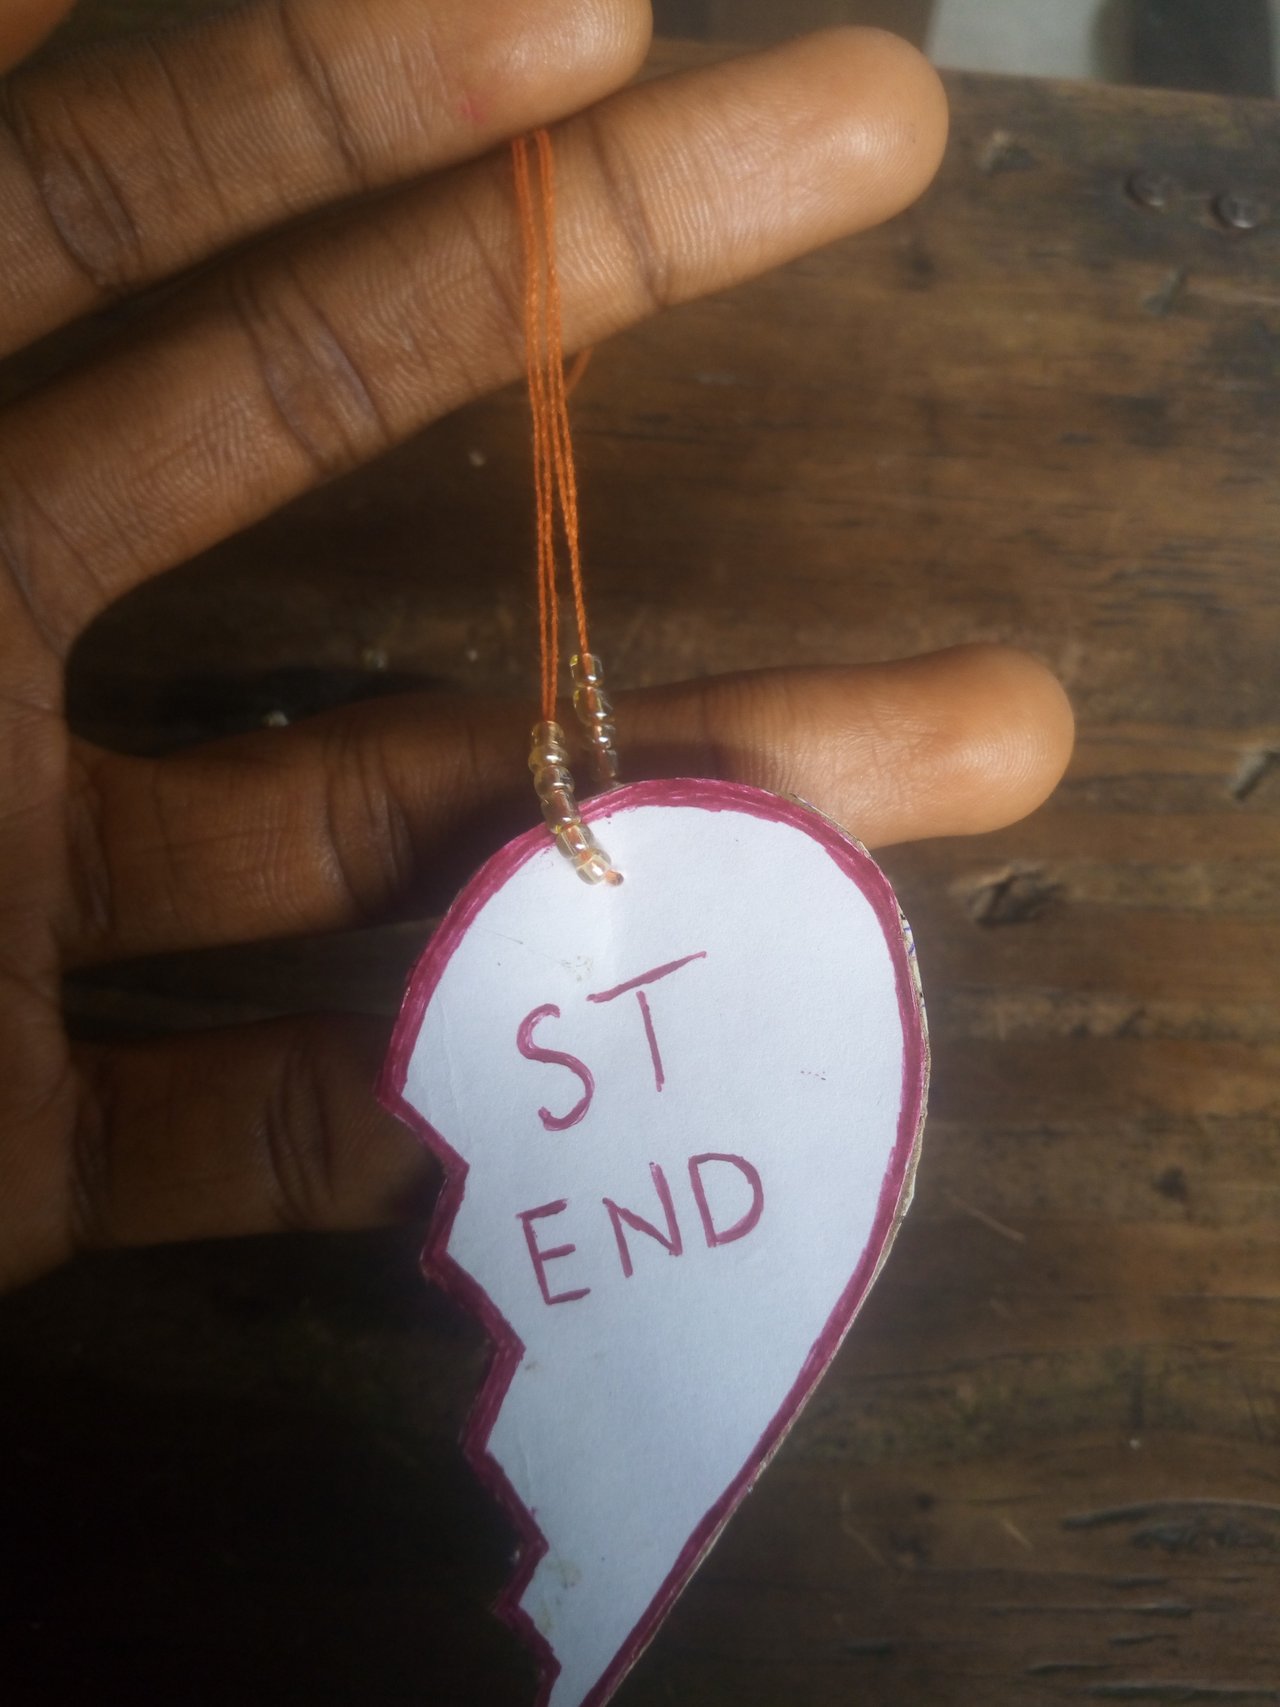
step 9
I repeated the same procedure for the other half and this was my final result.
step 10
This is the final step where I took a picture of my craft.

I would love to invite @caringmanasseh @mhizta and @missyleo to also share their amazing entries as well.
Cc @mesola
Comments