Steemit Learning Contest Season 21 - Week 4 | How to Create a Payoneer Account and Link It to Amazon Affiliate
0 comments
Hello everyone! I hope you are all doing great and enjoying your journey of learning and exploration on Steemit. After the insightful lesson in Week 3 where we explored product hunting strategies and learned how to promote them effectively on steemit we are now moving towards more practical skill that complements your affiliate marketing journey.
.jpg)
In today lecture we will learn
- How to create a Payoneer account a widely used payment solution that allows you to receive global payments easily.
- How to link your Payoneer account to your Amazon Affiliate account so you can start receiving earning directly into your account.
By the end of this lecture you will not only understand how to set up these accounts but also be fully prepared to manage payments for your affiliate marketing effort. whether you are a beginner or someone looking to streamline their affiliate busines this lesson will guide you step by step.
Step 1: Open the Payoneer Website
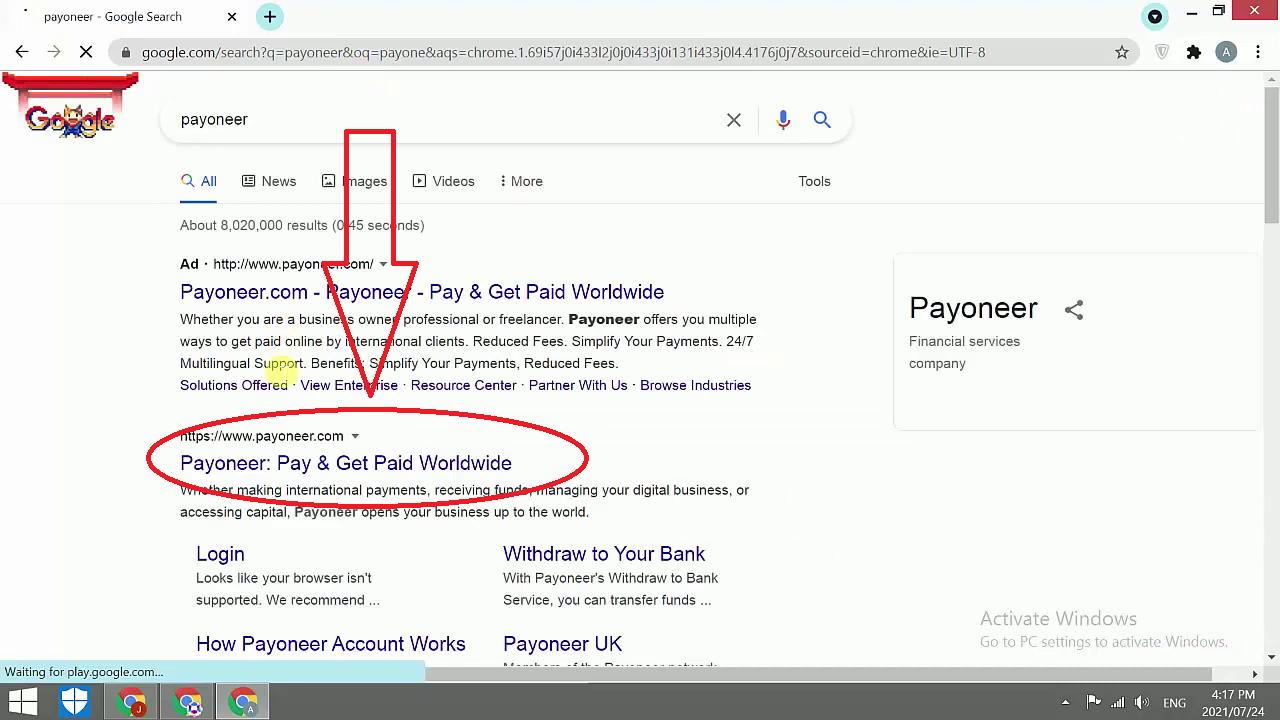
- Open your web browser and type Payoneer in the search bar.
- From the search result click on the official Payoneer website (www.payoneer.com).
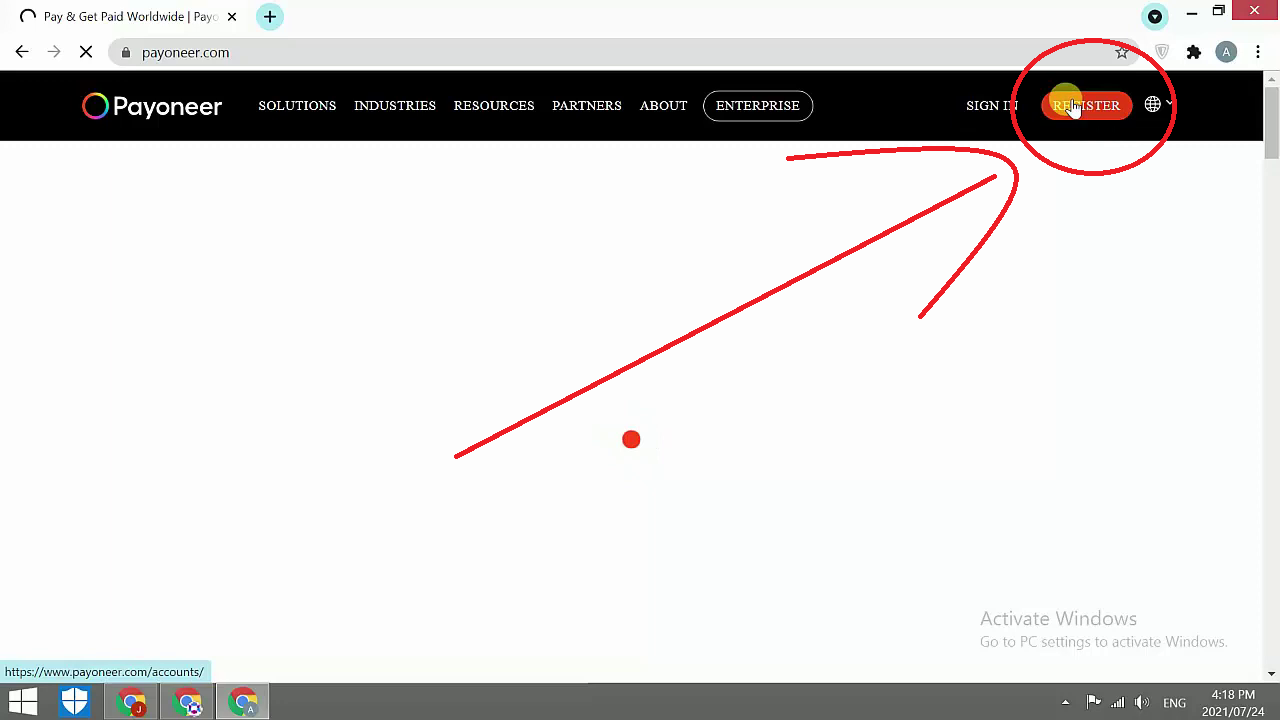
- Once the website open locate and click on the “Register” button usually at the top right corner of the page.
Step 2: Start the Registration Process
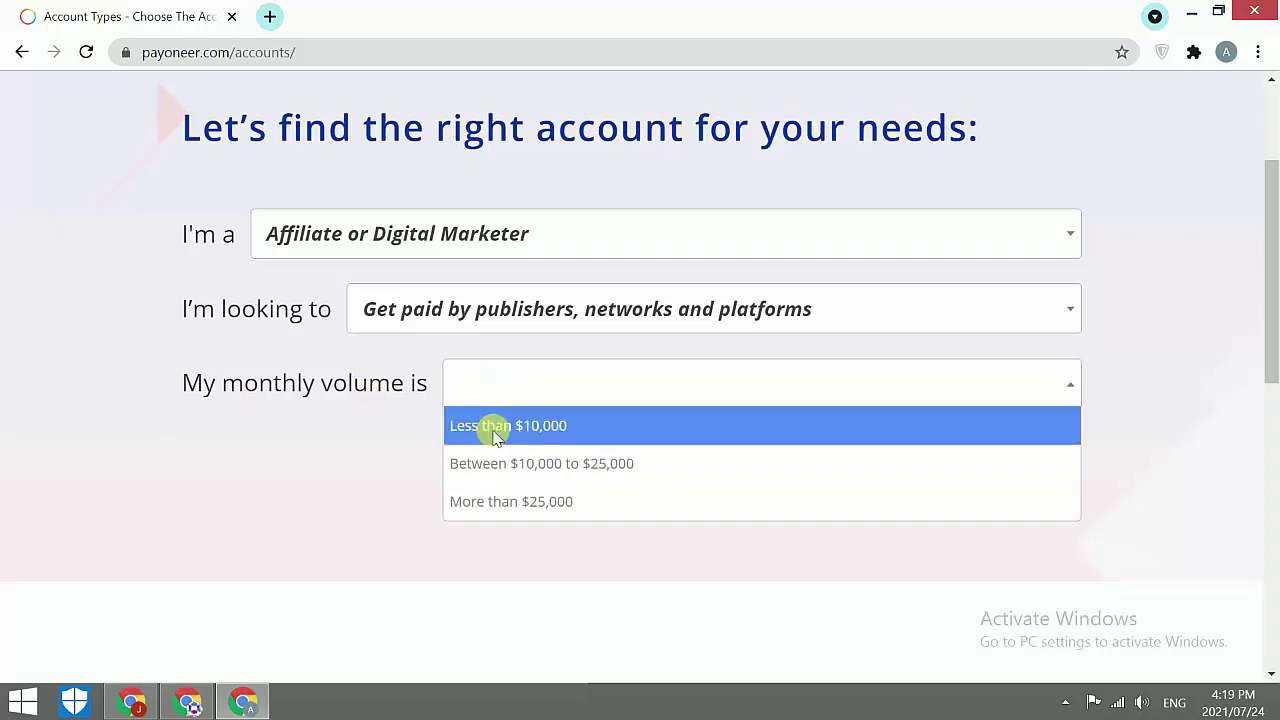
When you click “Register” you will be prompt to answer few questions
- I am? Select what describes you best:
- Freelancer
- Online Seller
- Affiliate Marketer
- Individual
- I am looking for? Choose the type of service you need
- Get paid
- earn by affiliate commission
- My monthly volume? estimate how much money you expected to receiving per month (e.g. less than $5 000 $5 000 - $ 25 000 ) .
Click Next to proceed.
Step 3: Fill in Your Personal Details
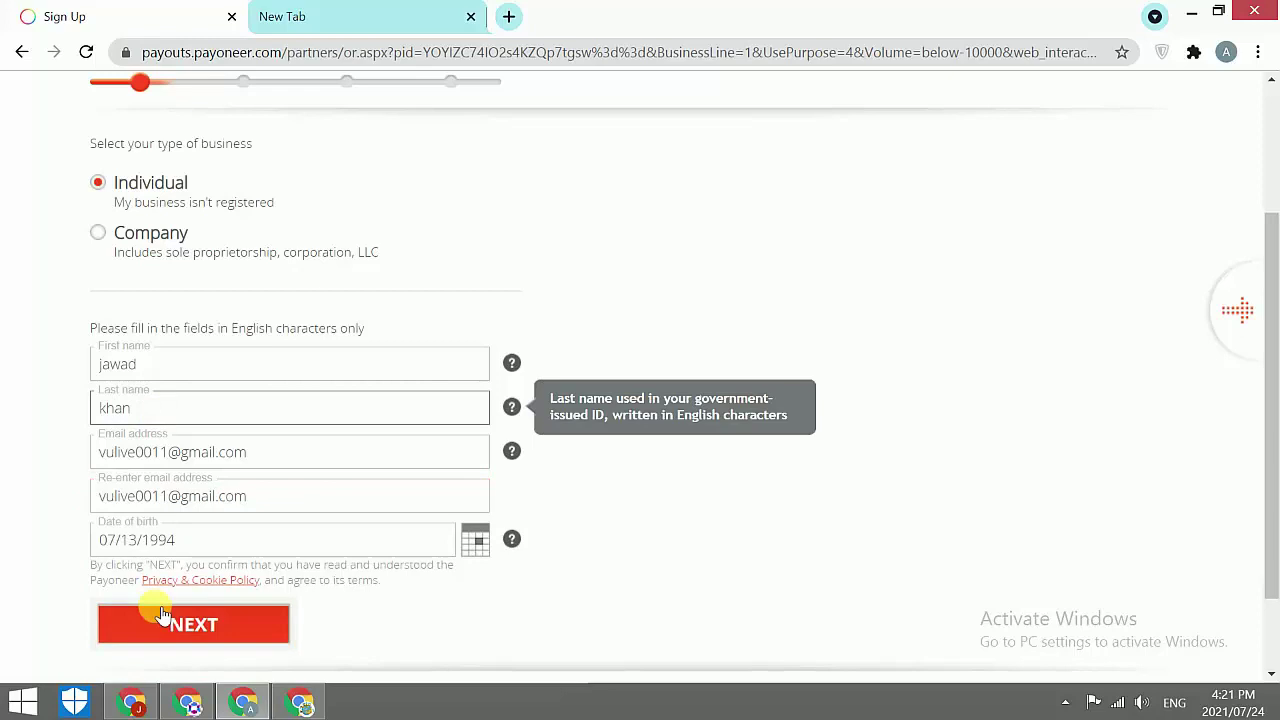
You will need to provide the following:
- Account Type: Choose Whether this is for personal or busines use.
- Full Name: Enter your first and last name as a they appear on your government-issued ID.
- Email Address: Provide valid email addres ( double check for accuracy).
- Date of Birth: Enter your birth date as it appear on official document .
Tips:
- Ensure that all details match your bank account information.
- Use an email address that you check frequently Payoneer will send important updates there.
Step 4: Add Your Contact Information
Next you will be asked to fill in your:
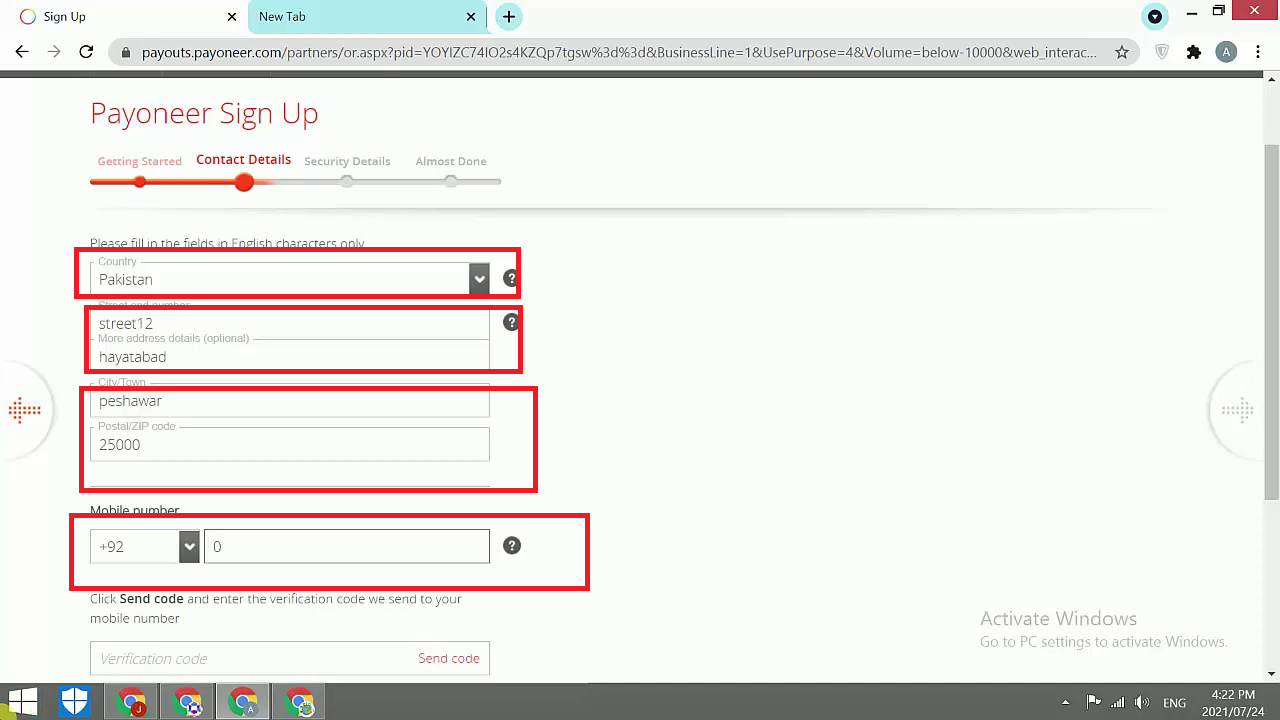
- Residential Address: Provide your current addres including city and postal code.
- Phone Number: Enter your active phone number for verification.
Payoneer might send a Verification code to your phone so keep your device nearby.
Step 5: Set Up Security Details
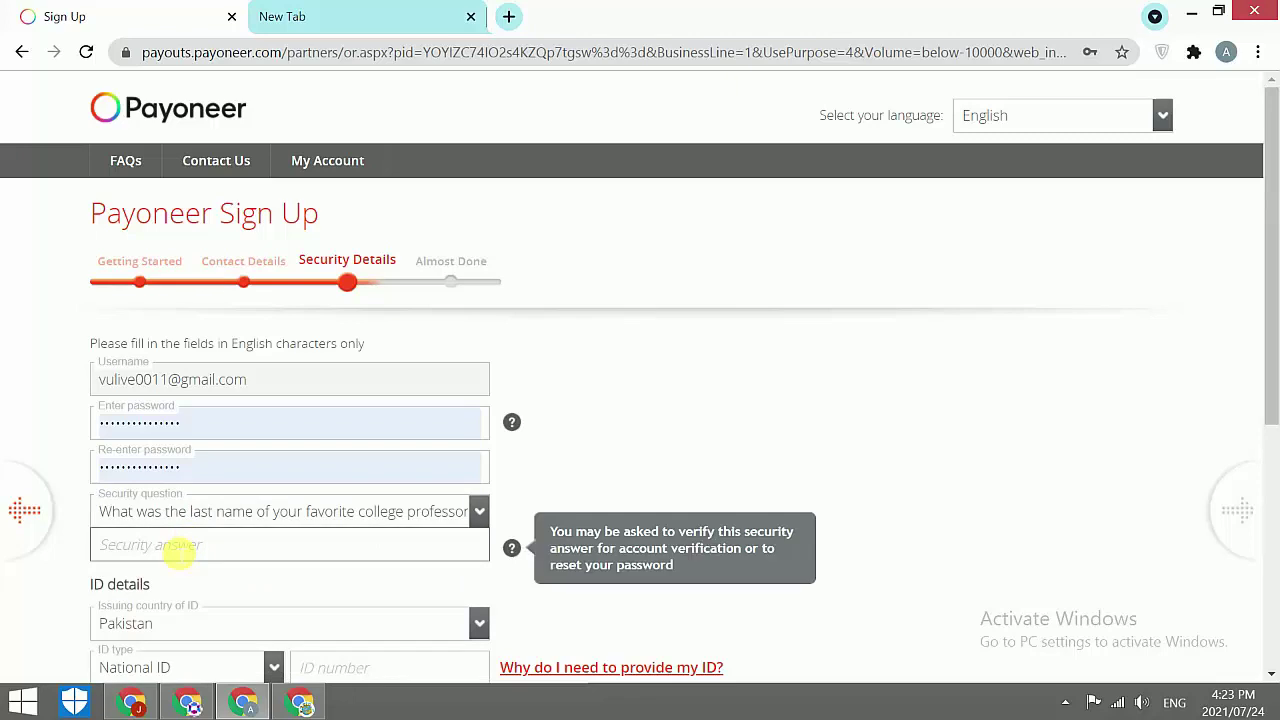
- Password: Choose strong password with mix of upper case lowercase numbers and symbol.
- Security Questions: Select two questions and provides answers. These question will help recover your account if you forget your pasword.
Final Step: Add Your Bank Account Details
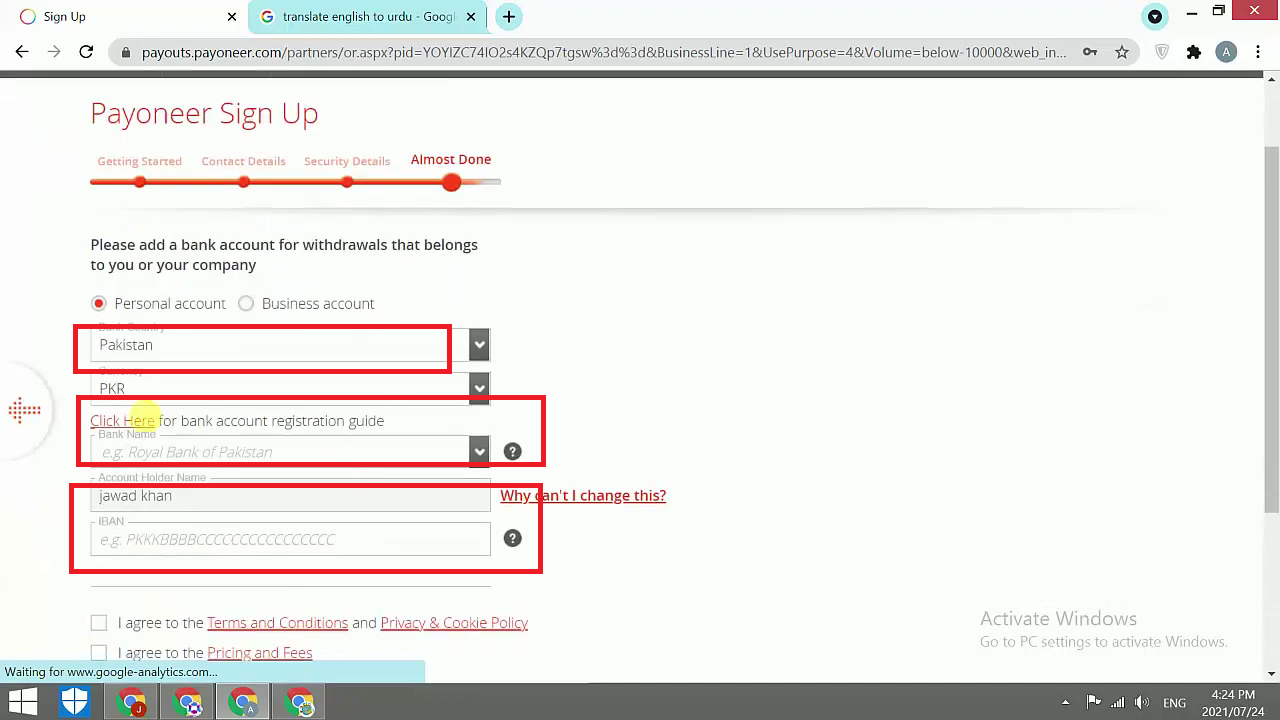
- Enter your bank information including:
- Bank Name
- Account Number or IBAN (depending on your country).
- SWIFT/ BIC code (you can get this from your bank ).
- Bank Address (optional but recommended).
Once all details are filled review your information carefully and submit the form.
Important: It usually take 24 hour for Payoneer to Verify your account. you will receive a email once your account is ready
Step 1: Log in to Payoneer
- Go to the payoneer website and log in to your account using the Email and password you Create.
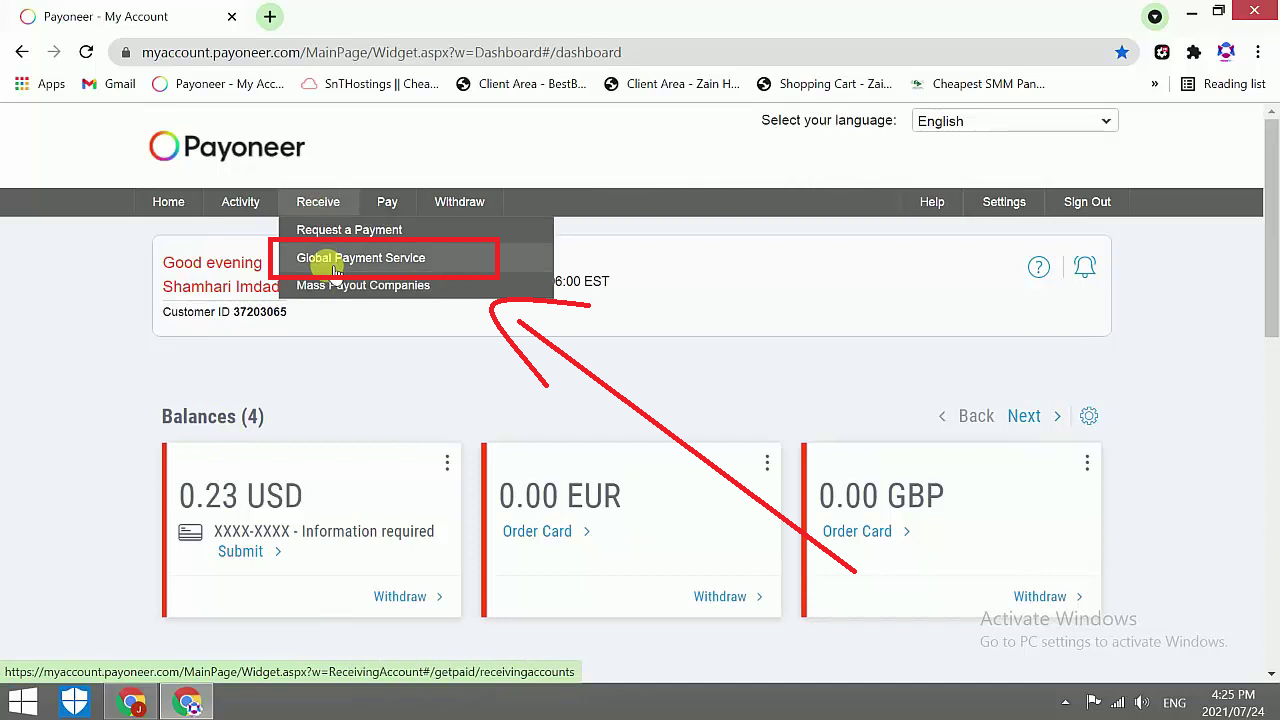
- Once logged in click on the “Receive” tab in the menu bar.
- Select Global Payments service from the drop down.
Step 2: Choose a Currency
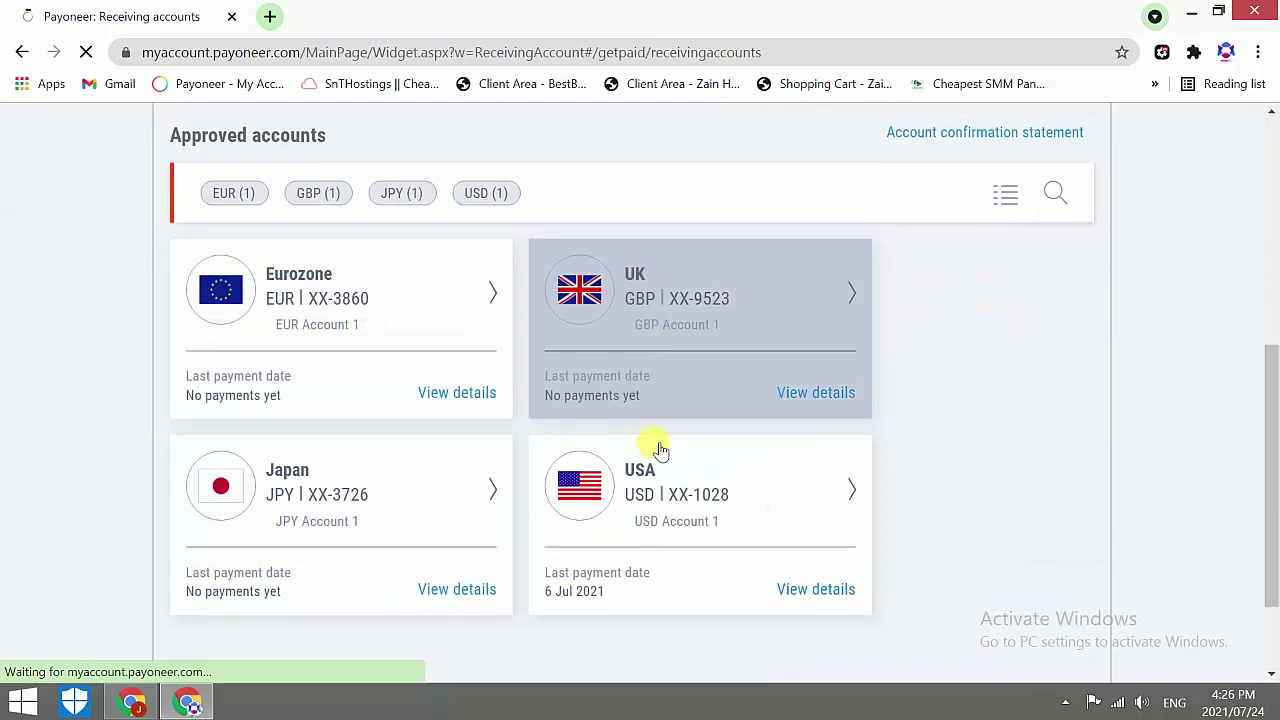
- On the Global Payment Service page you will see multiples curency option (e.g. USD EUR GBP).
- Choose the currency in which you want to receive payment . For this example lets chose Euro (EUR).
- When you click on the curency Payoneer will show you:
- Bank Name
- IBAN (Internatonal Bank Account number)
- SWIFT / BIC Code
Copy these details as you will need them in your an amazon Affiliate accounts.
Step 3: Log in to Amazon Affiliate Account
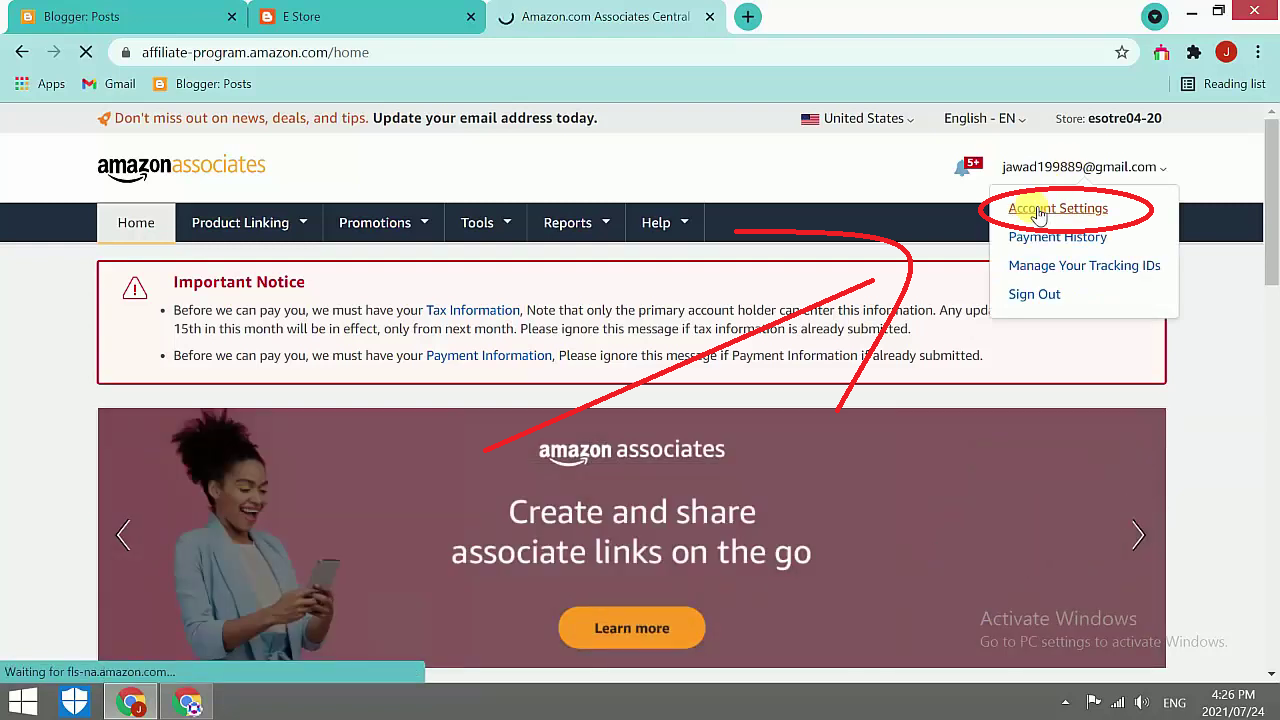
- Open the Amazon Affiliate website and log in to your accounts.
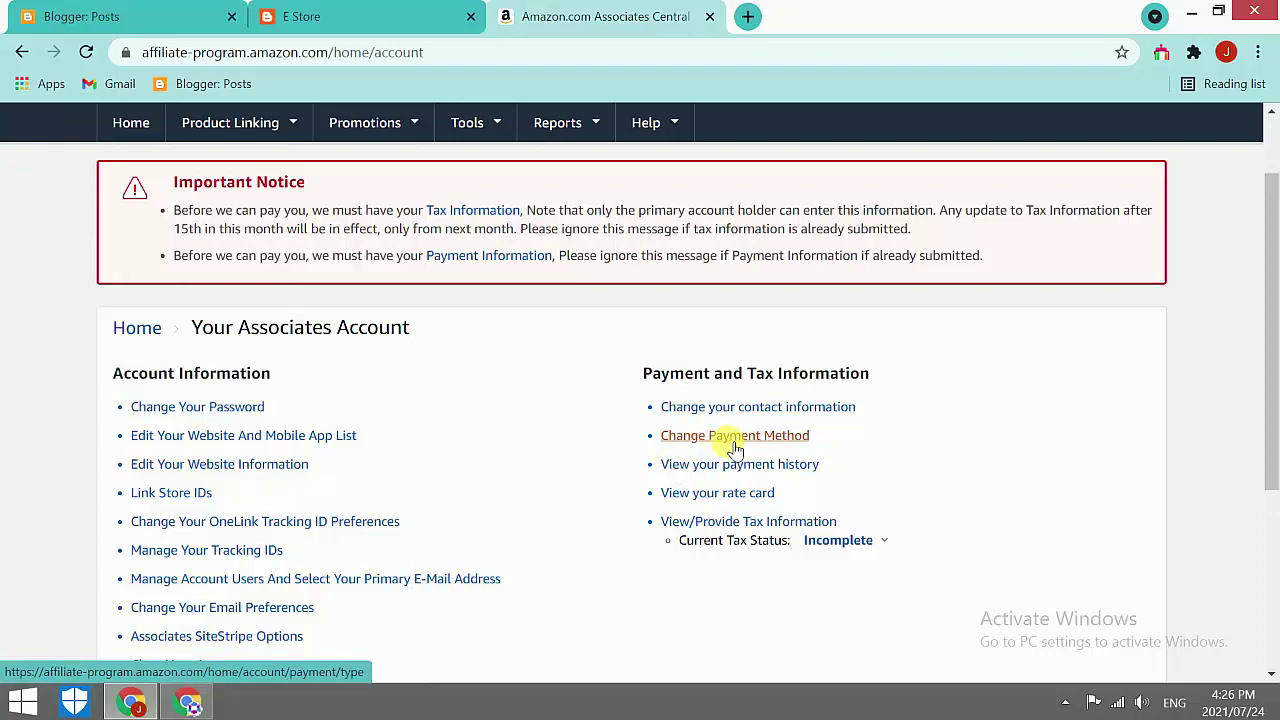
- Navigate to the Settings section in your Dashboards.
- Click on Payments Methods.
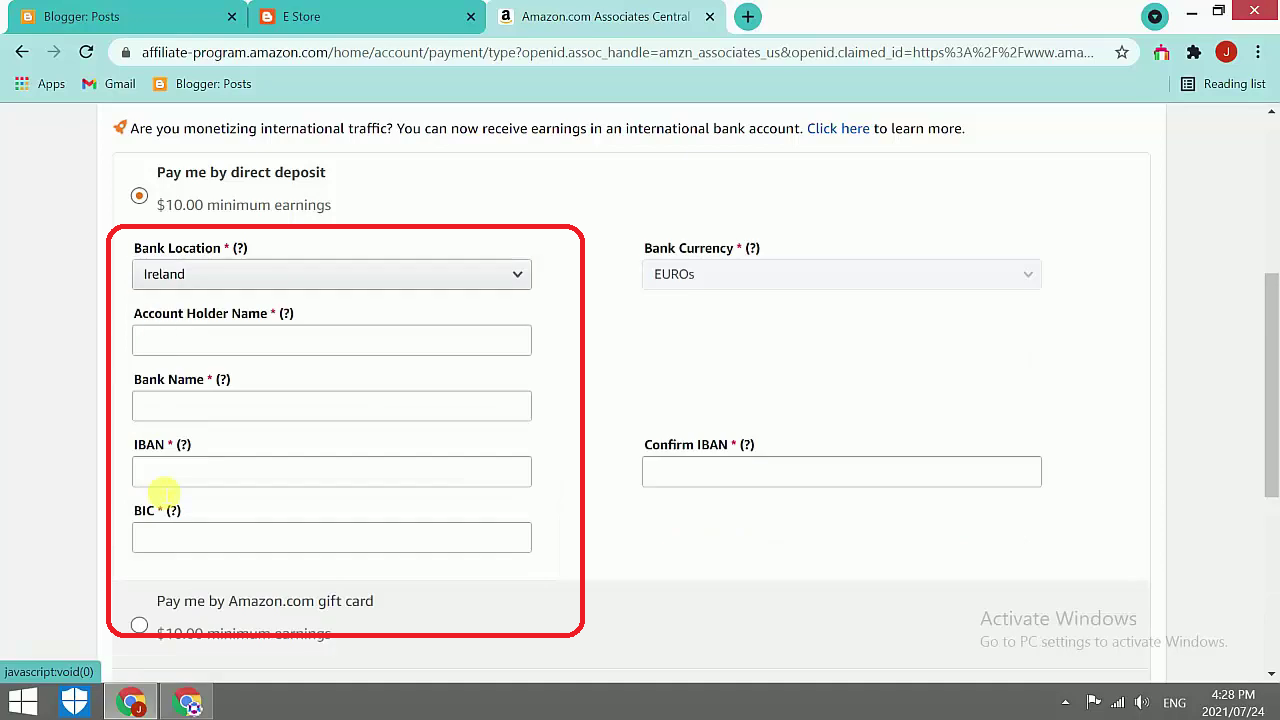
Step 4: Enter Payoneer Bank Details
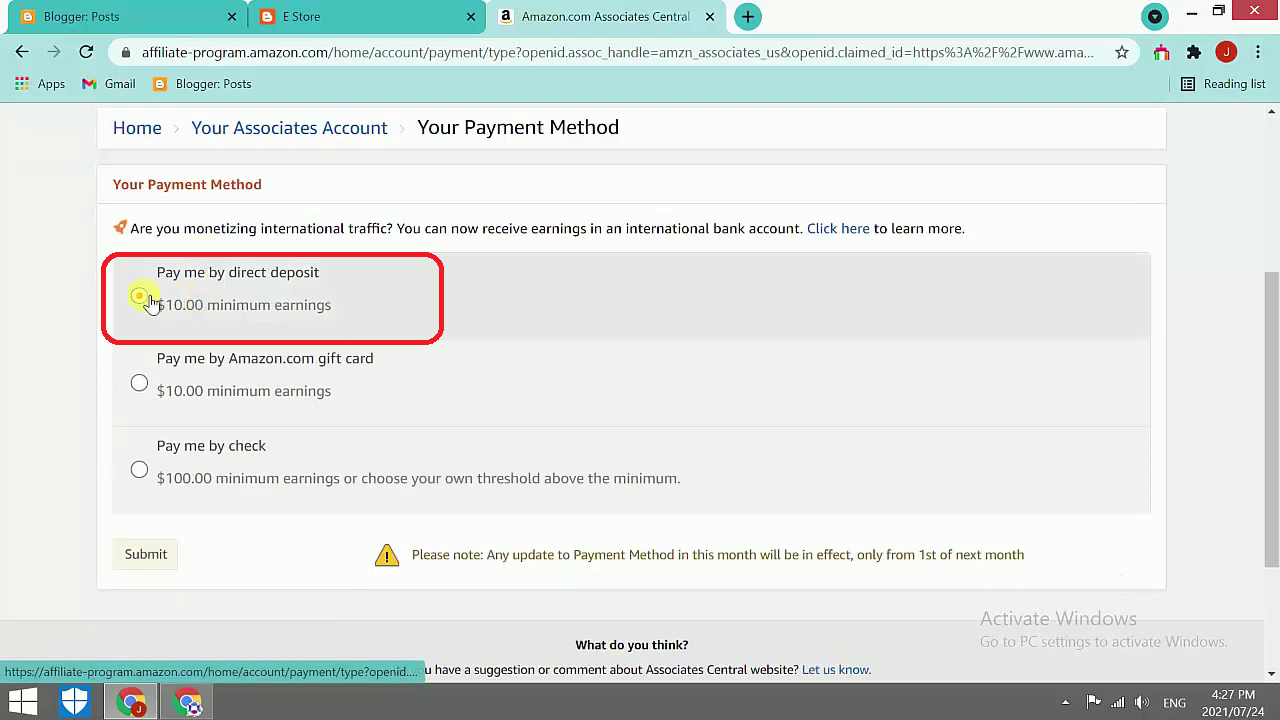
- Under payment settings choose the option Pay Me by Direct Deposit.
- Fill in the following information from your payoneer Global Payment Service page:
- Bank Name: Copy and paste it directly.
- IBAN: Paste the IBAN number you copied.
- SWIFT/BIC Code: Enter the SWIFT code provid by Payoneer.
Double-check all the details and click Submit.
Done
Your Amazon Affiliate account is now linked to Payoneer and you can receive your earning directly.
Video Lecture Links
For more detailed guidance you can watch the video lecture:
English Lecture
Urdu Lecture
|
|---|
Create a Payoneer Account
- Write down the steps you followed to create your Payoneer account.
- Share a screenshot of your Payoneer dashboard after registration (hide sensitive details).
Link Payoneer to Amazon Affiliate
- Explain how you linked your Payoneer account to your Amazon Affiliate account.
- Provide screenshots of the key steps (e.g Global Payment Service in Payoneer Payment Method in Amazon).
- This Week 4 assignment will run from Monday November 18, 2024 to Sunday November 24, 2024.
- Ensure your post is at least 500 words. This length is necessary to provide a thorough description of your blog creation process.
- Your assignment must be free from plagiarism and AI-generated content. It should reflect your own work and understanding of the lesson.
- Use the exact title format for your post: "SLC-S21W4: How to Create a Payoneer Account and Link It to Amazon Affiliate"
- You can post your assignment in any Steemit community or on your blog but must include the tag: #s21w4-afmcourse04.
- Include the #steemexclusive tag to designate your post as exclusive to Steemit.
- Add your country tag (e.g. #pakistan if you are from Pakistan) to specify your location.
- Use only your own images and screenshots throughout the post.
Following these guidelines will ensure your assignment meets the course standards.
- Top 4 Selections: Each week we will select the 4 best asignment posts and recommend them to SC01/SC02 for additional visibility and support.
- Curator upvote: Other Steem Curators may also upvote posts base on their quality so be sure to follows the guide line and put forth your best effort

BEST OF LUCK

Comments