SLC S22 Week1 || Getting Started with Java and Eclipse
4 comments
Hi friends, after reading around I am interested in participating in an amazing challenge this week. The challenge is titled: "Getting Started with Java and Eclipse" by Mr @kouba01 following the contest link.
.png) |
|---|
| Previously I also invited other friends such as Mr. @irawandedy, Mr @muzack1 , and Mr @pelon53. |
|---|
Task 1

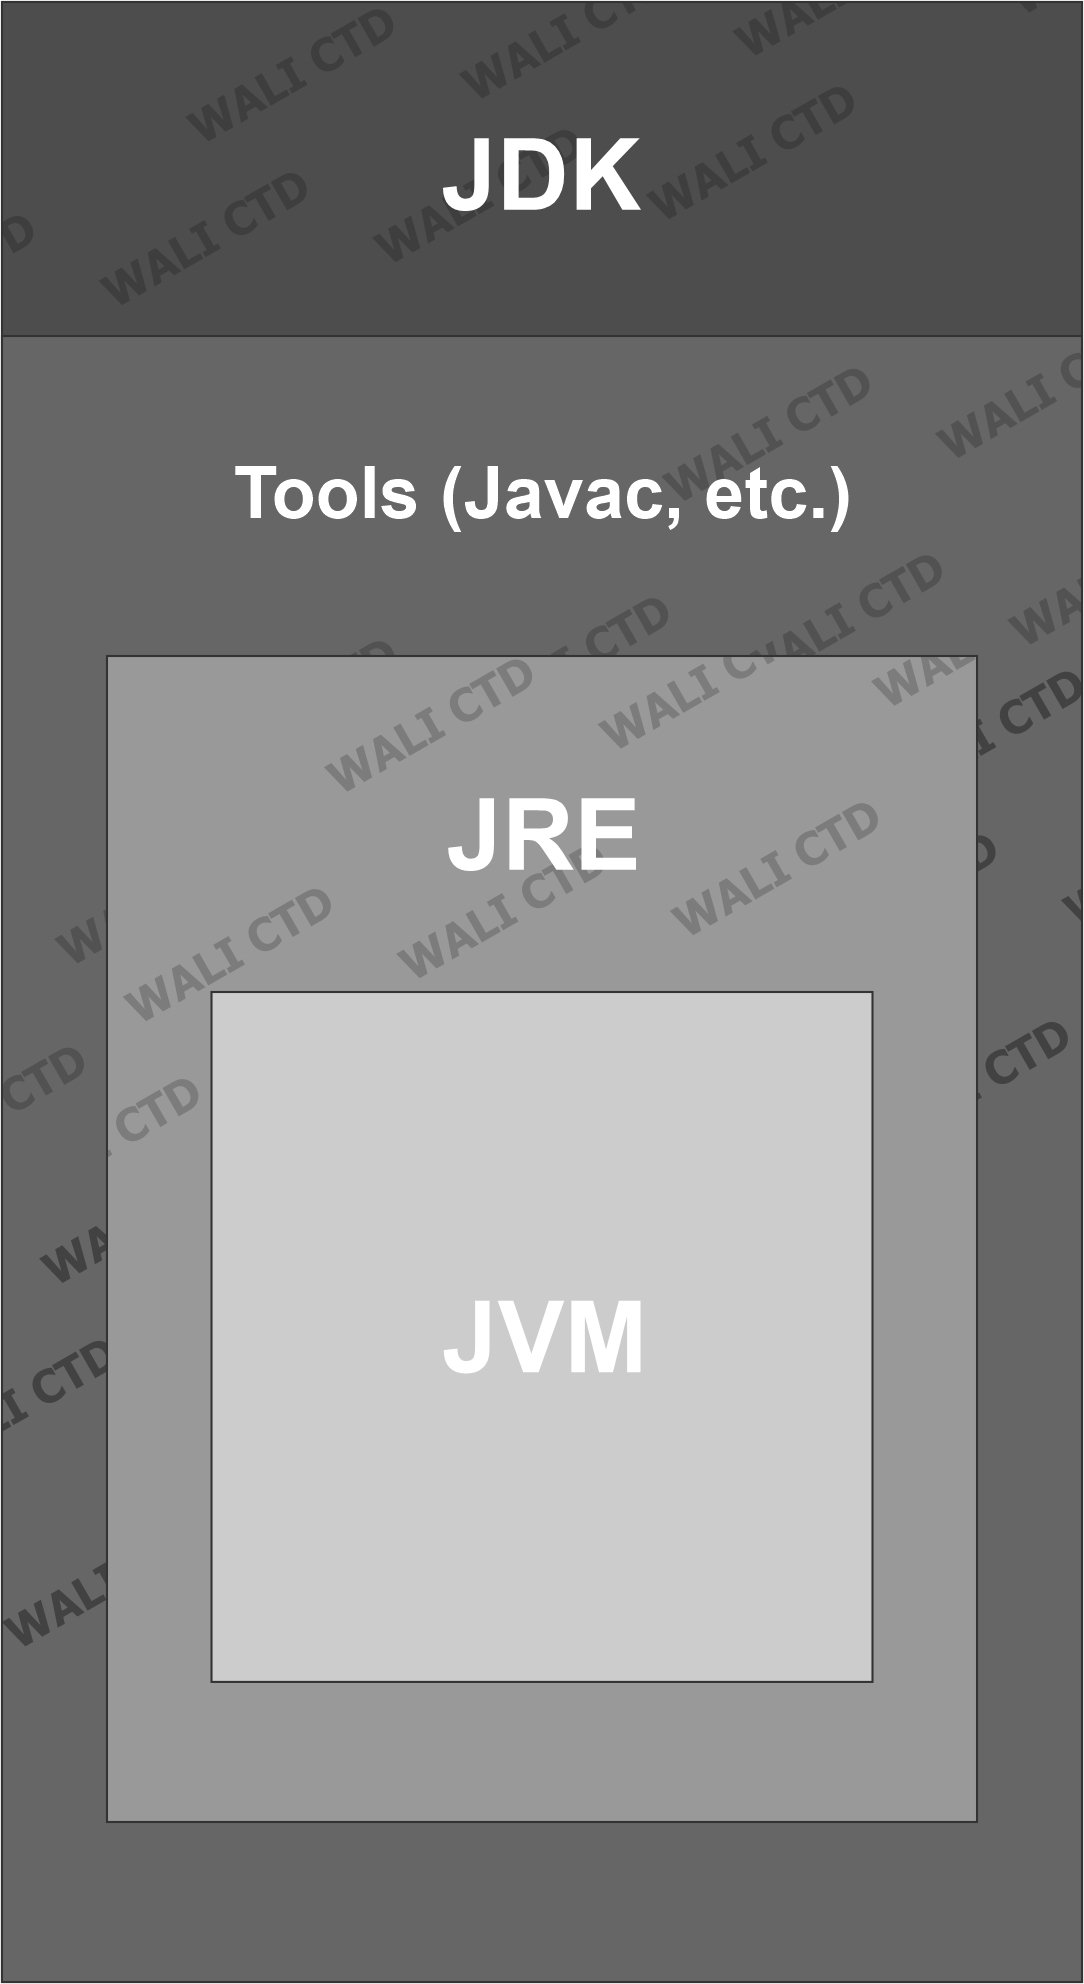
JDK which stands for Java Development Kit is one of the complete tools that developers can use to create, change, and run Java programs. The JDK consists of several components such as a compiler (javac) which is used to convert Java code into bytecode, while the JRE is used to run a java application, and there are several additional tools such as a debugger to find errors in the code. So through the JDK, the Java development process may become more practical where everything is available in one complete package.
The JRE stands for Java Runtime Environment, which is an environment that is used in order to run a program on Java. Well, in this JRE consists of several basic libraries that are usually all indispensable for Java applications, while JVM stands for Java Virtual Machine, which JVM will function so that it can run bytecode. The main role of the JRE is to run applications, which cannot be used to develop programs like the JDK. However, with the JRE it will be very important for those of us who just want to run Java applications without having to understand the development process.
Task 2
Install and Set Up Your Java Development Environment and provide step-by-step screenshots of the installation process, Eclipse configuration.
| Install JDK |
|---|
The first thing I have to do will prepare a laptop/PC that has decent specs, for example I use a Lenovo B40 laptop, 8GB RAM, 128 GB SSD. In addition, I must connect the PC/Laptop with a fast network to download JKD, JRE and JDK.
Next, I will install JKD by visiting the page: https://www.oracle.com/java/technologies/downloads/?er=221886.

Next, I selected the Window version as shown below:

After the jdk.exe file has been successfully downloaded, the next step is to install it. The way to install it is quite easy, namely by double-clicking on the jdk file that was downloaded earlier. Then it will appear as shown below:

Then we just click the next button to continue the install process. For the duration of the install it depends on the specs of the pc we are using. We just need to wait until the install process is successful:

After successfully installed, if a close button appears, just click it. Then we will set the path in the system first by visiting Advanced system settings.

Then we will edit the path first so that jdk can run in CMD properly. Click as shown below:

Then in the path add as follows: C:\Program Files\Java\jdk-23\bin. Then just save and apply.
 |  |
|---|
To make sure the JDK is installed properly, let's check it in CMD. Then there is only when: java --version. If it is installed properly, it will appear as follows:

| Install Eclipse |
|---|
To install Eclipse, let's visit the official website at : https://www.eclipse.org/downloads/packages/installer. Dan berikut adalah halaman utamanya :

On the main page above, we only need to click download. Next, our Eclipse application will be downloaded immediately. We just need to wait for the download process to finish. After that just install. At the first time the install will definitely appear as follows:

Next, several options will be displayed, and I chose as below:

Then we will be directed to the install process, we only need to click the install button as follows:

Just wait for the intall process which may take a little while.
 |  |
|---|
If it is installed, then we continue by opening it by clicking Launch.

Here is the main view of this application if it is installed perfectly.

Let's try the application first to see if it's running properly. Then we will create a new project by selecting the menu : File -> New -> Java project

Here I will name the project with test, because this is for testing only. Then choose finish.

Then we will create a class by : File -> New -> Class.

For the test class, I named it test. Don't forget to check public static void main(String[] args), then just click finish.

Then I entered the following coding:

Then to run is easy enough by double-clicking on run.

Then the results below will appear:

Task 3
Write a program that calculates and displays the sum of the first 100 integers. Define a mainmethod in a class named Sum to handle the entire calculation.
Save this program in a file called Sum.java, compile it, and run it.
Create a new program called Sum2.java, where the calculation of the sum of the first 100 integers is done in a separate function called calculateSum. This function should then be called from mainmethod.
First we just need to create a new project by going to the menu : File -> New -> Java project.
Then I name the project with : SumProject, then click finish.

Next I created a class by going to the menu: File -> New -> Class. I name the class with “sum” and don't forget to check public static void main(String[] args), then just click finish.

Then I entered the following code in the sum.java work page.


Then just run it and the results will appear in the bottom menu:

For the second class, I created it the same way as above, but this time I named it “sum2”. And the result is as follows:

Task 4
For Task 4, I also created a new project by selecting the menu : File -> New -> Java project. Then I named the project “TaxProject”. Then choose finish.

Then I created a new class by going to : File -> New -> Class. I named the class with “Tax” and didn't forget to check public static void main(String[] args), then just click finish.

Next, I entered the javascript code and then just run it and the results appear as follows:

Task 5
Just like any other task, I will create a new project by going to : File -> New -> Java project. Then I name the file with “ConversionProject”. Then choose finish.

Next, create a class by selecting : File -> New -> Class. I name the class “Conversion” and don't forget to check public static void main(String[] args), then just click finish.
Then I entered the code and ran it:

Task 6
Just like any other task, I will create a new project by going to : File -> New -> Java project. Then I name the file with “ArrayOperationsProject”. Then choose finish.

Next, create a class by selecting : File -> New -> Class. I name the class with “ArrayOperations” and don't forget to check the public static void main(String[] args), then just click finish.
Then I entered the code and ran it:

Then just add the program and run it:

Thank you for your attention and apologize if there are any mistakes.
@walictd

Comments