SLC s21w3-Basic layout for men's shirt
2 comments
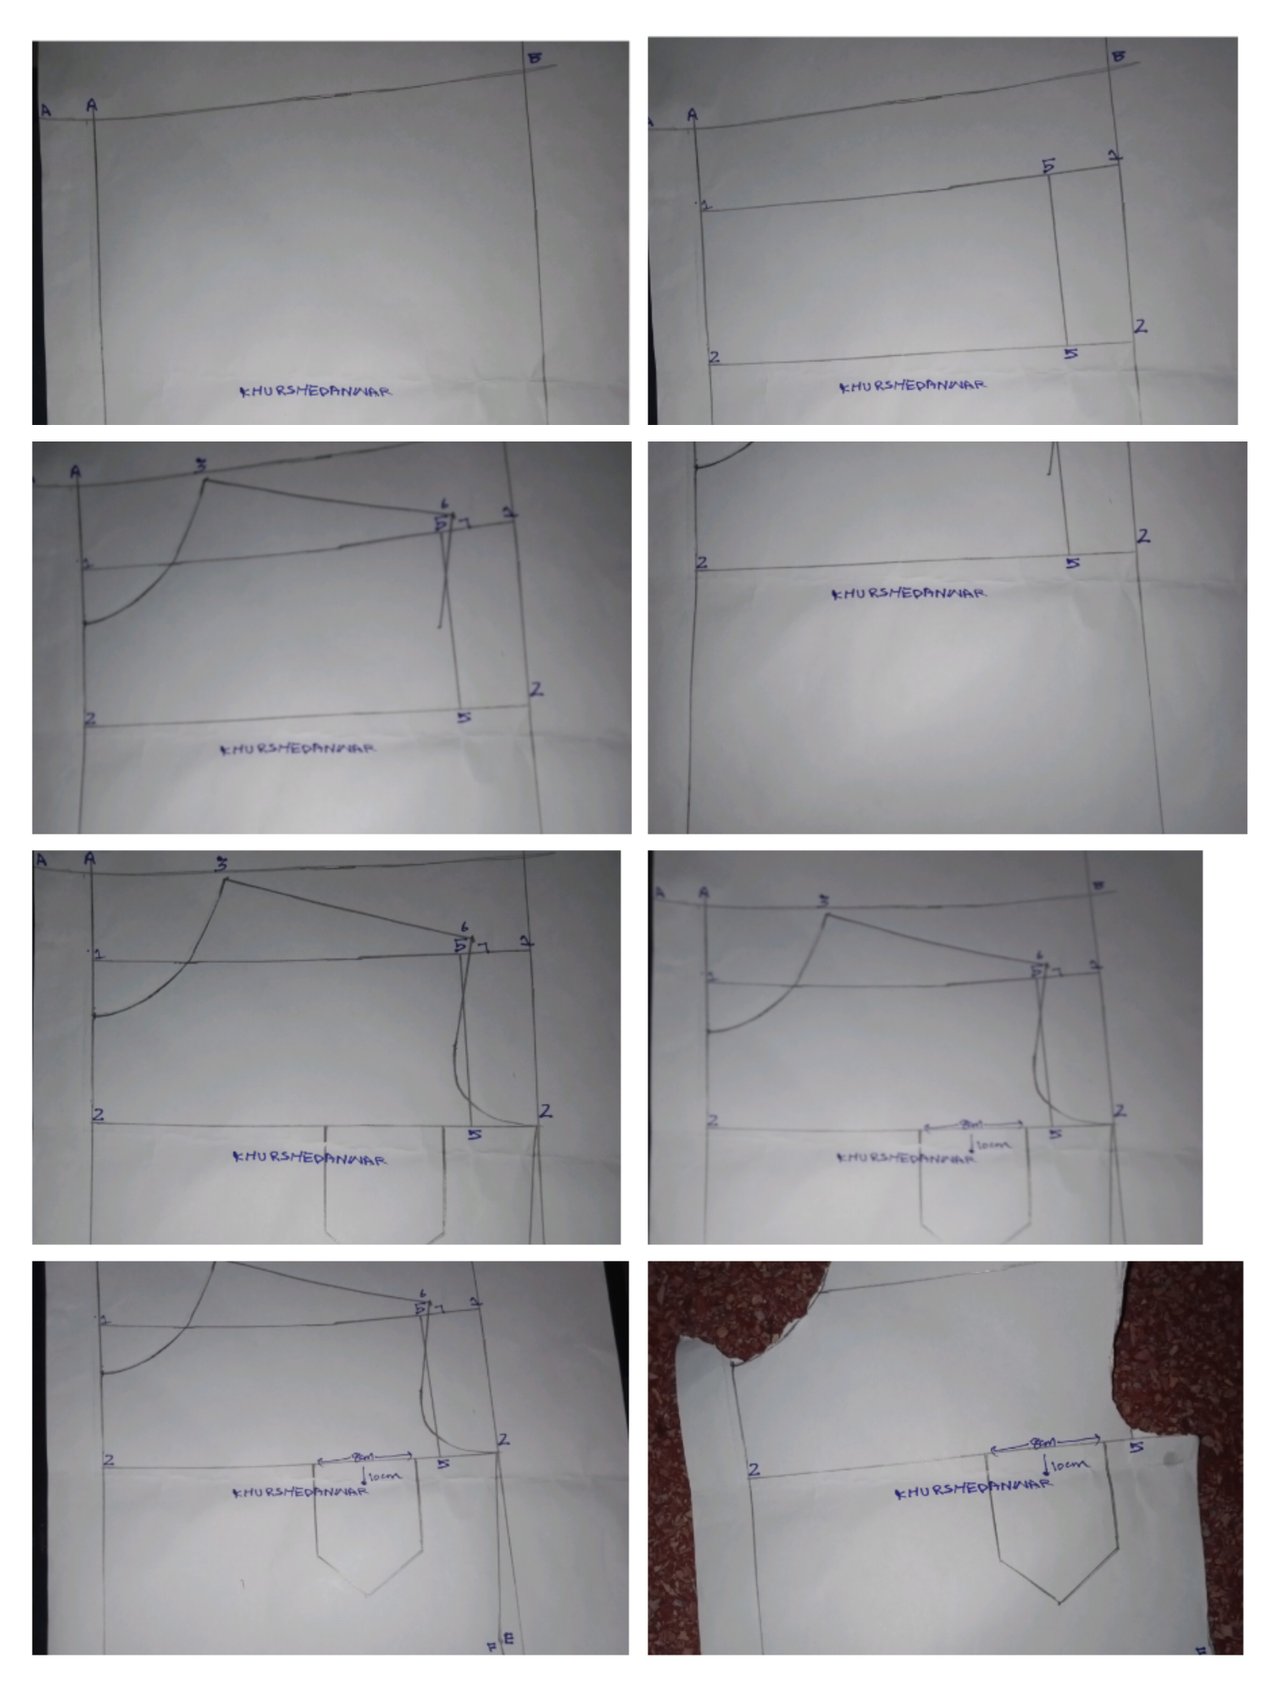
Here I am using a step by step approach for describing basic steps for men's shirt layout,although it was not easy for me that's why I am sharing it at weekend after practicing it for many times!
Let's start!
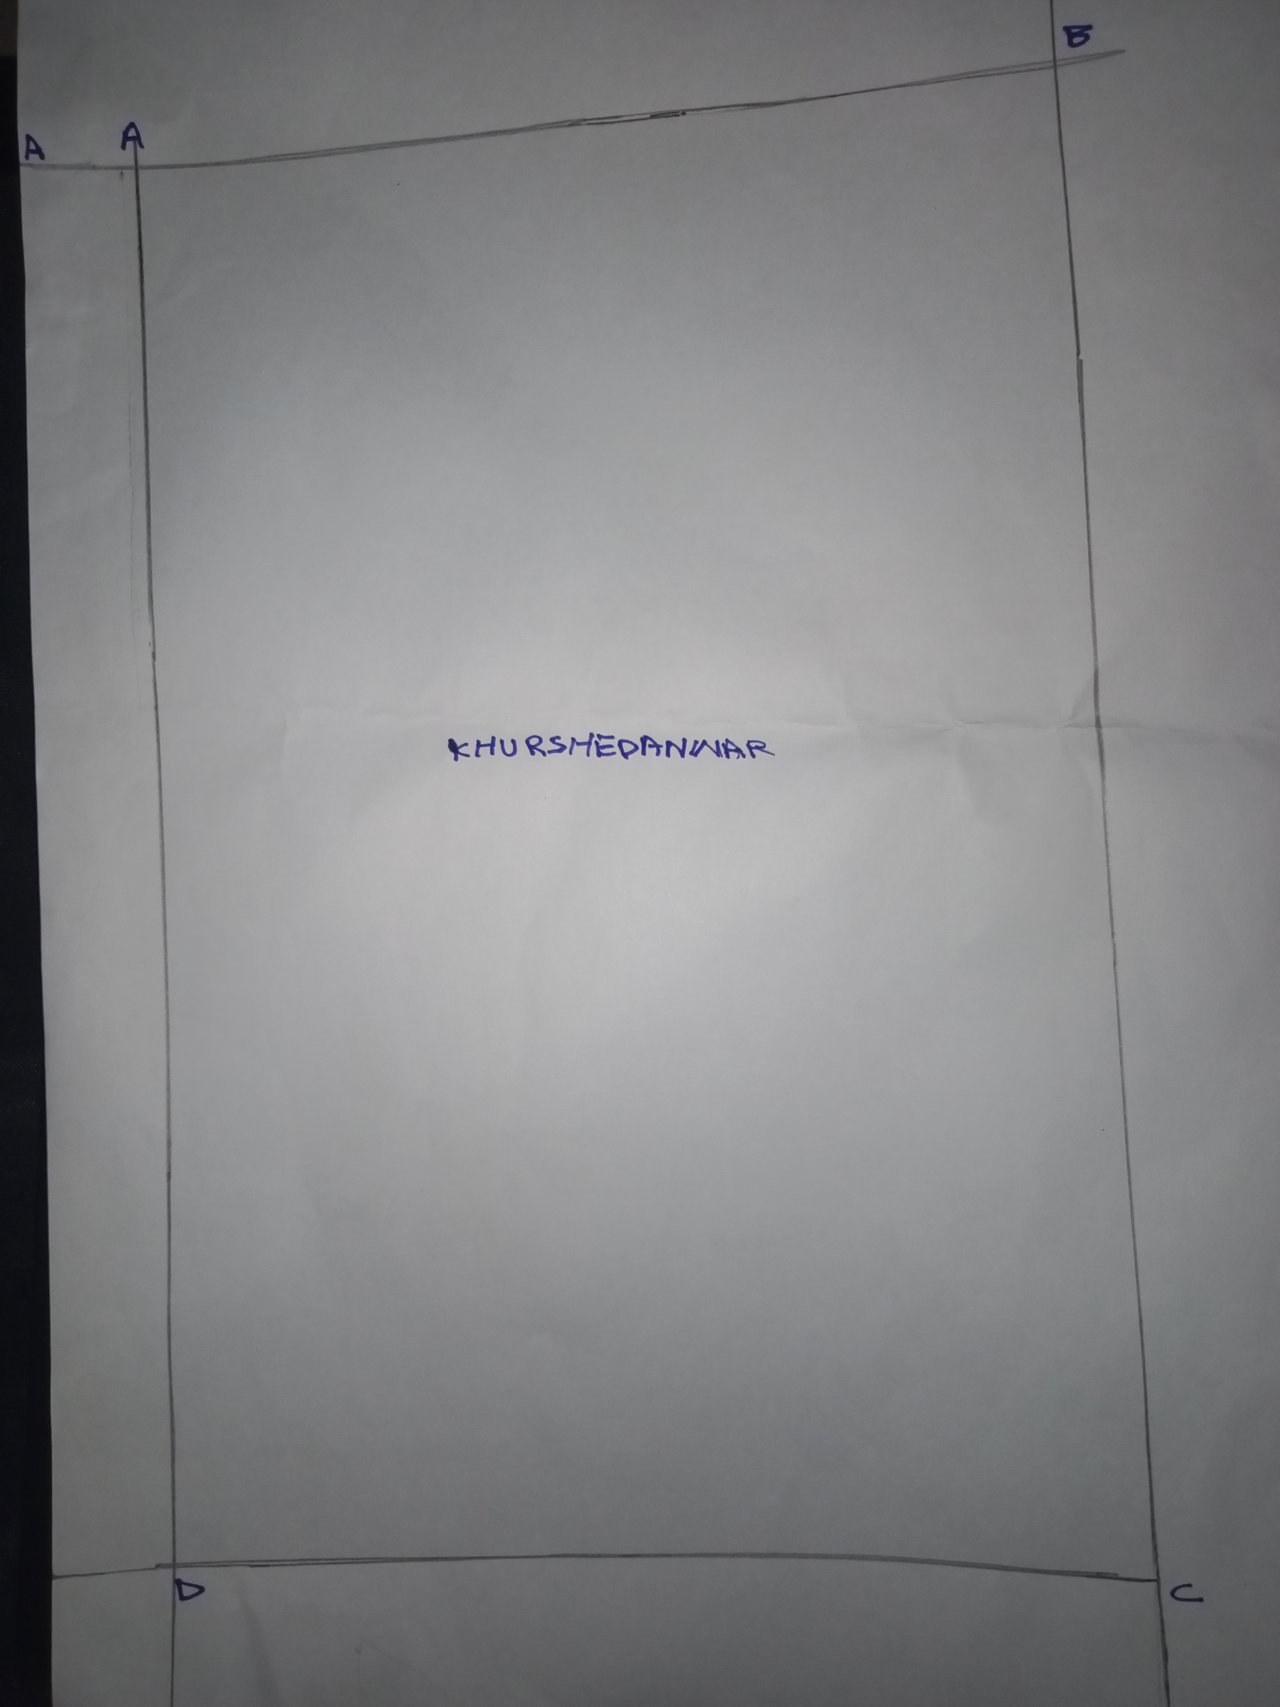
Step 1: Draw Center Front Rectangle
I simply take a paper and I draw vertical line at cardboard and my first step was to make a rectangle (4 cornered square) and label corners of rectangle with points ABCD.
Step 2: Measure Chest Circumference
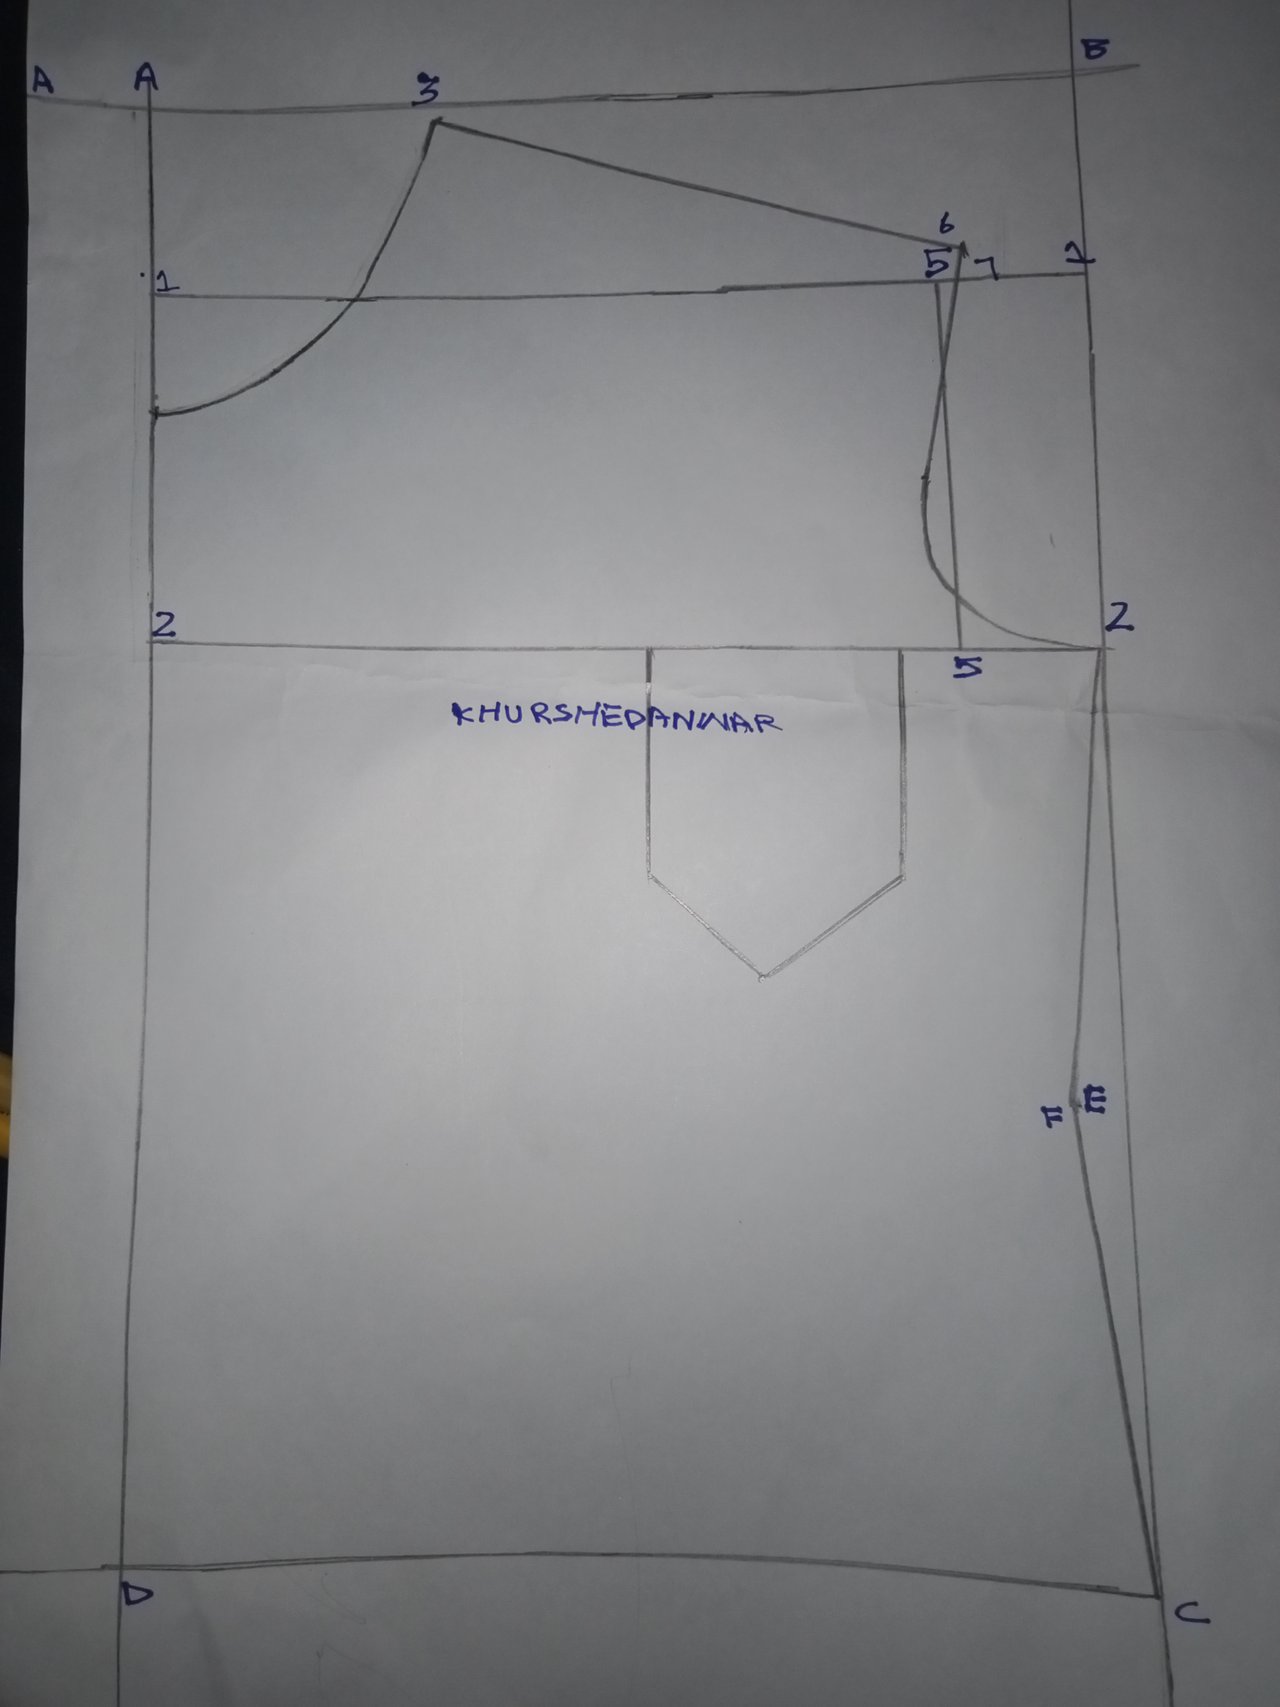
In my second step J measure 1 by 4th of over all circumference of chest by starting my measurement from top of rectangle I made and then I added two centimetres by drawing a horizontal line.
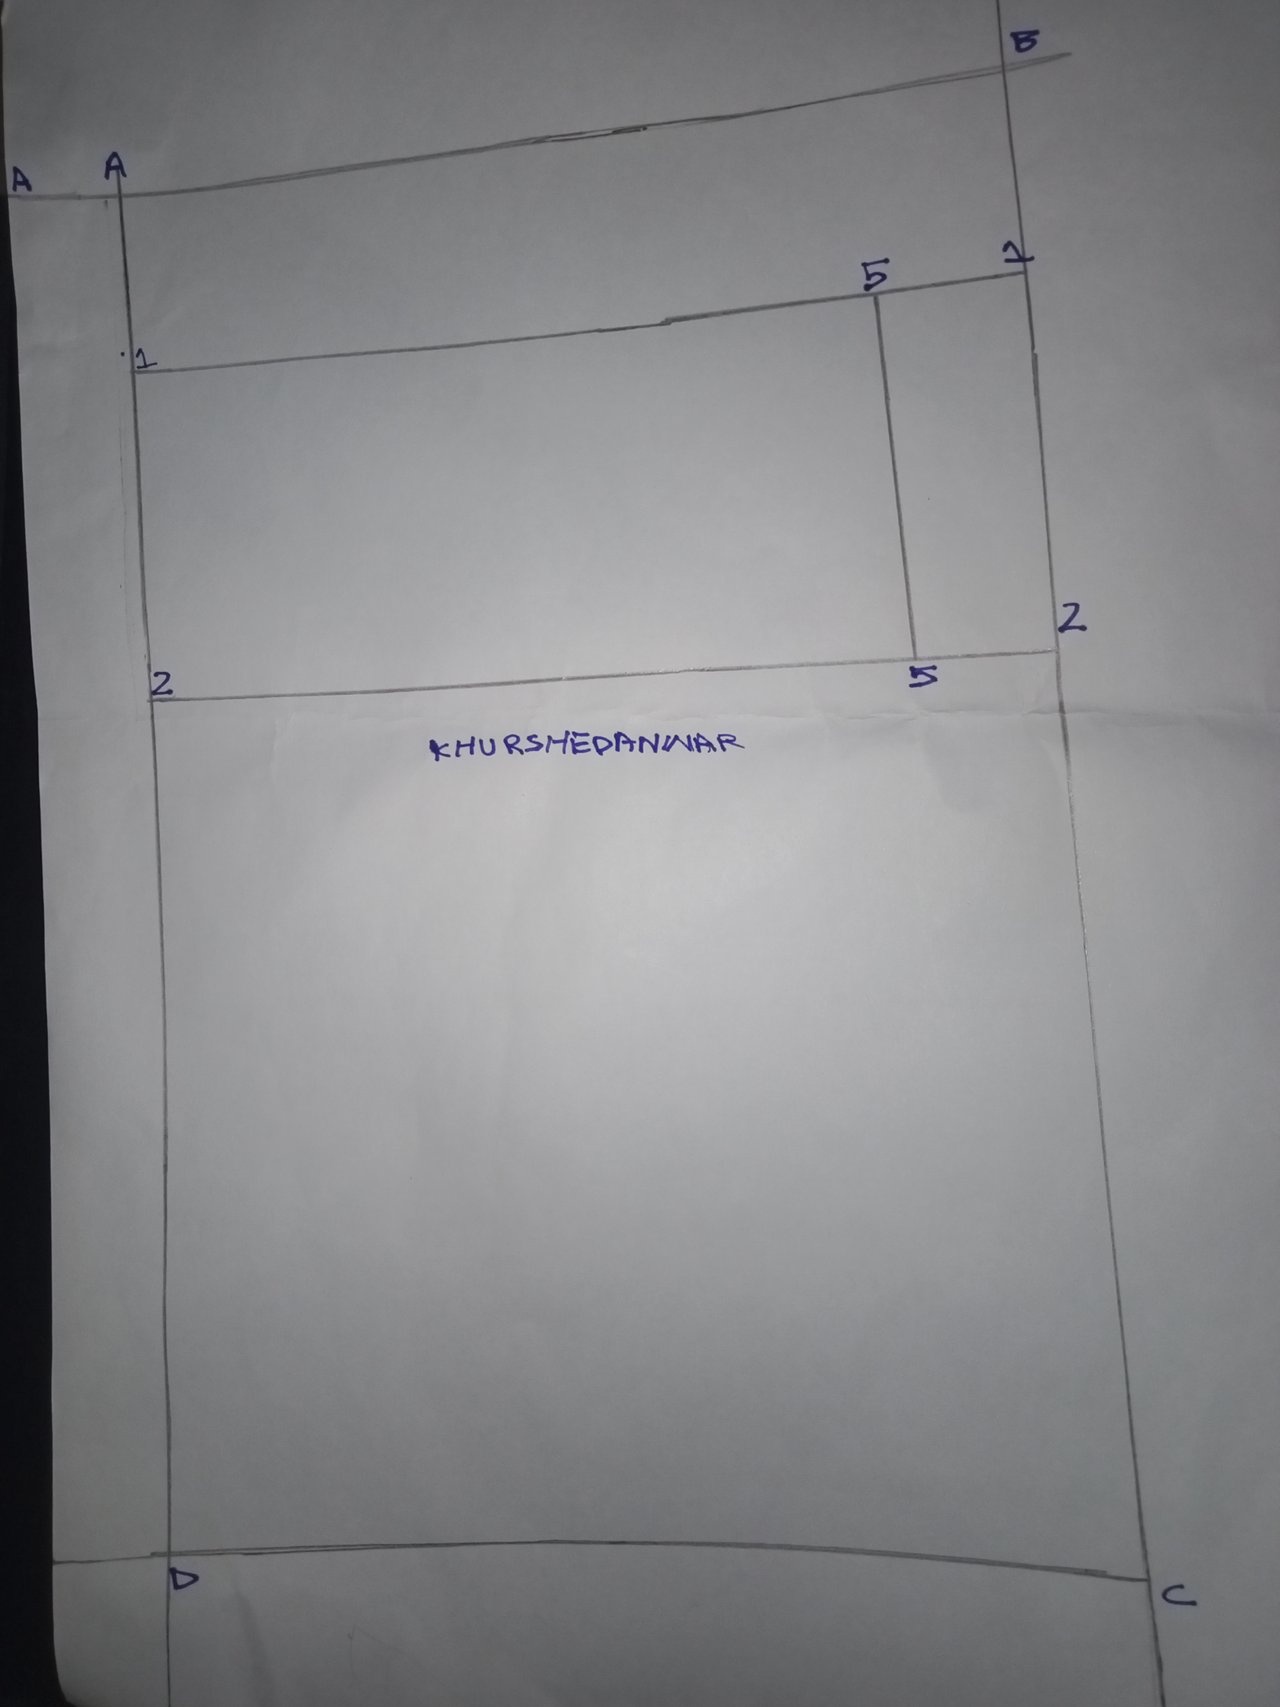
Step 3: Measure Neck Circumference
After that it was the time to measure 1 by 6th of overall circumference of neck. After that I minus 1 cm to give it an allowance.after doing that it was the time to draw curve the line starting from point A and moving towards D.
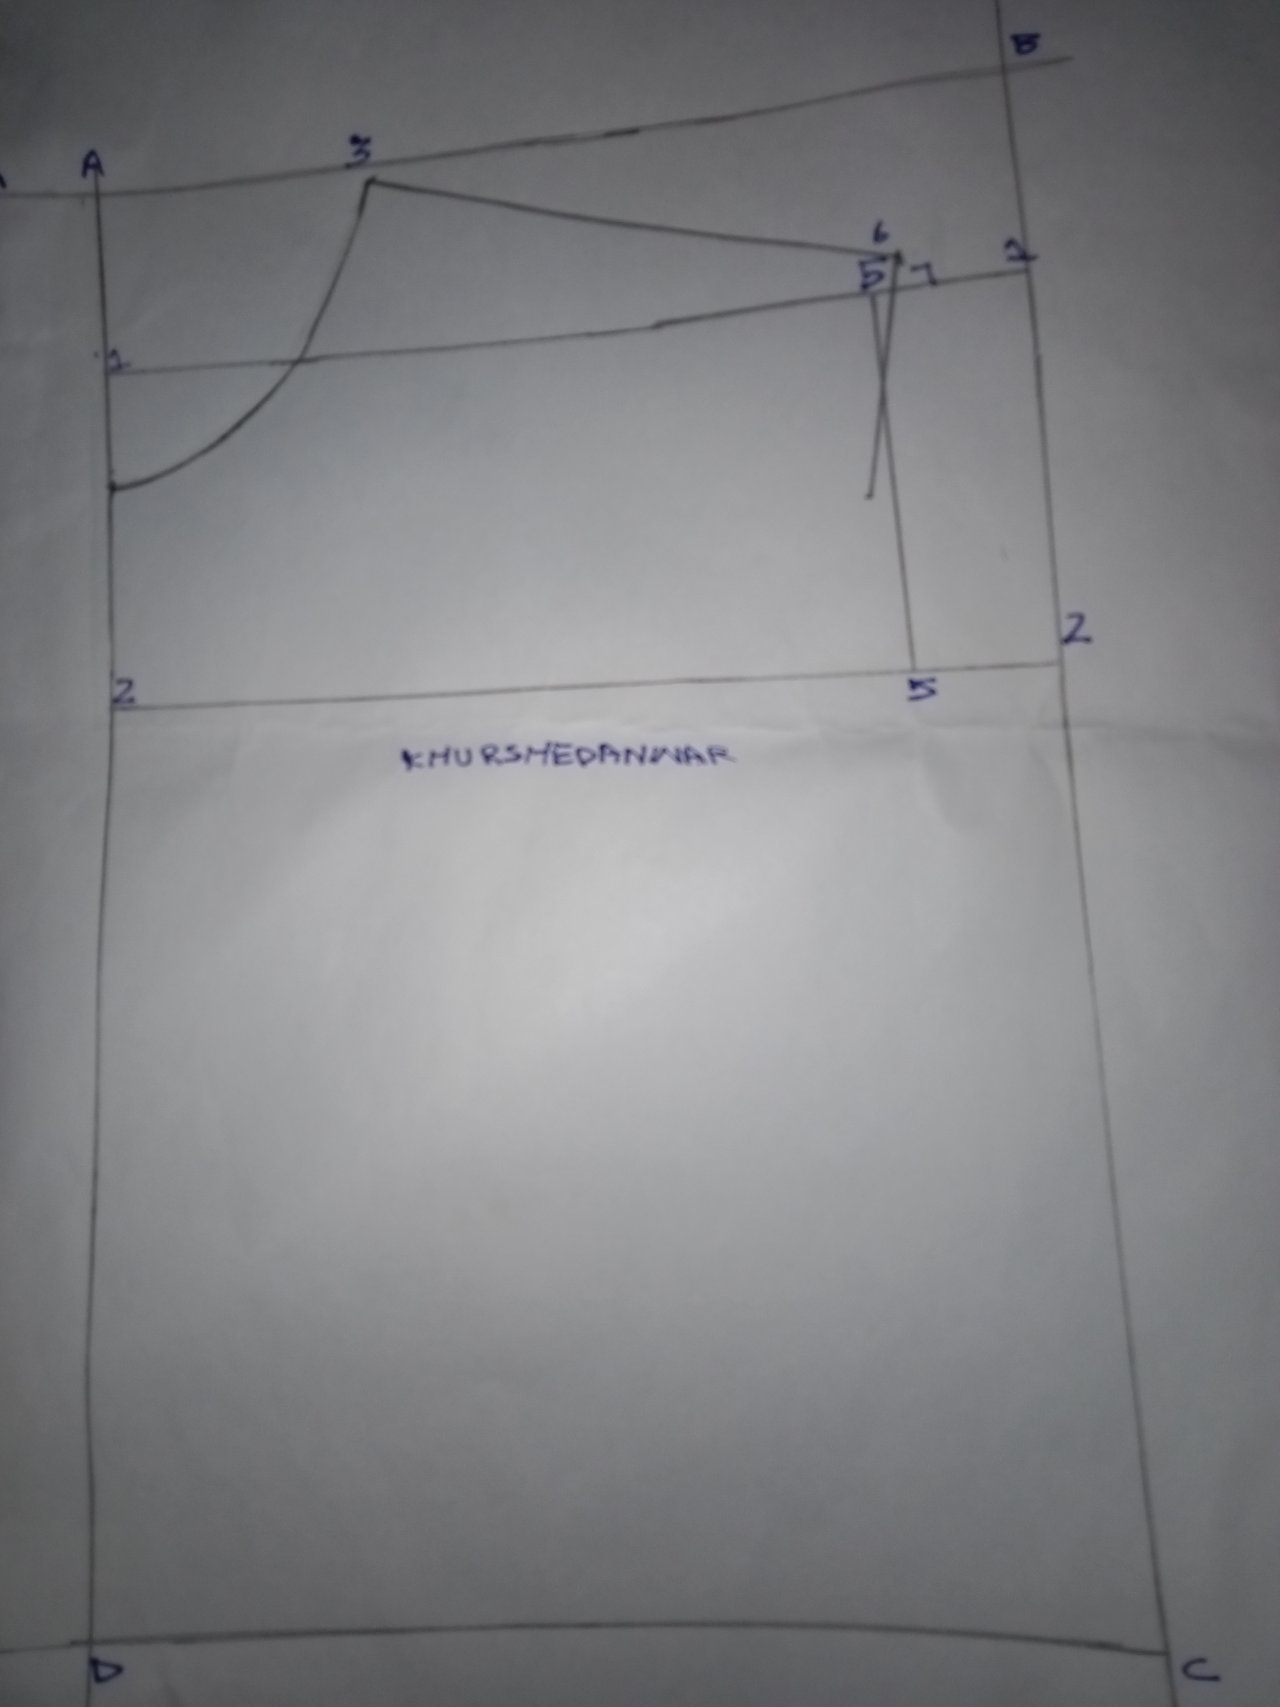
Step 4: Define Chest and Neck
You can clearly see in the picture I have shared that where is point a and where is point b so if we combine both of them then it will be AB point so from that point we need to take measurement of 1 by 6 of circumference of neck. After that we will give around 2 cm allowance and will mark that specific point.
 |  |
|---|
Step 5: Determine Back Width
Now this is a time of measurement of 1/2 of width of back from AB points.
Step 6: Create Shoulder
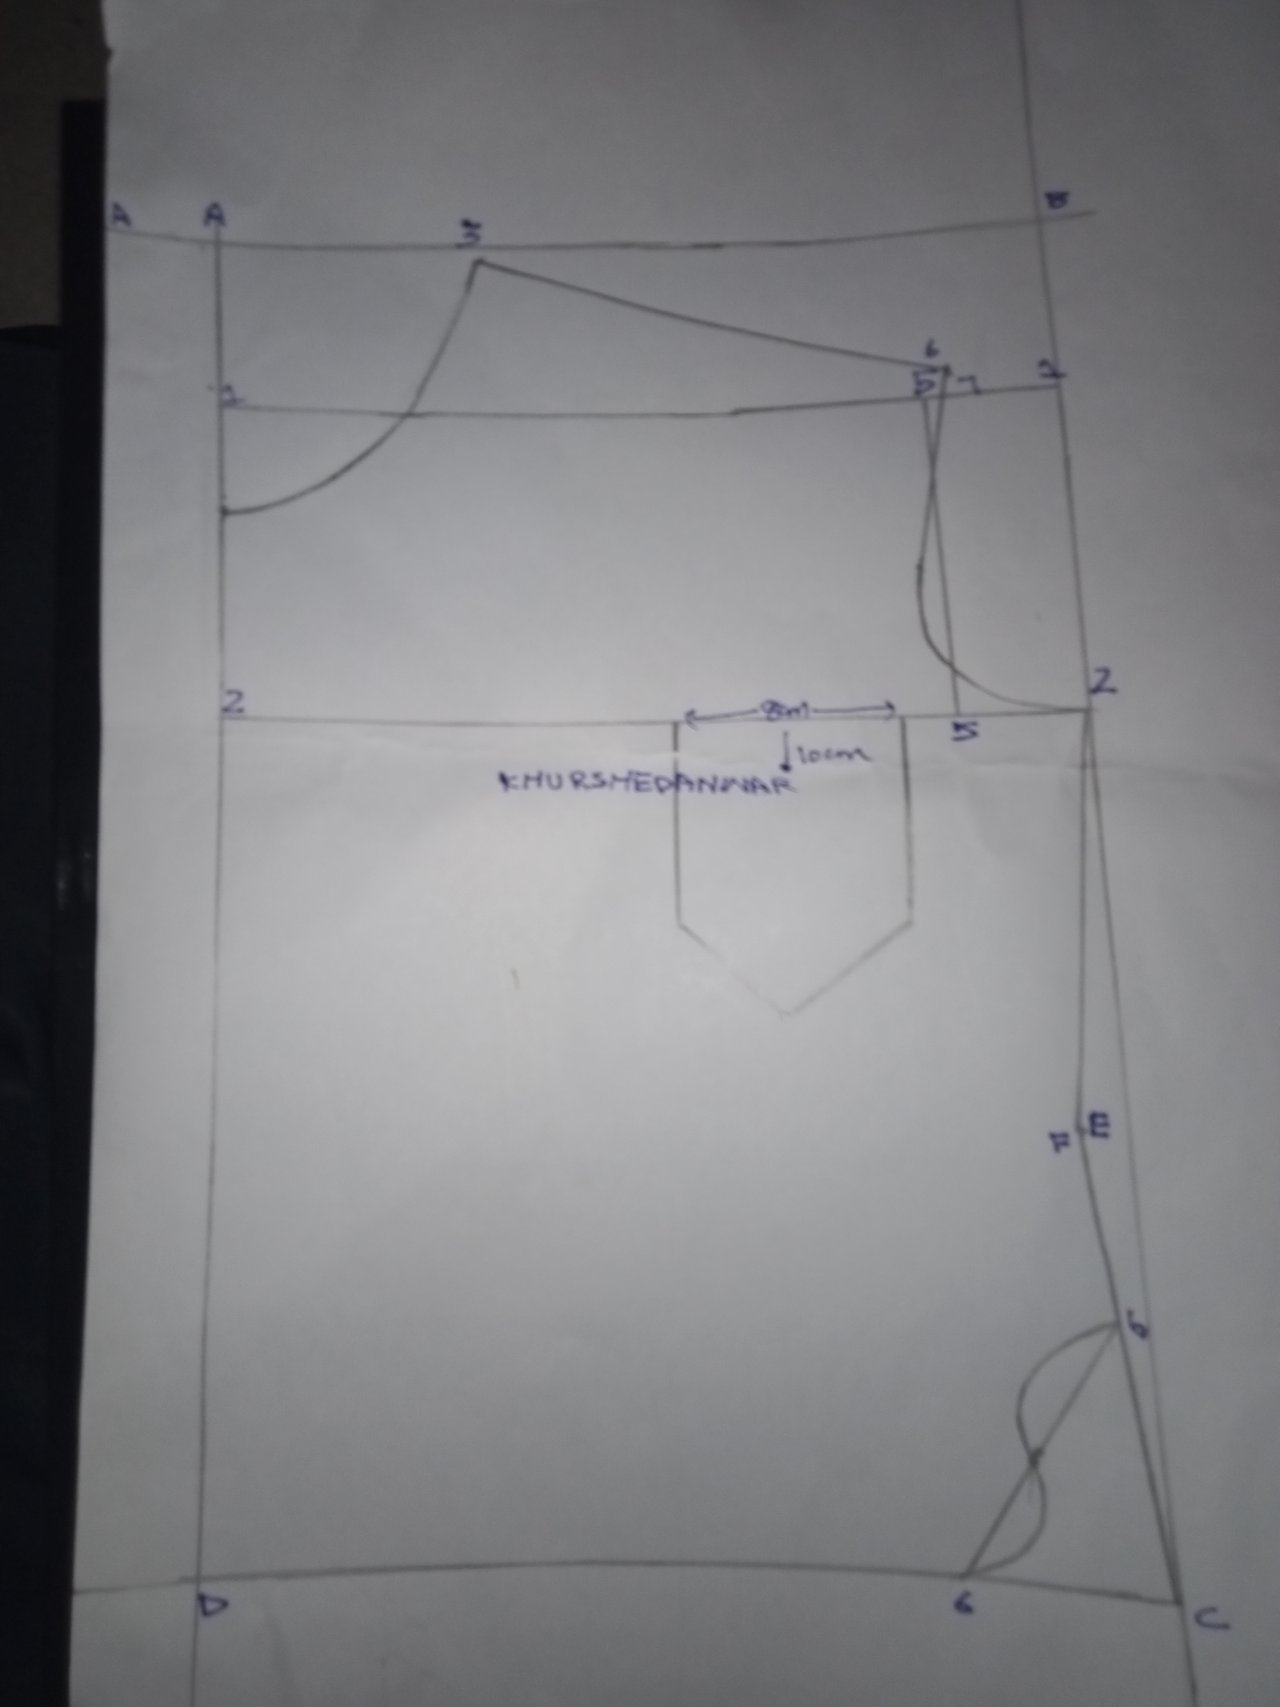
Next step was for creating shoulder in which you can see that from line number 5 I have measured around 1 cm and by keeping in mind the intersection I draw a straight line.
 |  |
|---|
Step 7: Define Armhole
Now you can see that there is line number 8 from which I take a measurement of 1 cm towards down so that I make create a curve.
Step 8: Define Drop Shoulder
This is really very important to define drop shoulder so for this purpose I have drawn straight line for meeting intersection of arm hole curve.
Step 9: Create Slant
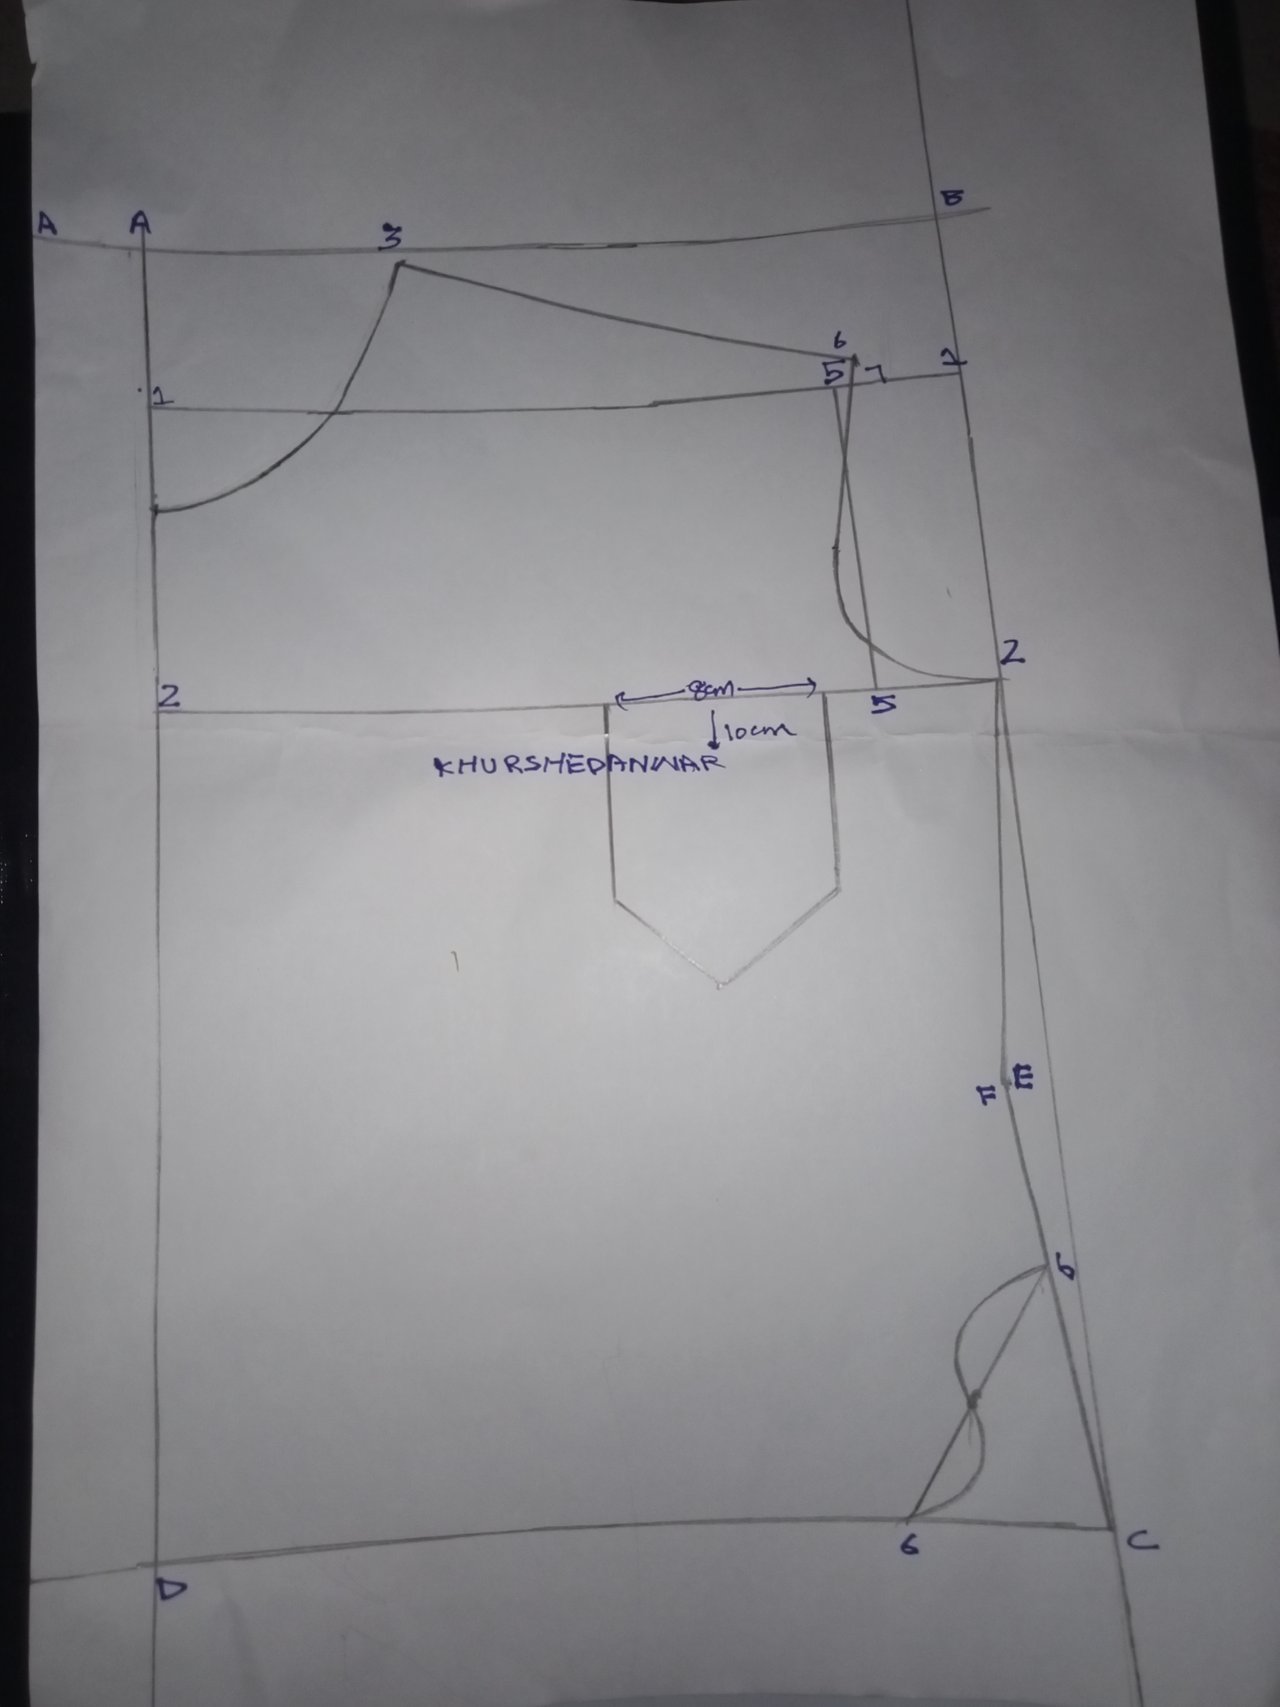
I need to create a slant now so for that purpose I keep in mind seed so that I may take measurement of 1/2 for creation of curve line.
Step 10: Add Pocket
For adding pocket I measured a distance of 3 cm from line number 5 and 10 cm from length side.
Step 11: Add Button Allowance
It is always important to add button allowance so so this purpose I have added 3 cm folding from point a to b.
Step 12: Verify Fit
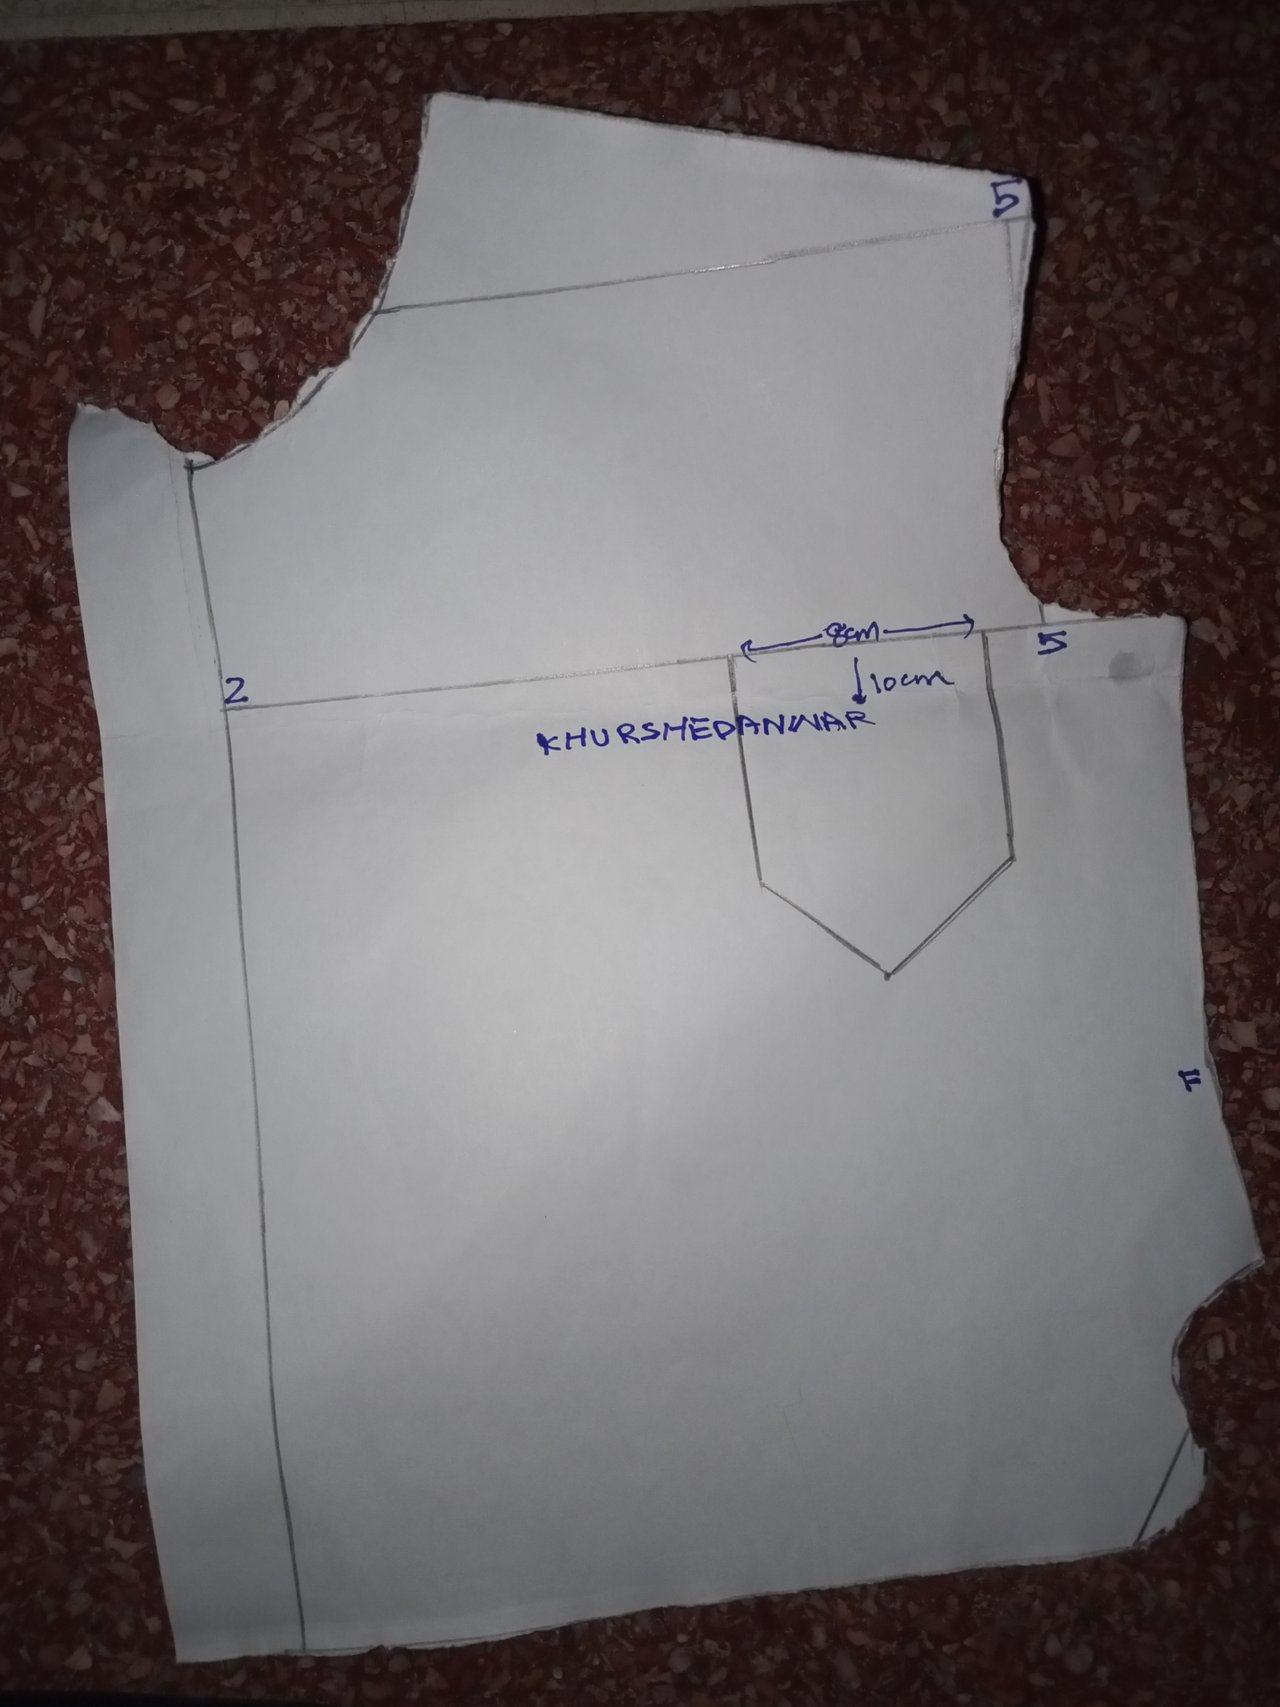
After that this is last step of verification in which I verified that this front layout seems to be fine or not so it seems fine to me by following step by step procedure.
Common measurements
- Circumference of chest: 1/4 + 2cm
- Circumference of neck: 1/6 - 1cm
- Width of back: 1/2
- Shoulder: 1cm from line 5
- Armhole: 1cm down from line 8
So that was all about basic steps for making basic layout for men's front of shirt.
In different garments of men's different categories of collars used which I am going to explain below;
Following type of shirts are available about which collar type I am talking!
• Sports Shirt
• Dress Shirt
• Henley Shirt
• Work/Lab Coat
• School Shirt
These some of typical collar styles for each garment;
Sports Shirt
- Crew neck or
- V-neck collar
Dress Shirt
- Pointed collar
- Spread collar
- Cutaway collar
Henley Shirt
- Rounded collar
- No collar (T-shirt style)
Work/Lab Coat
- Standing type of collar
- Lapel collar type
School Shirt
- Point collar type.
- Button down collar
These were some of collar styles according to my culture but collar styles may have significant variations from culture to culture.
Comments