DIY: How to make a origami deer.
6 comments
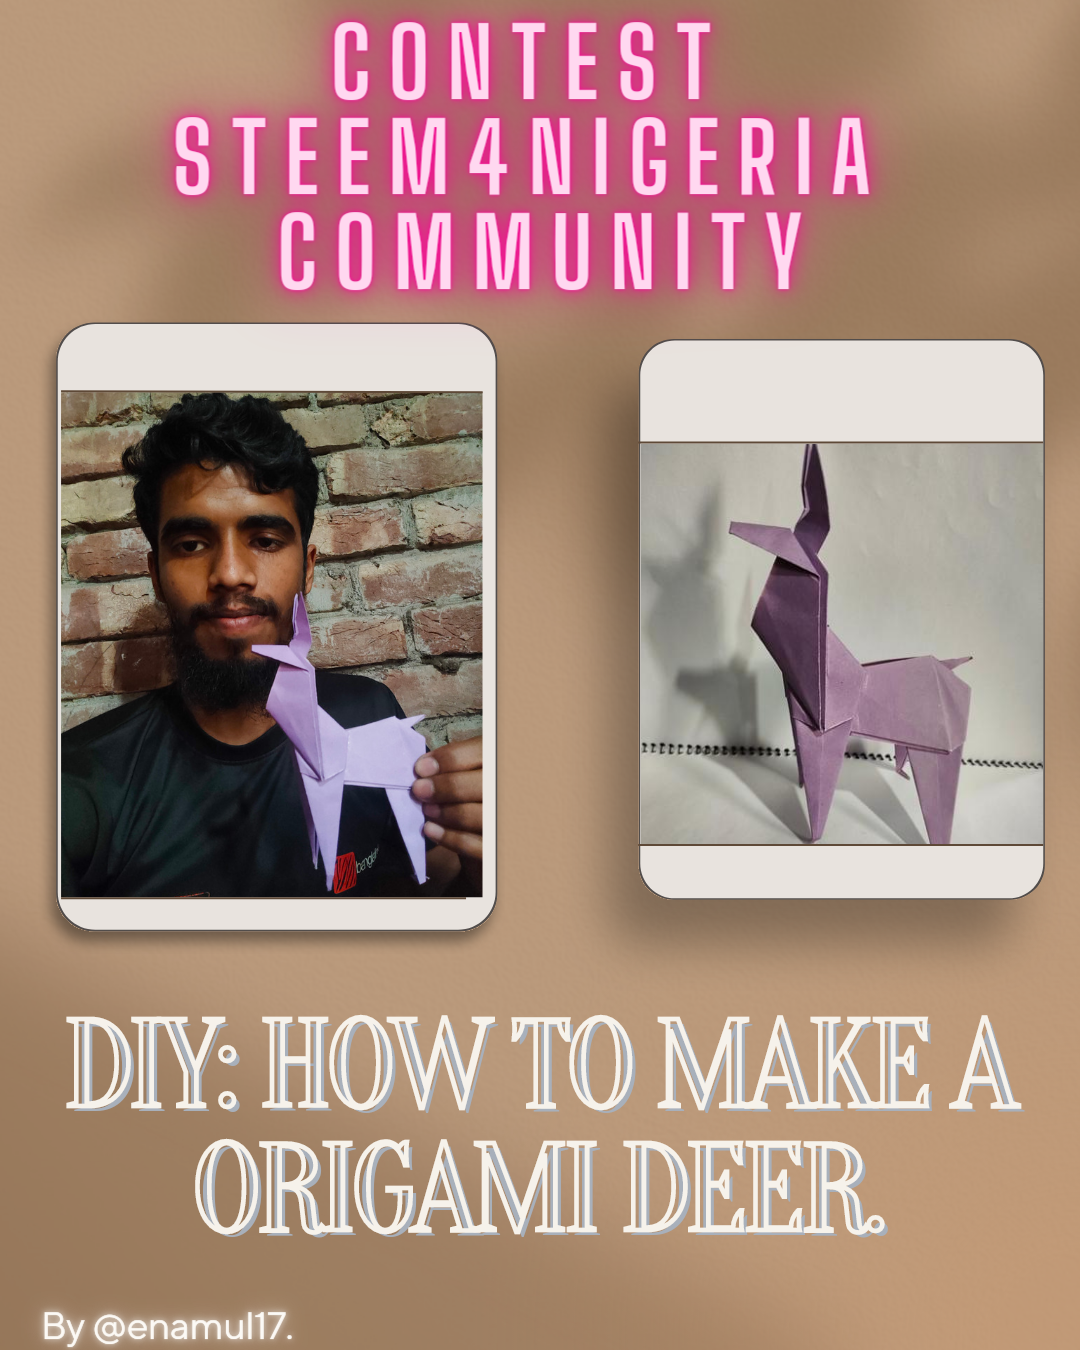
Created by canva app.
Assalamualaikum my steemain friends. How are you all my friends? How is your day going? I hope you all are having a wonderful day.Alhamdulillah, by the mercy of Almighty Allah I am excellent today.Dear @goodybest sister has organized a beautiful Contest which is my favorite, so I have come to participate in her Contest today. The content of the contest given to us is to create DIY. Today I have come up with my paper-made craft and what I have done is paper deer. Hopefully all of you will like this paper deer craftsmanship.So let's start the making process.
- Purple colour paper.
- Pencil.
- Ruler.
- Scissor.
- Glue.
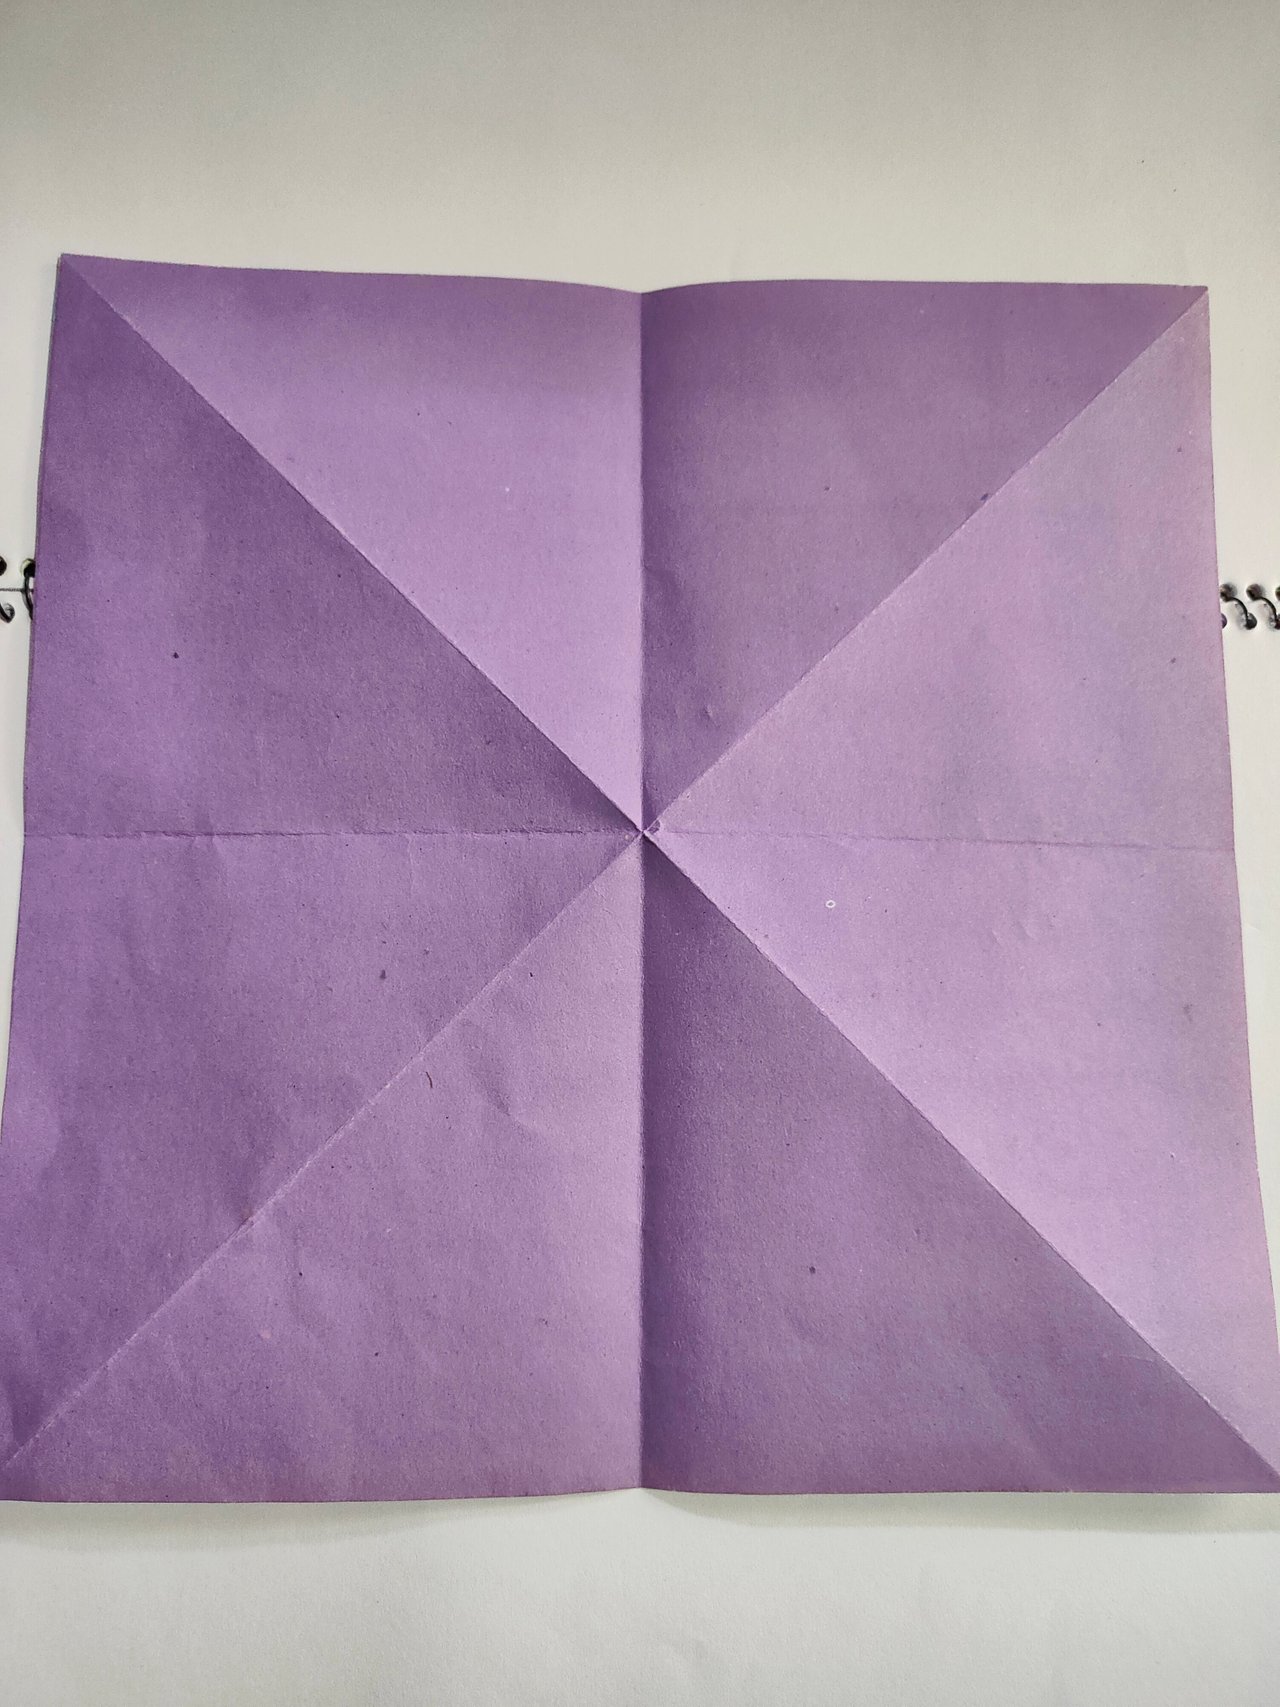
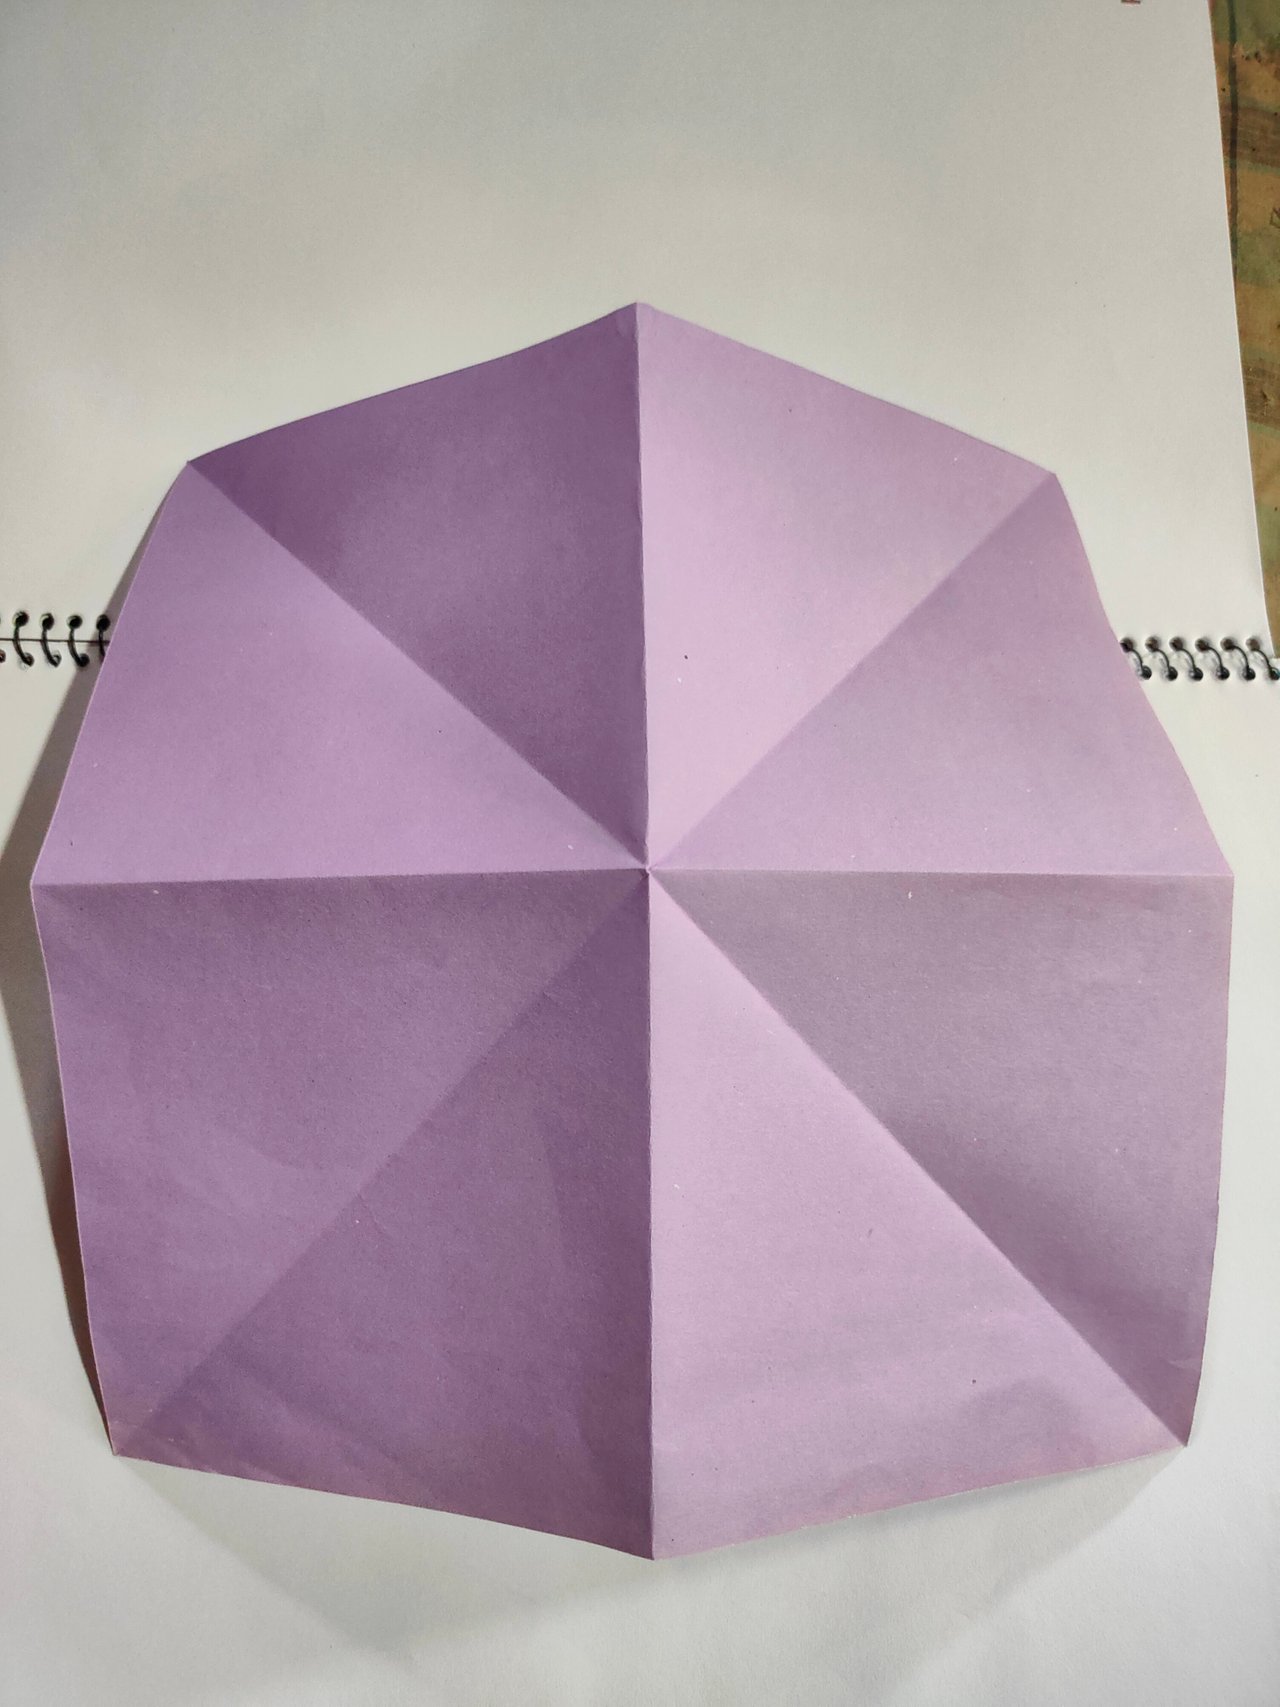
Step 1,
- Hello friends for this origami deer , at first I take two pieces of A4 size purple colour paper. Then measure it (20×20)cm and then I cut that two part paper nicely and carefully. After that I take a piece of paper and start folding, firat I fold the paper angularly and then turn over the paper and then fold the papaer in middle both side.
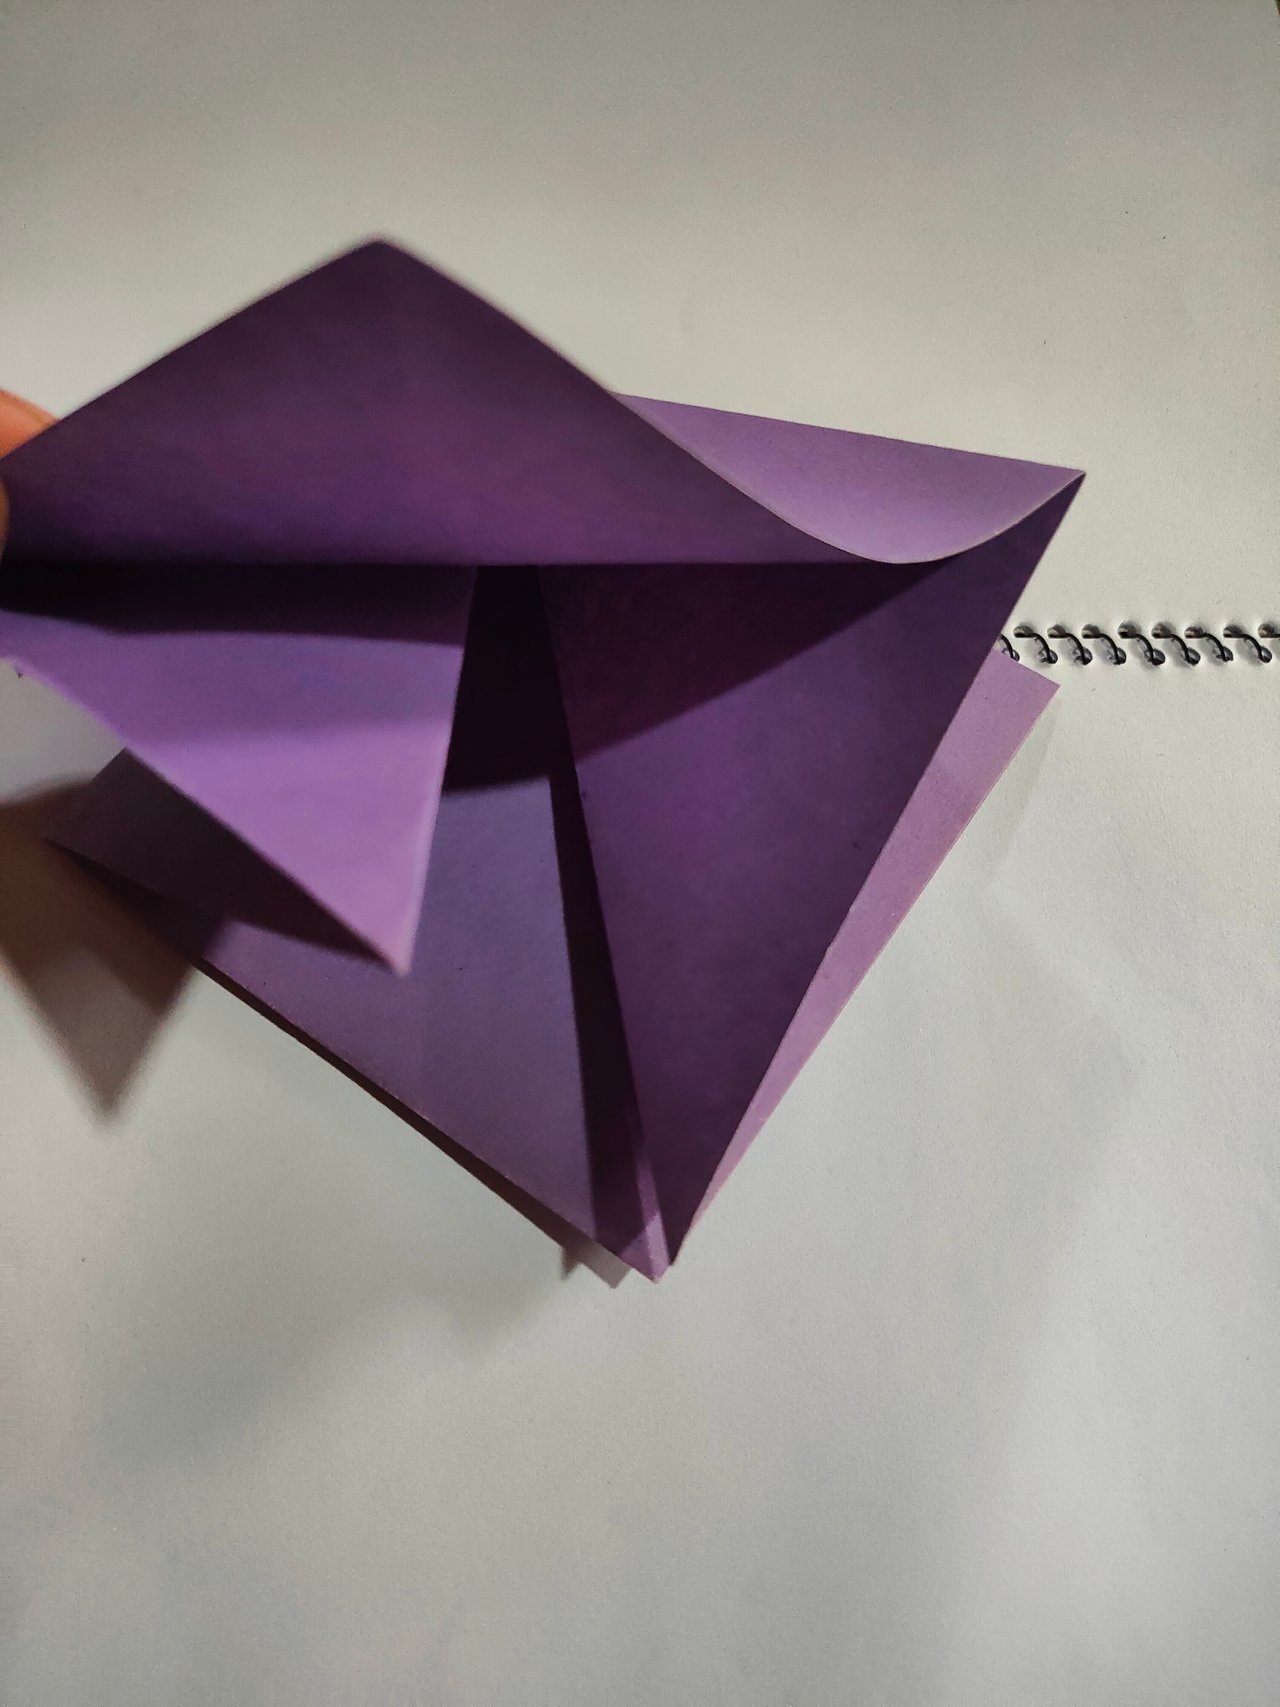
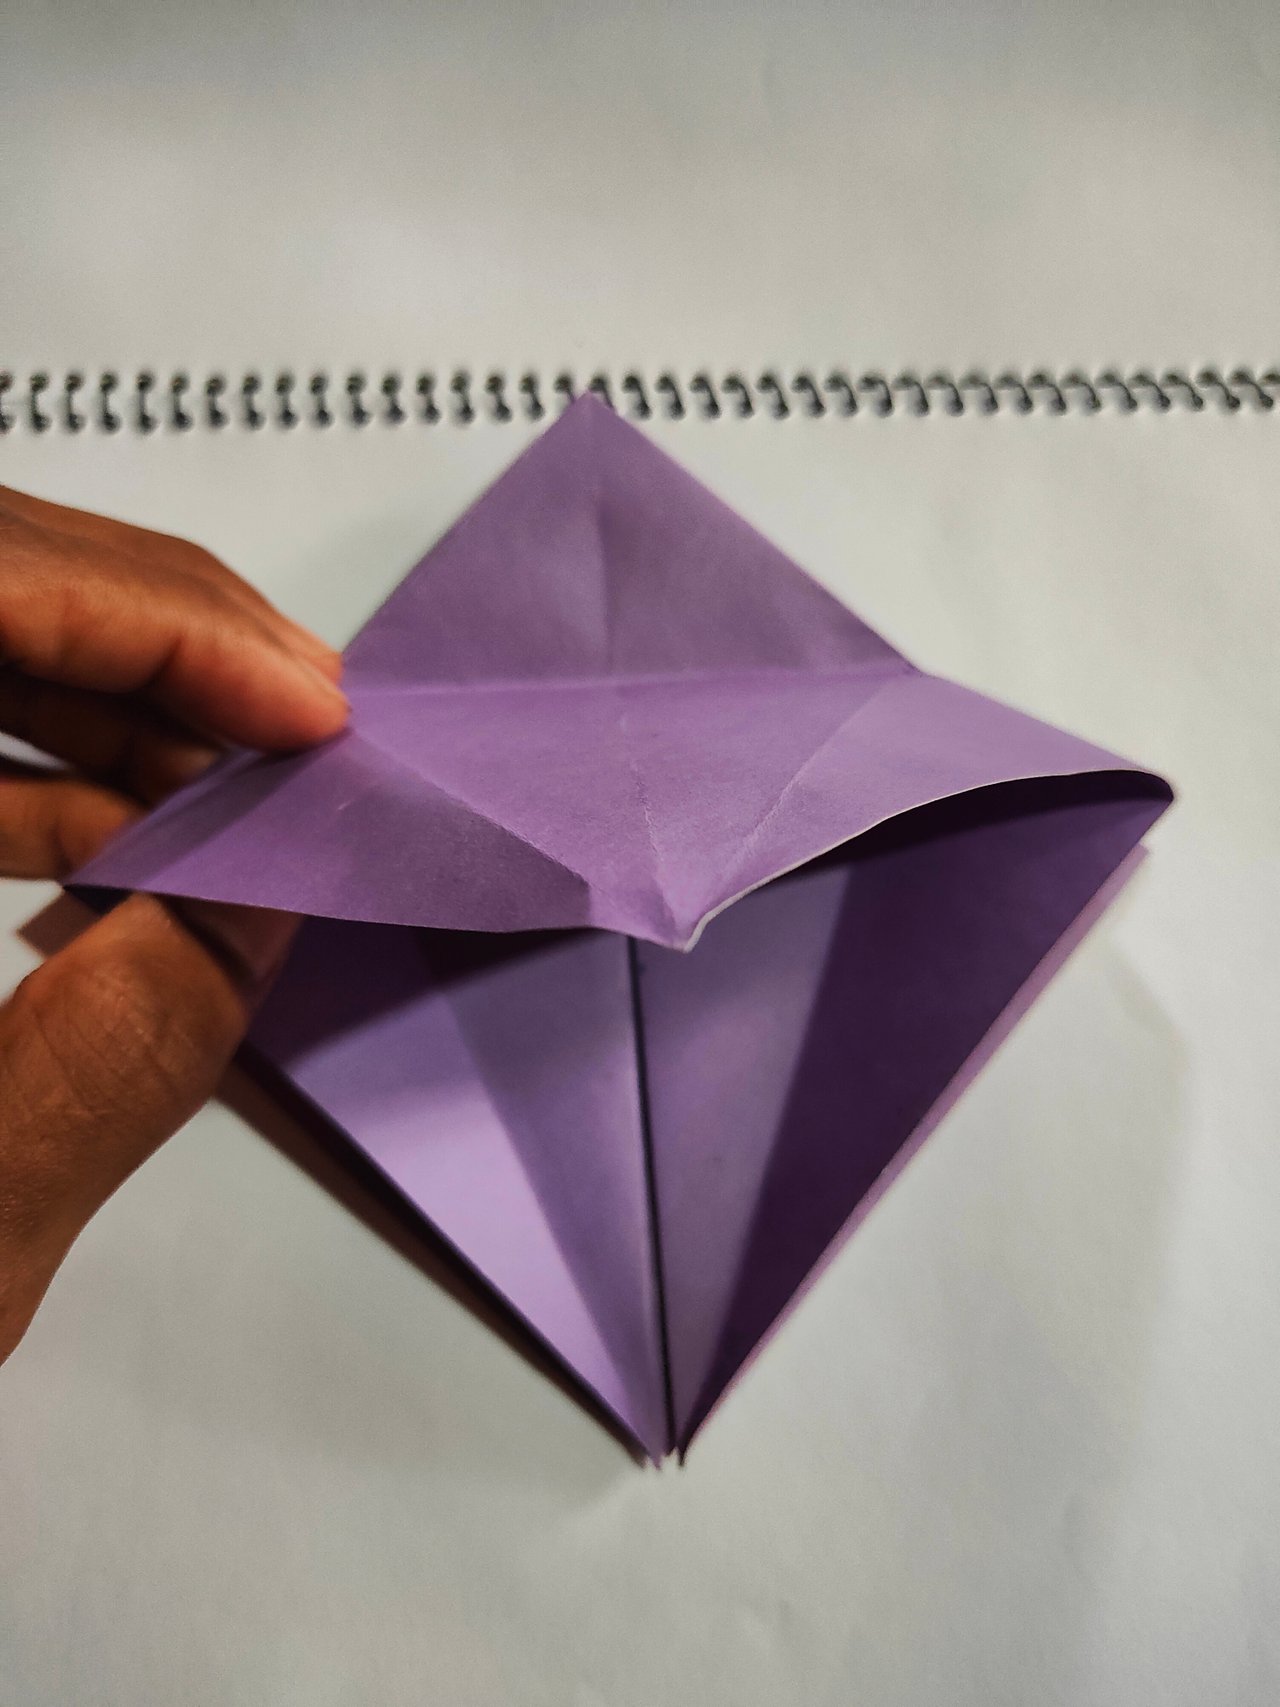
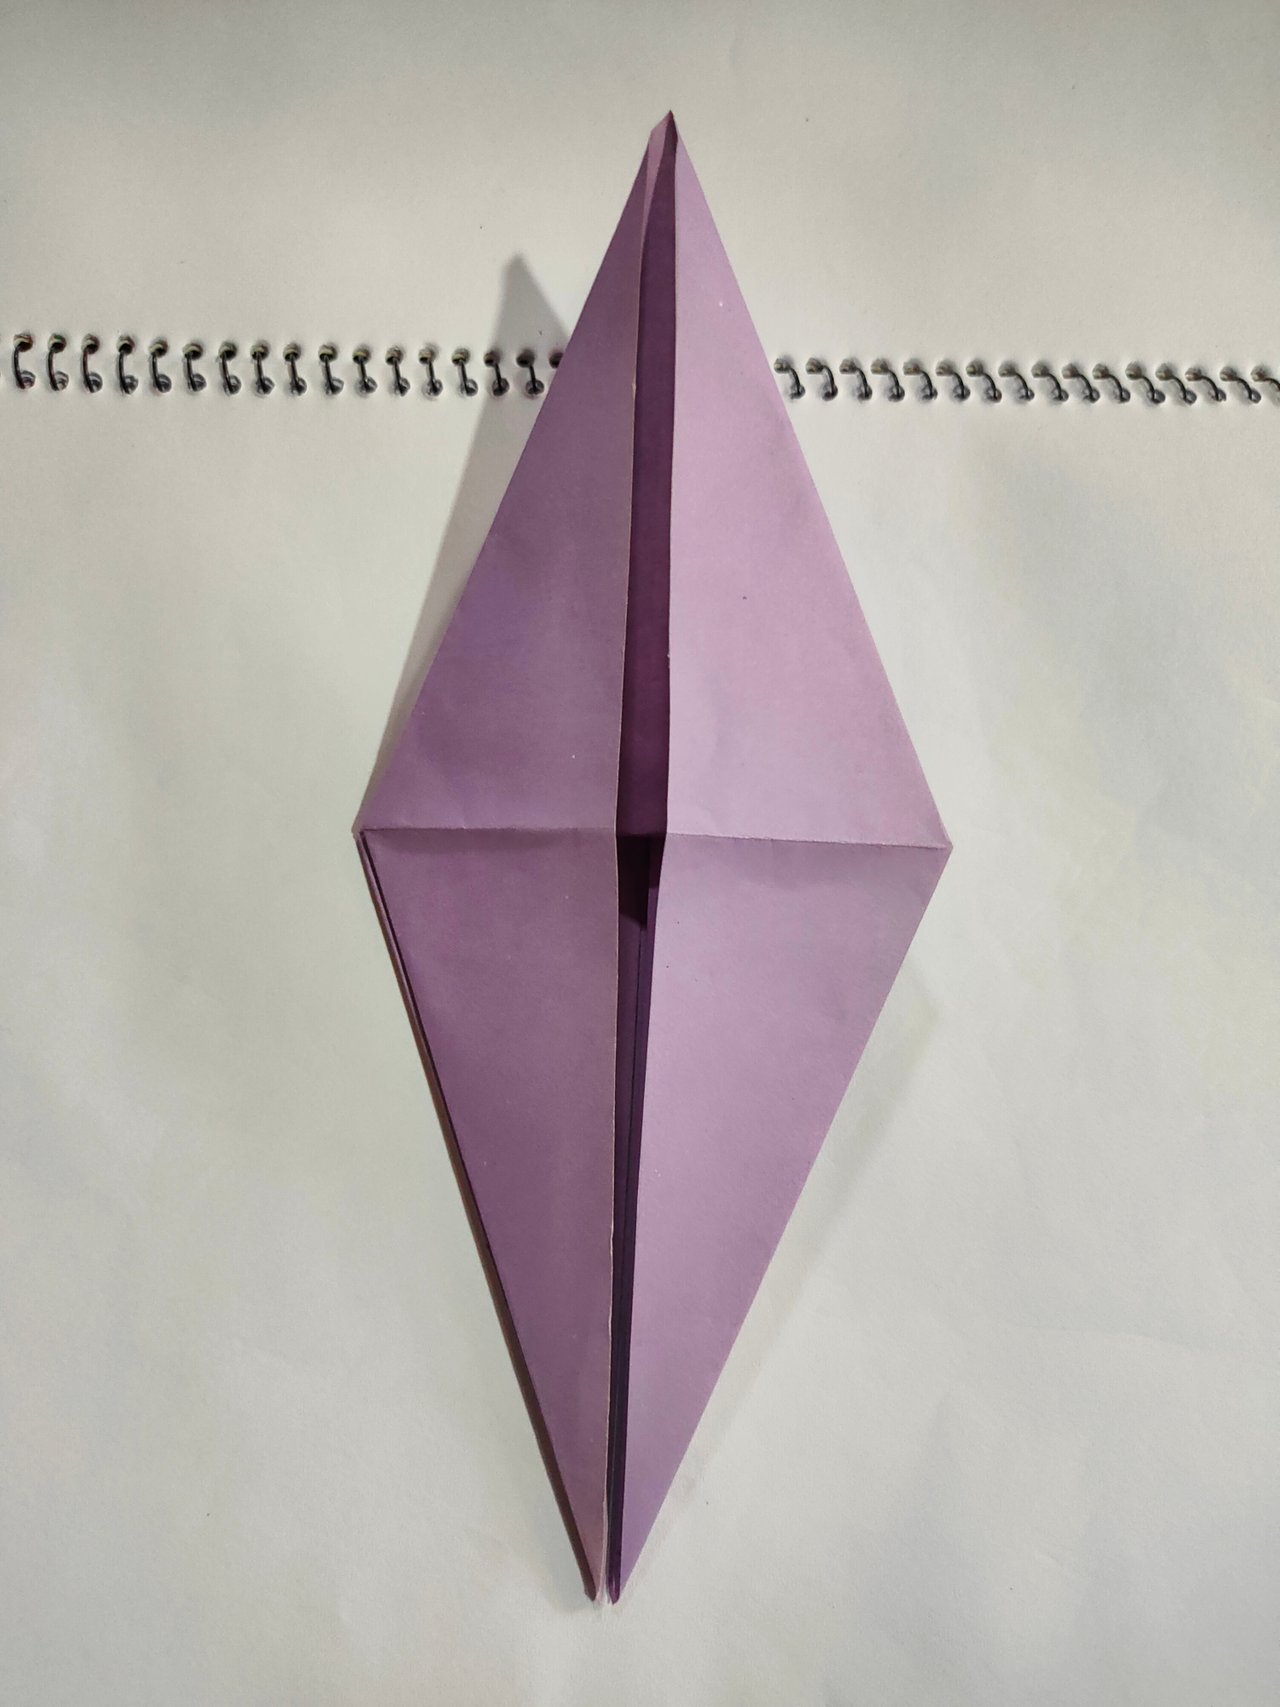
Step 2,
- At that point I put two corner side paper inside it and two other part is already on the top and bottom part. So I fold it very nicely and carefully.
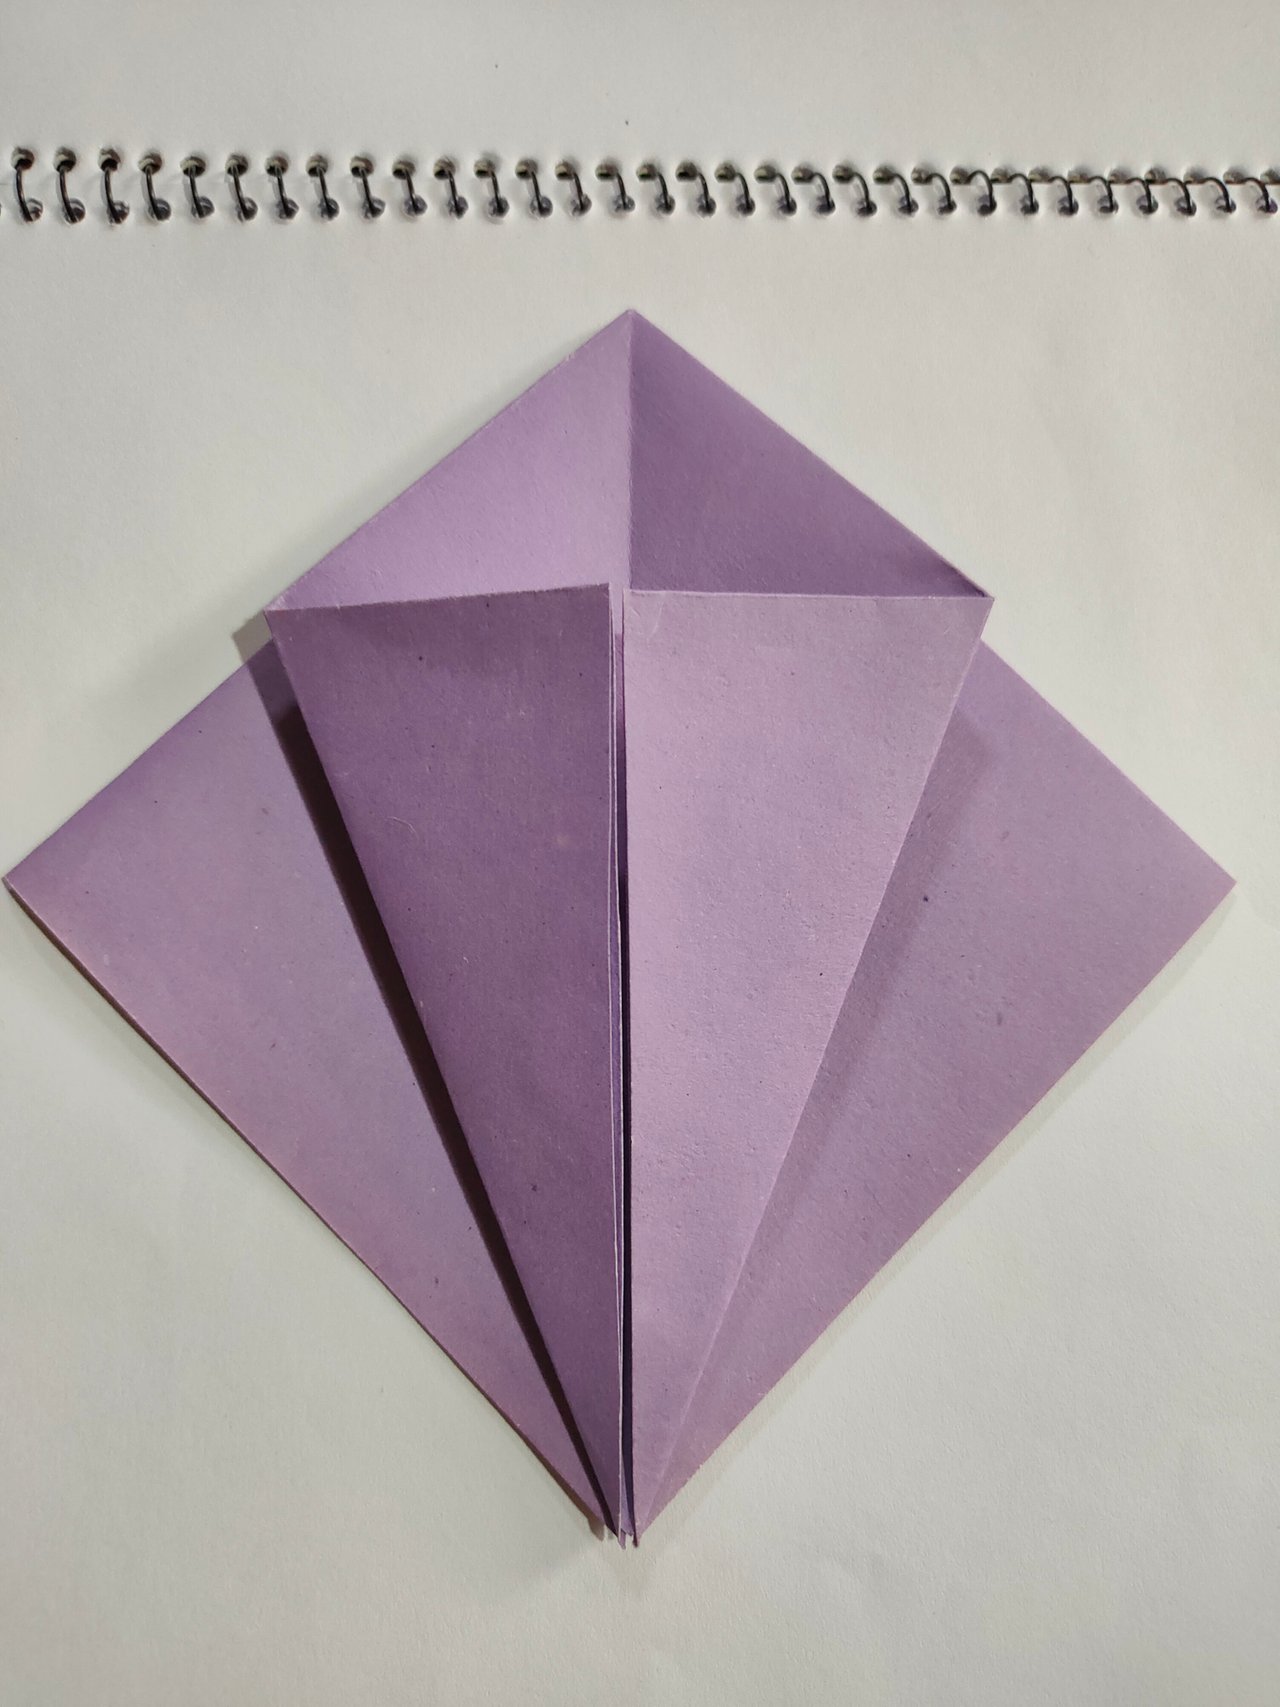
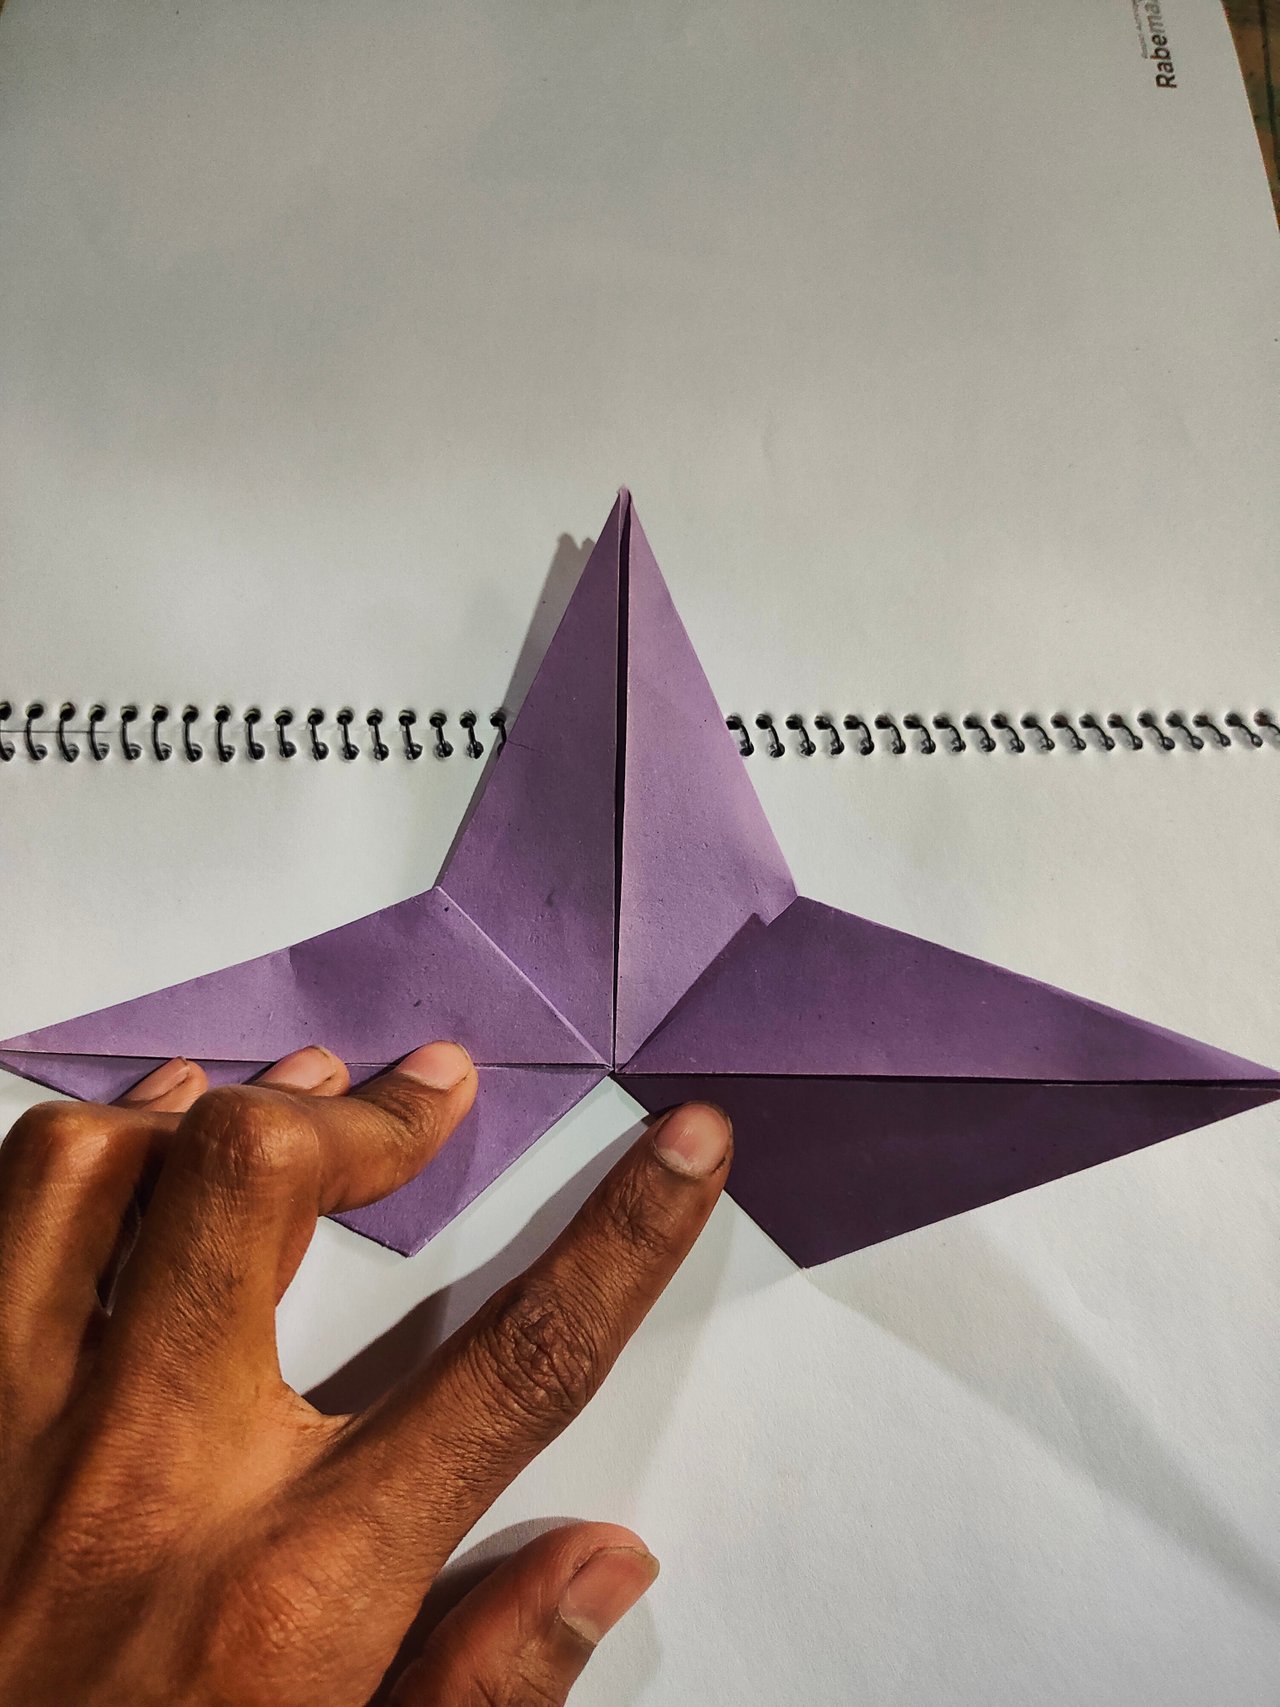
Step 3,
- Then I hold that point nicely and then first fold top part paper angularly alone the center of the paper both side.
Step 4,
- After that I fold the top corner part and then unfold the paper and then fold the paper again very nicely and carefully. Same way I try it on the other side very nicely.
 |  |
|---|
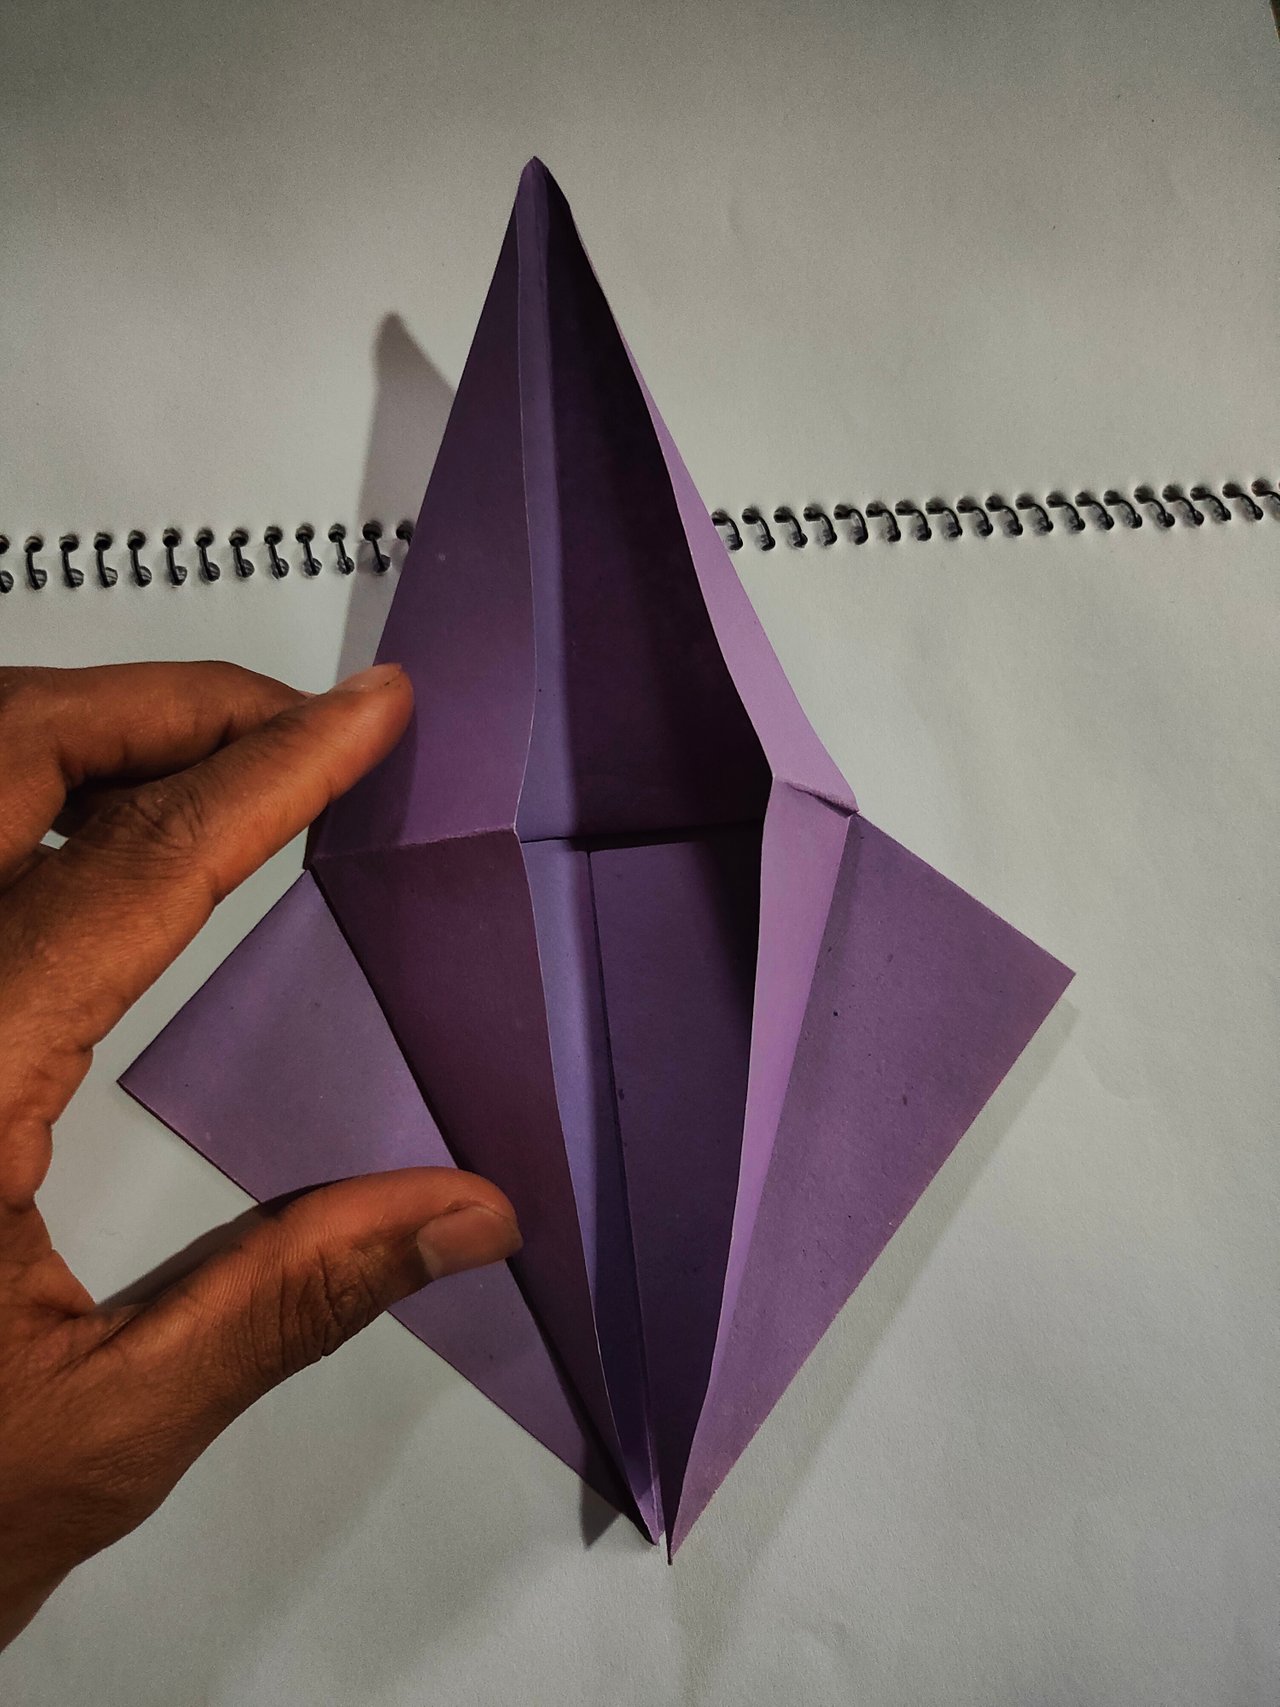
Step 5,
- After that I fold the bottom divided part, first I fold the left side on the left and right side on the right vertically.
Step 6,
- Then I put my hand inside the paper and flat it very nicely both side.
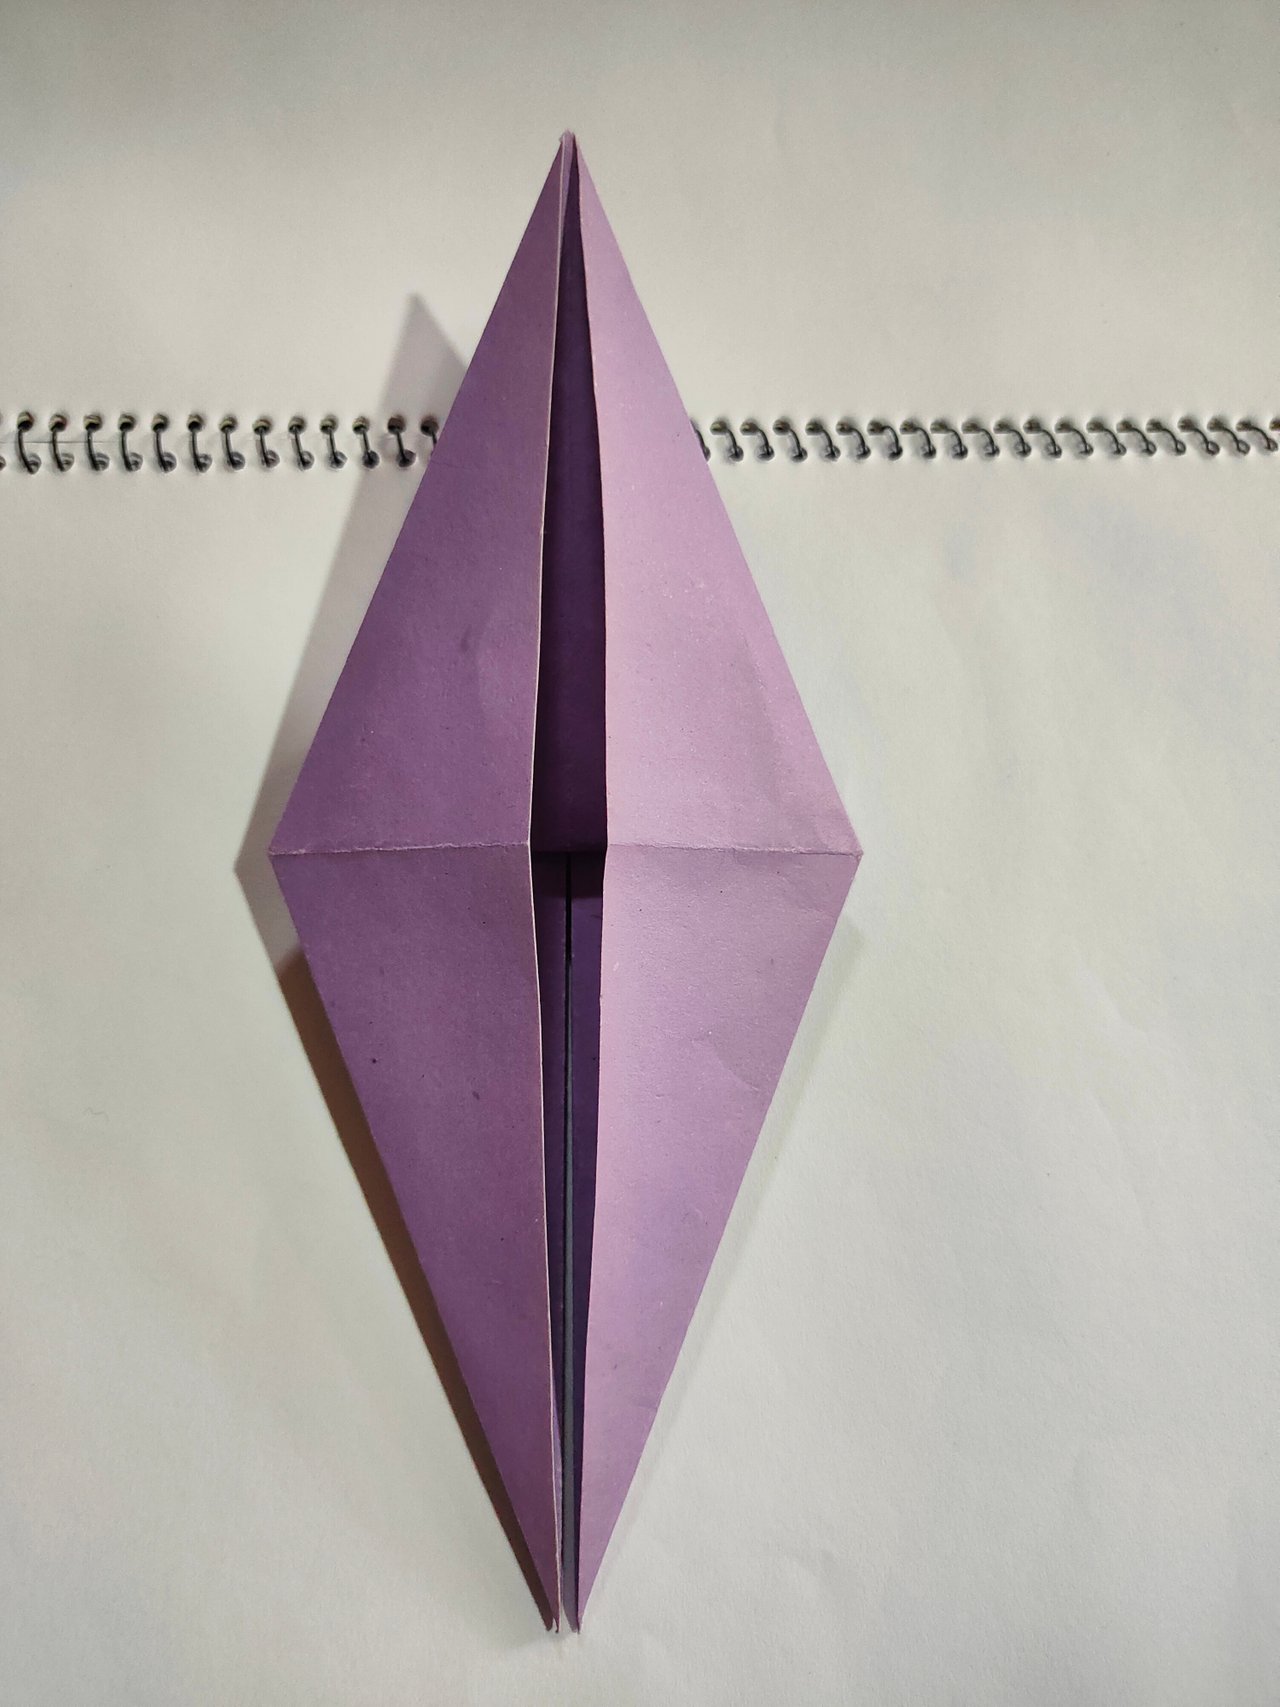
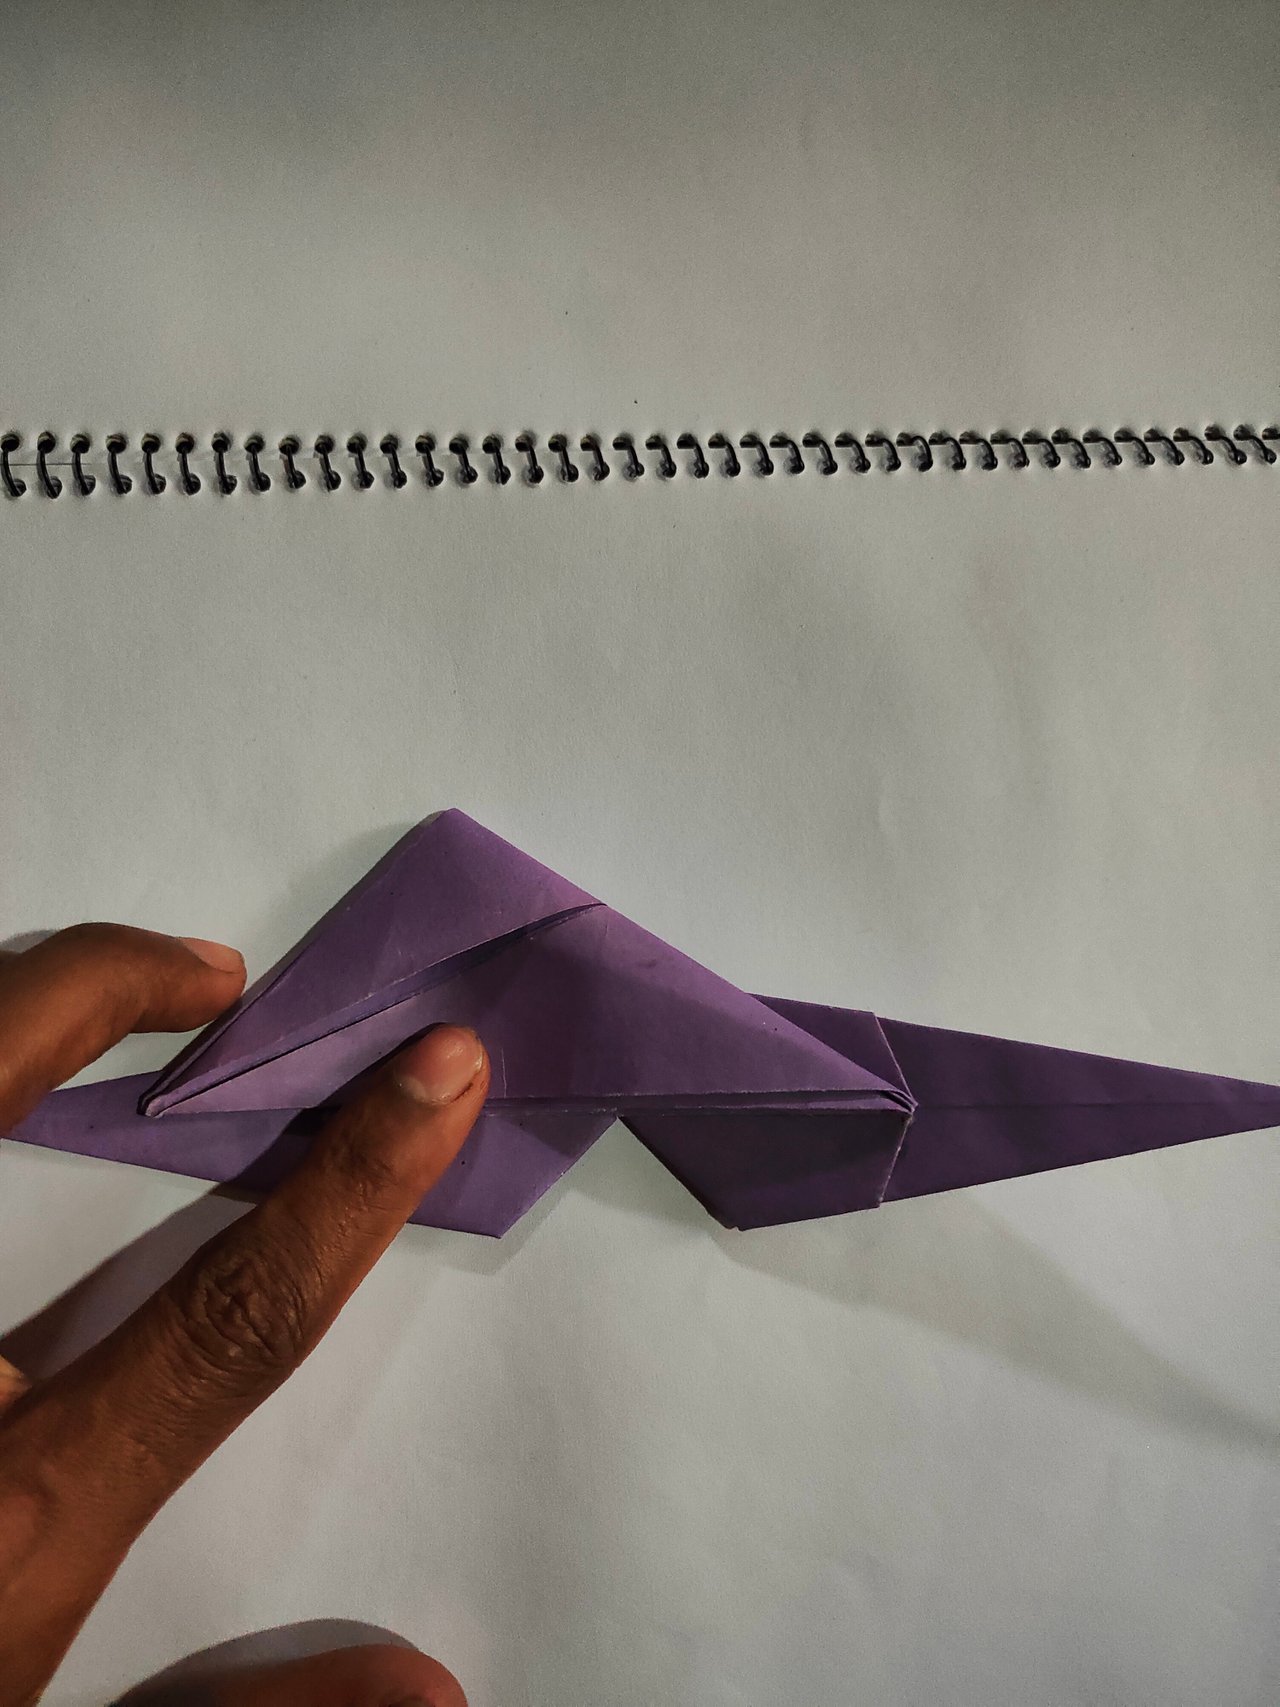
Step 7,
- Then I fold this paper nicely along the middle on both sides.

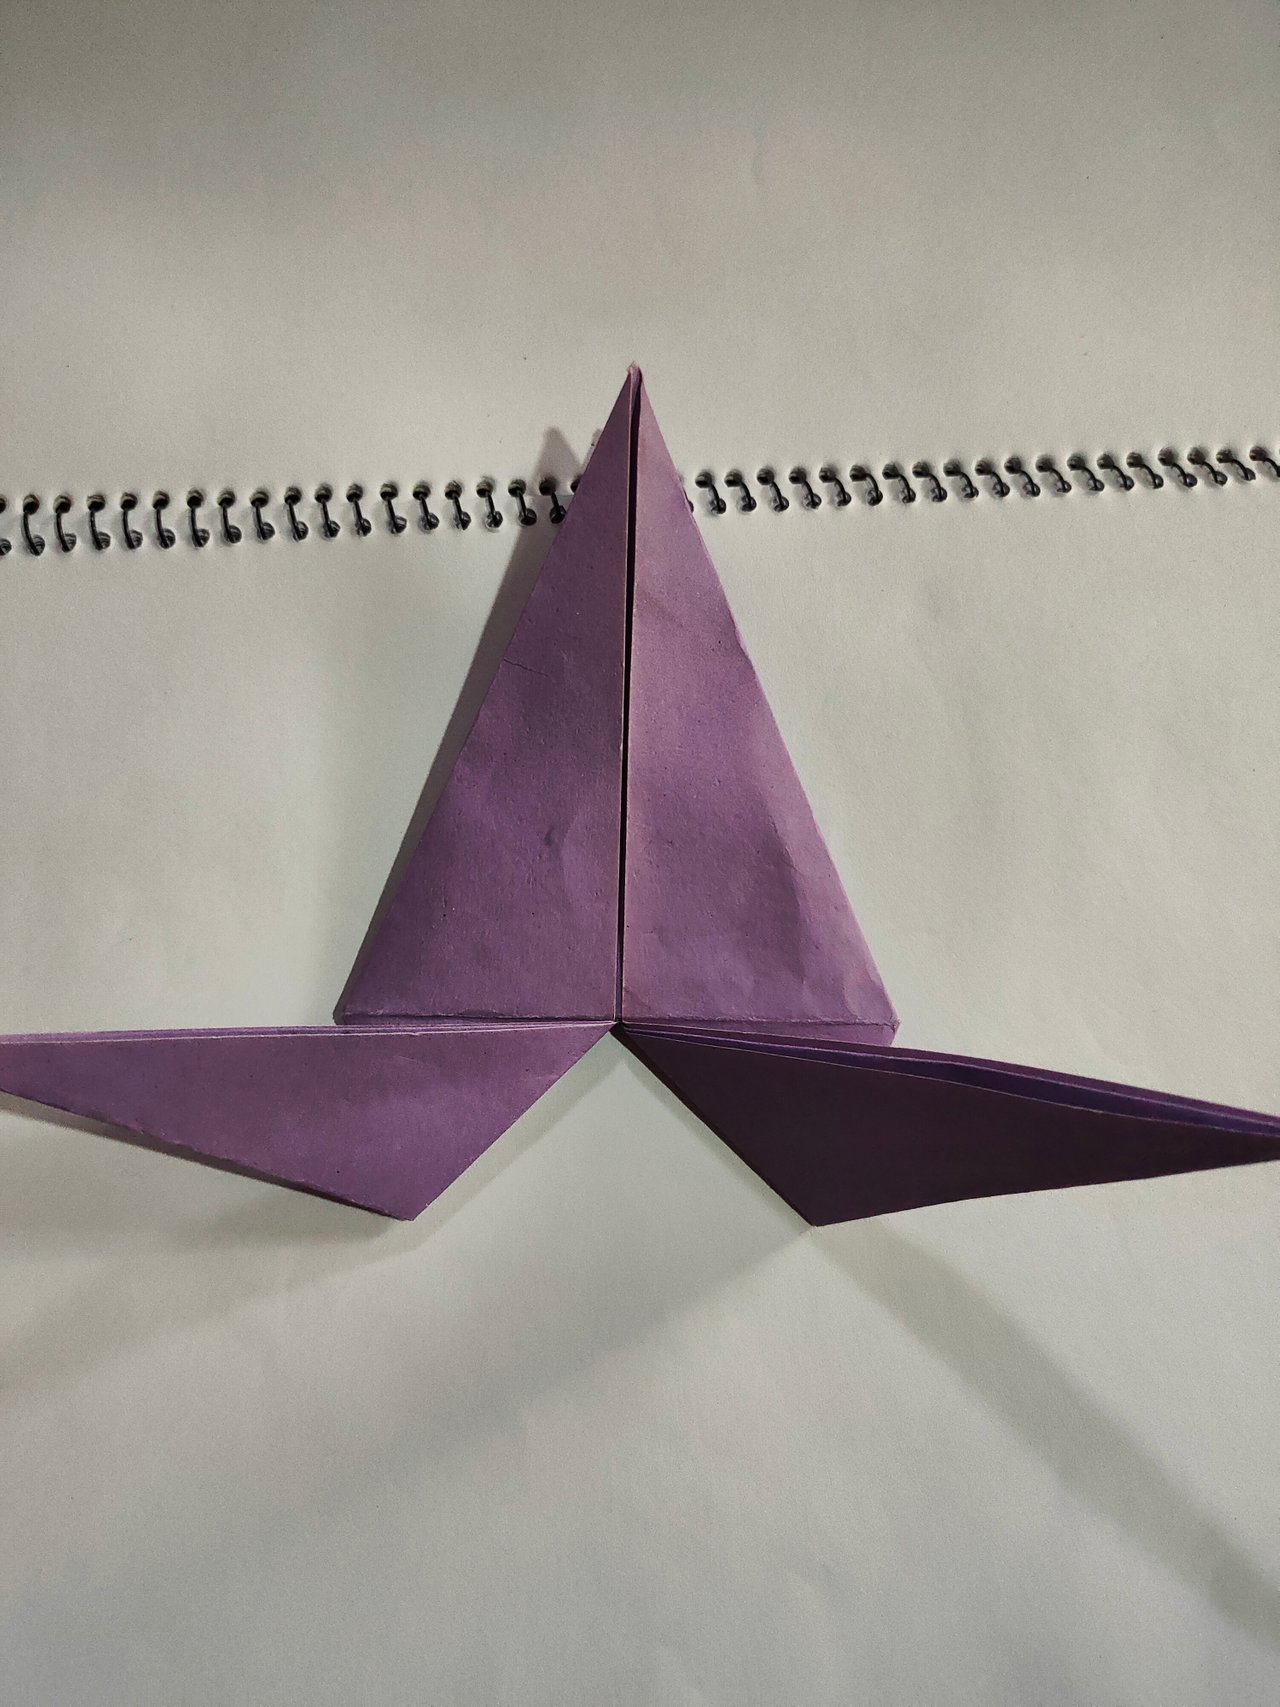
Step 8,
- Next I I turn the paper and and fold the middle part paper vertically both side nicely and very beautifully.
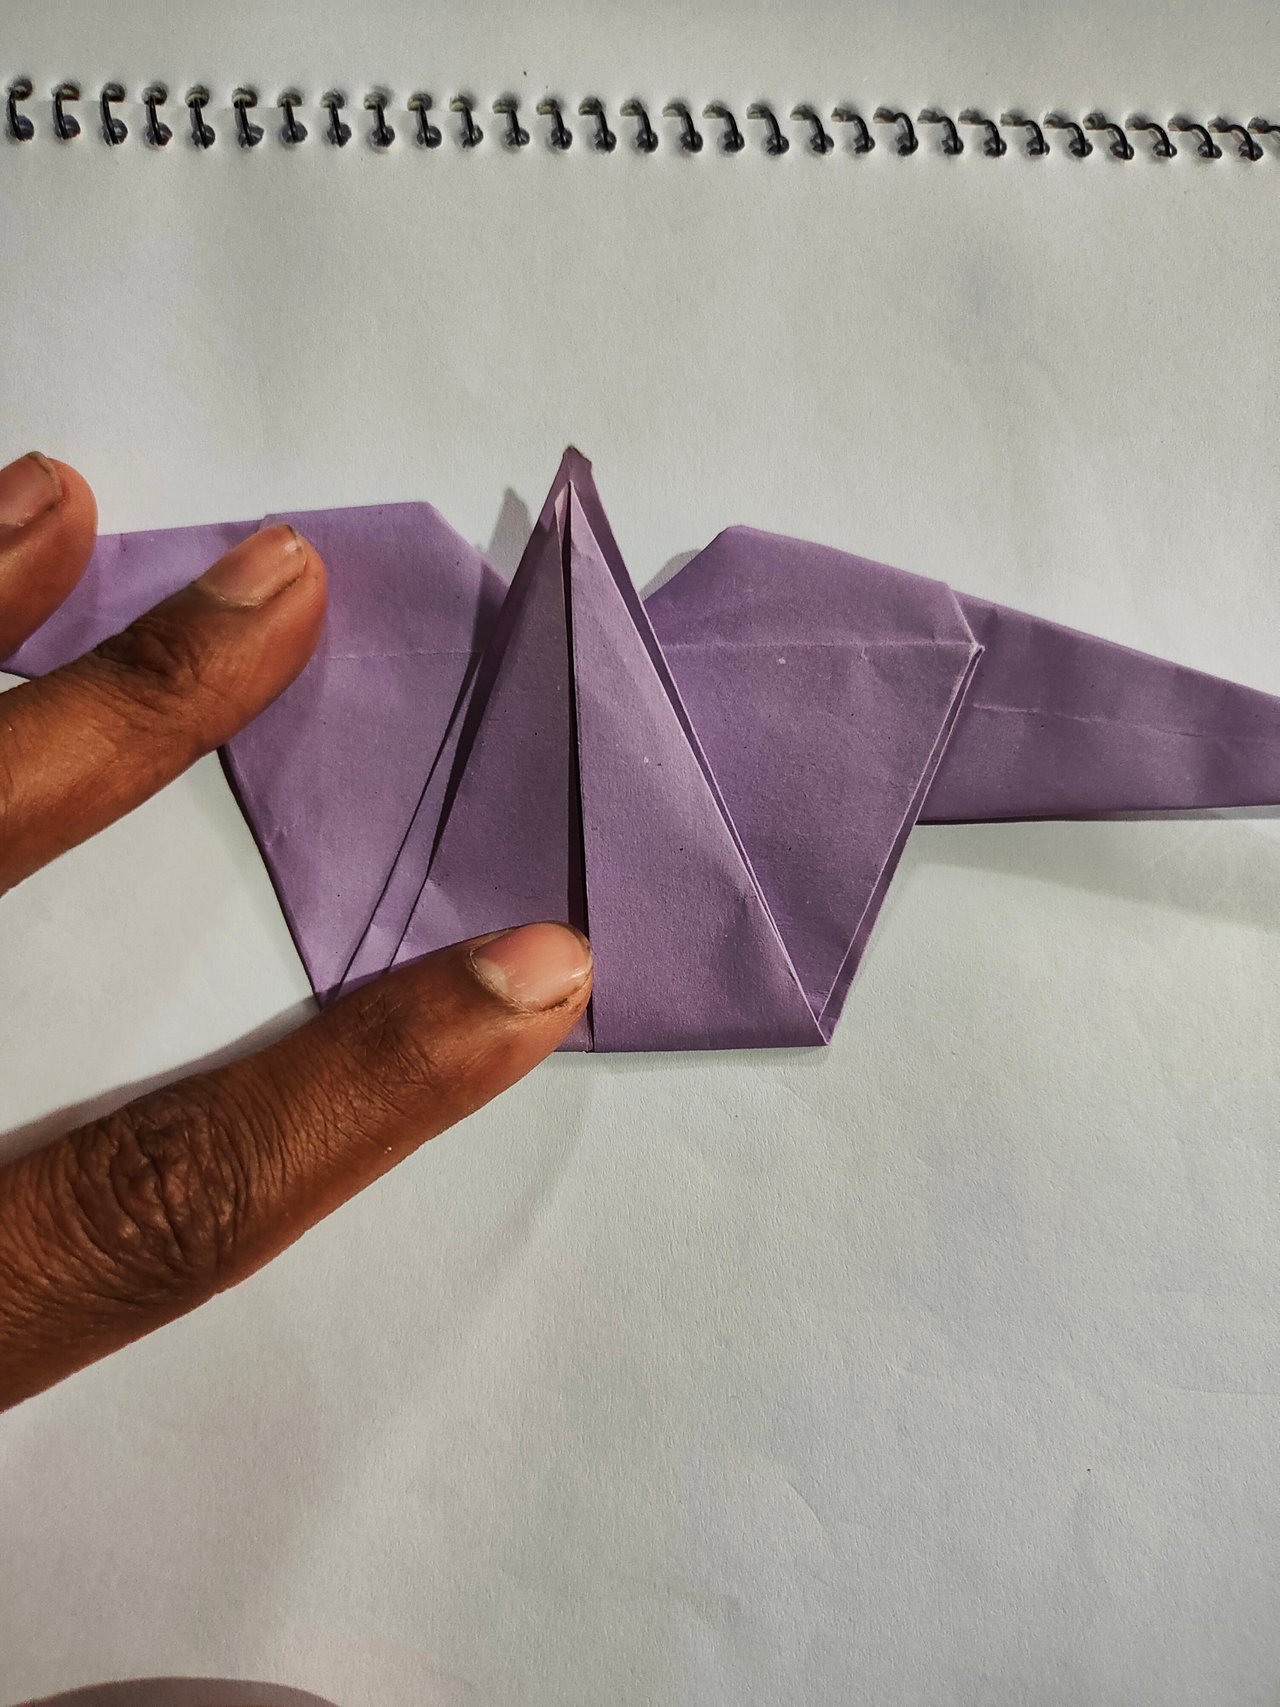
Step 9,
- Then I put it on my hand and then fold it in the middle very nicely and carefully.
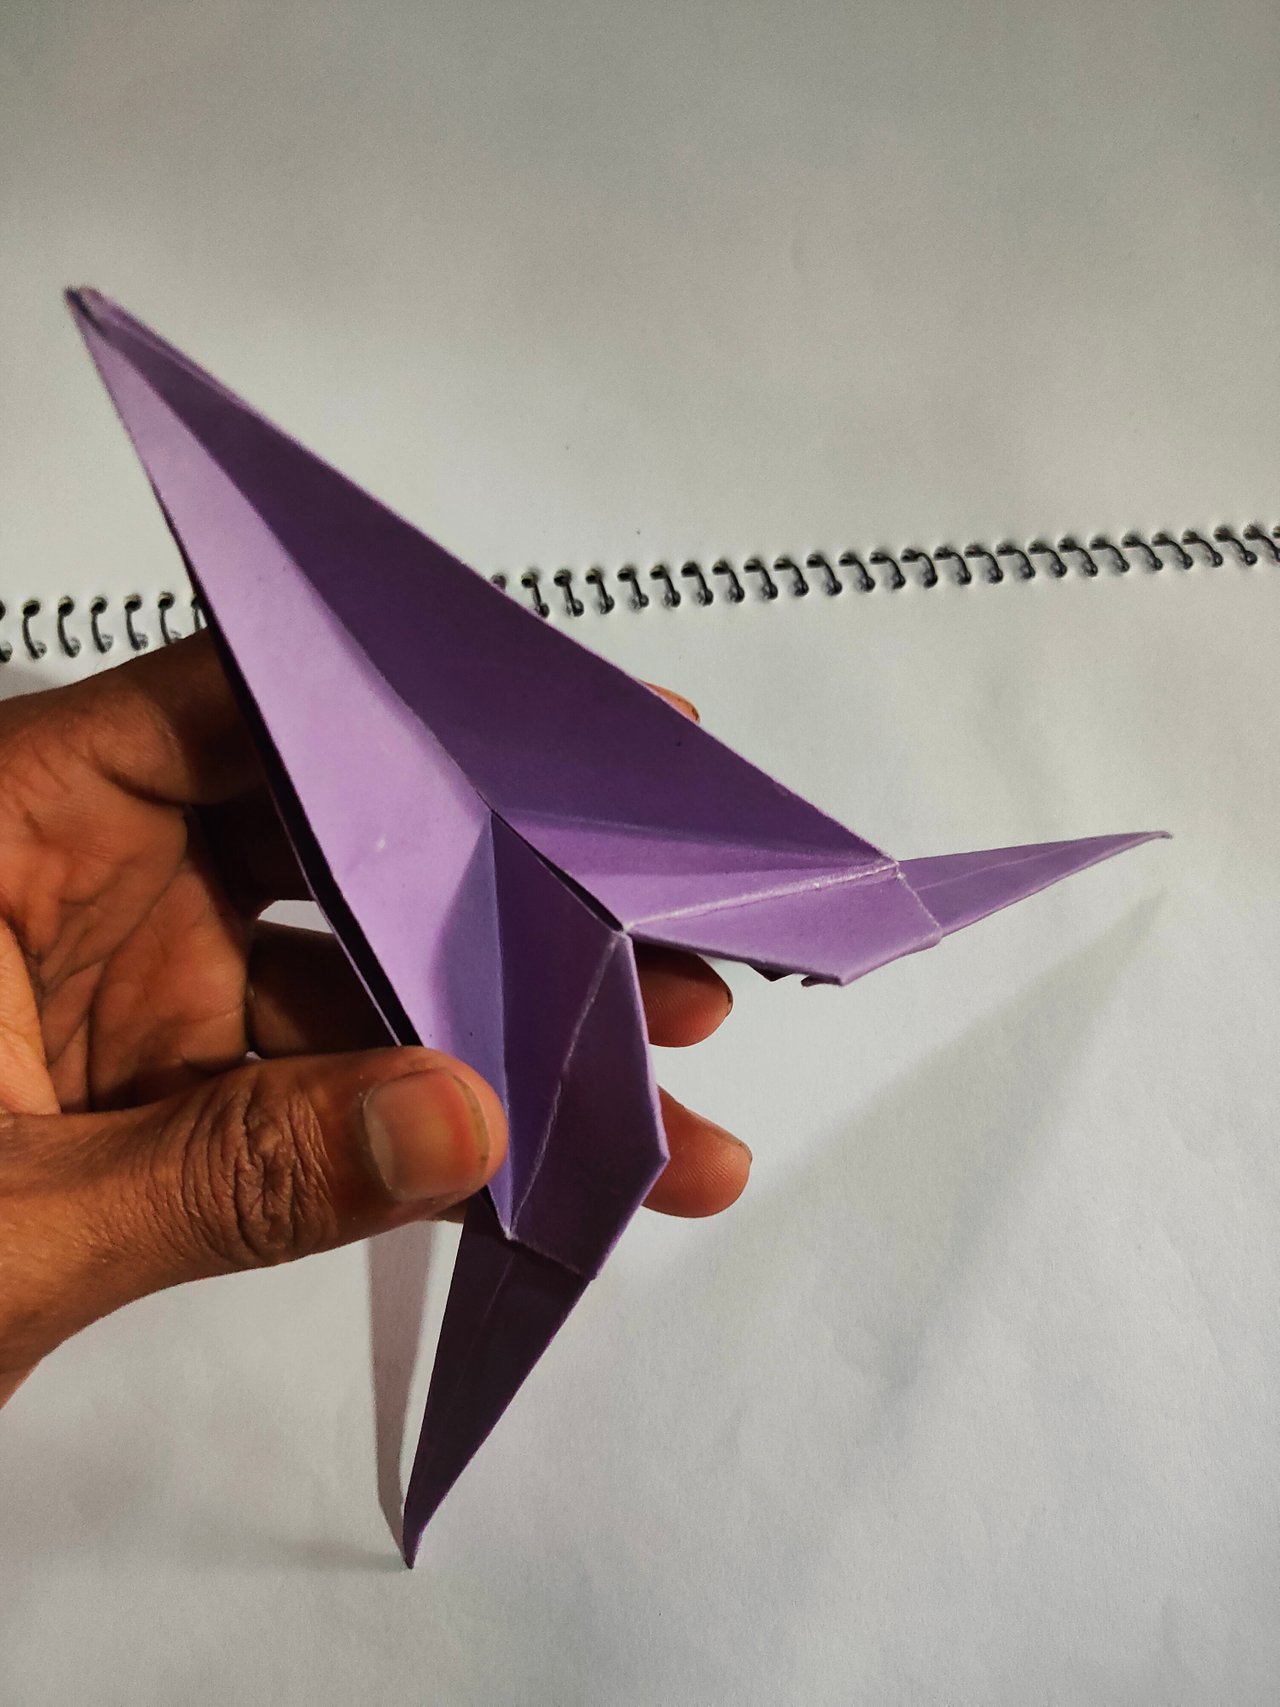
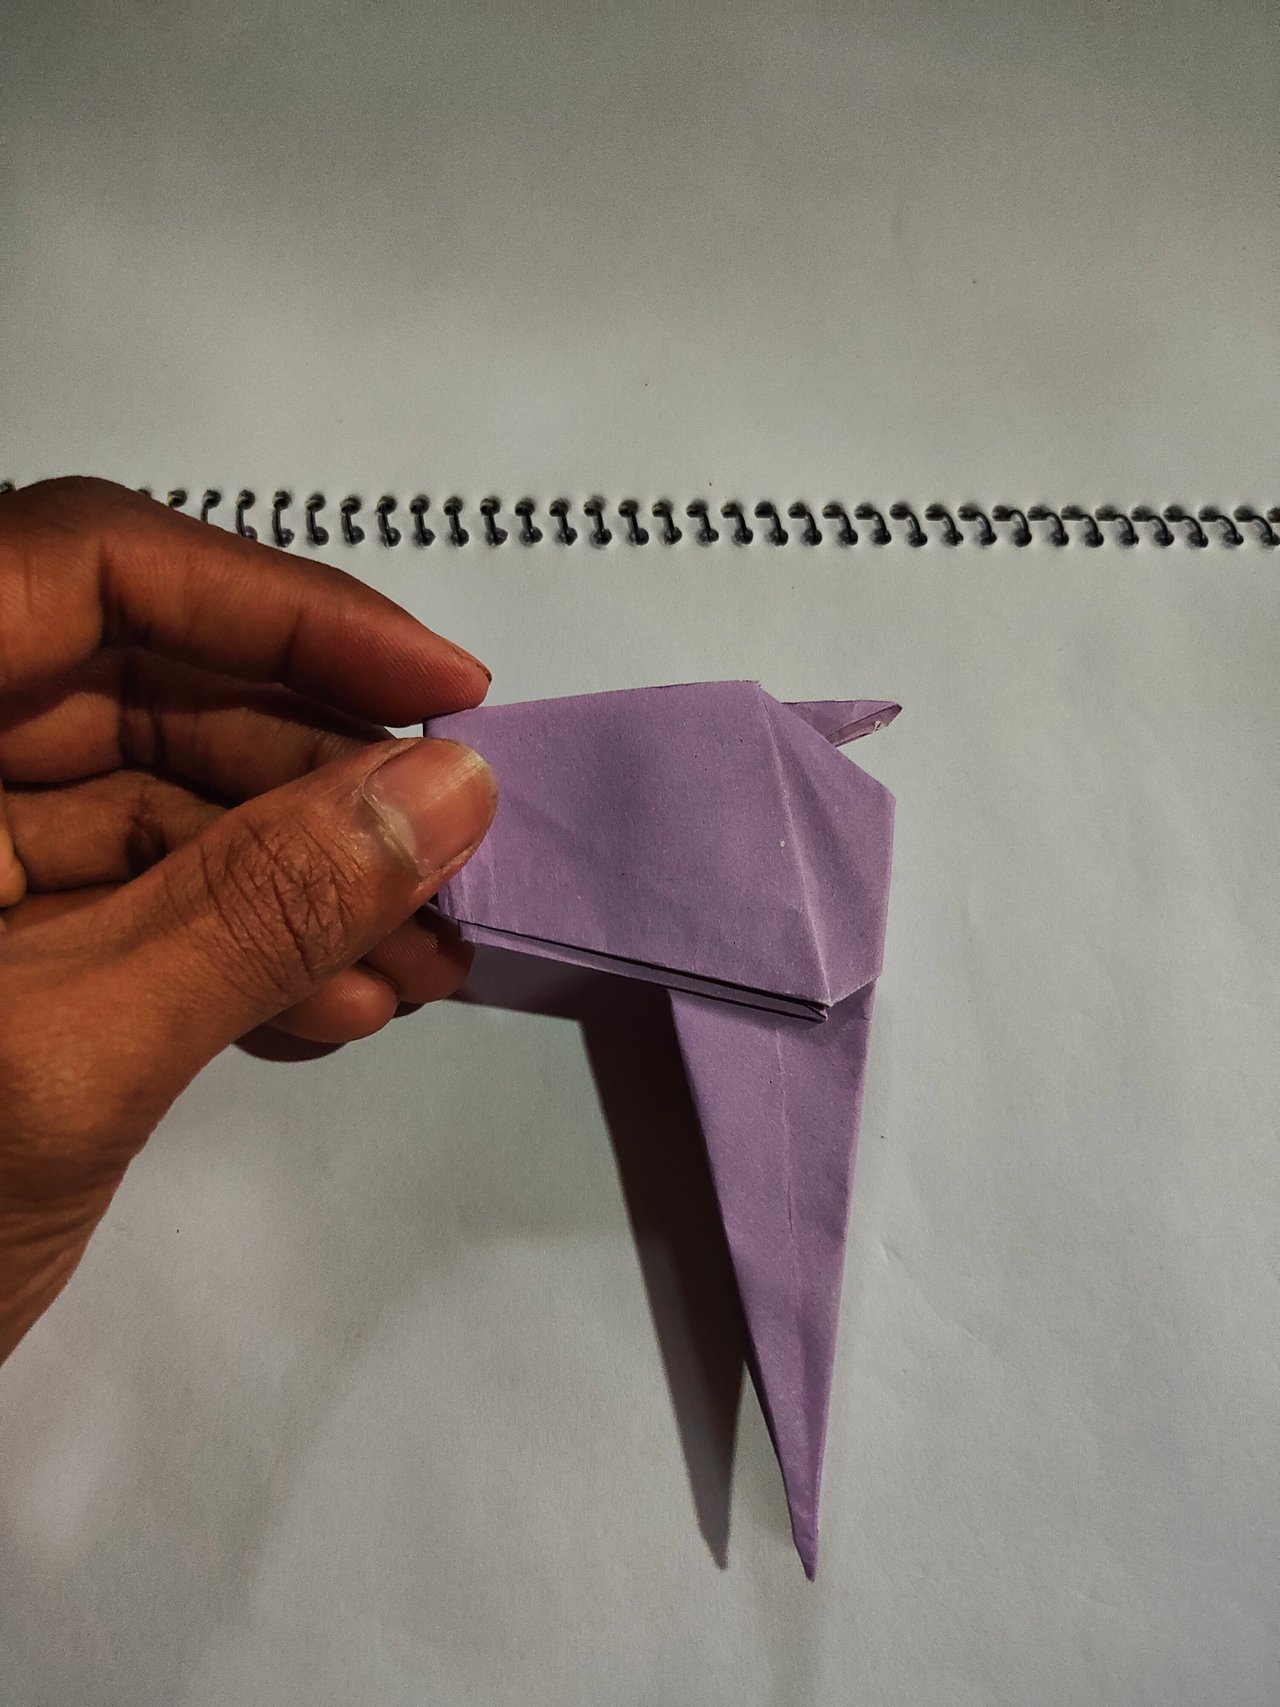
Step 10,
- Then I pull the first paper little bit down and then turn it in deer mouth shape. And then put aside it.
Step 11,
- Then I take the rest one and fold the paper same as the first one. In this way I will fold nicely in the same way up to step number seven.
 |  |
|---|
| |
|---|
Step 12,
- Then I turn the paper over and fold the middle paper up the middle. After that I fold the paper in middle again nicely and the deer second body part is ready.
 |  |
|---|
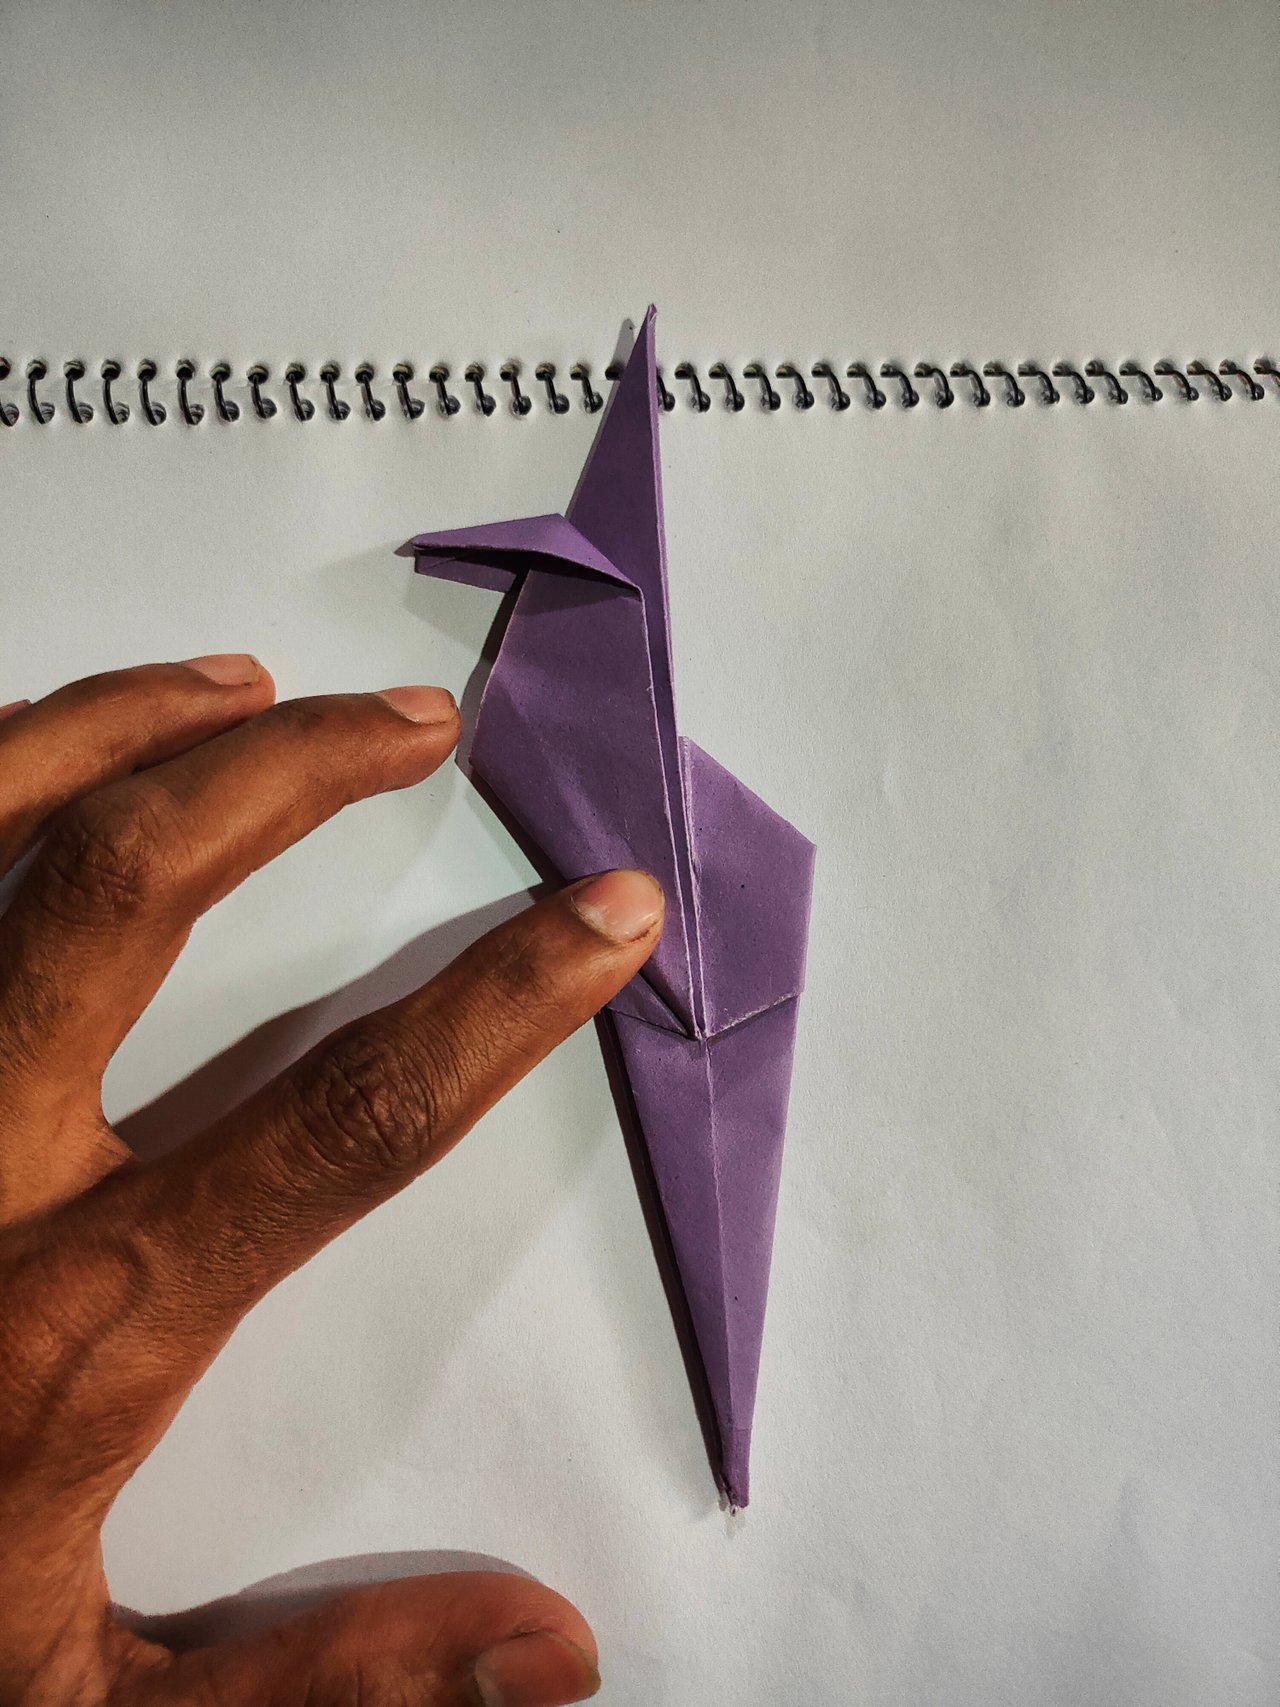
Step 13,
- Then I take the first part of the paper and cut the paper with scissors for the horn part and divide it into two separate parts.
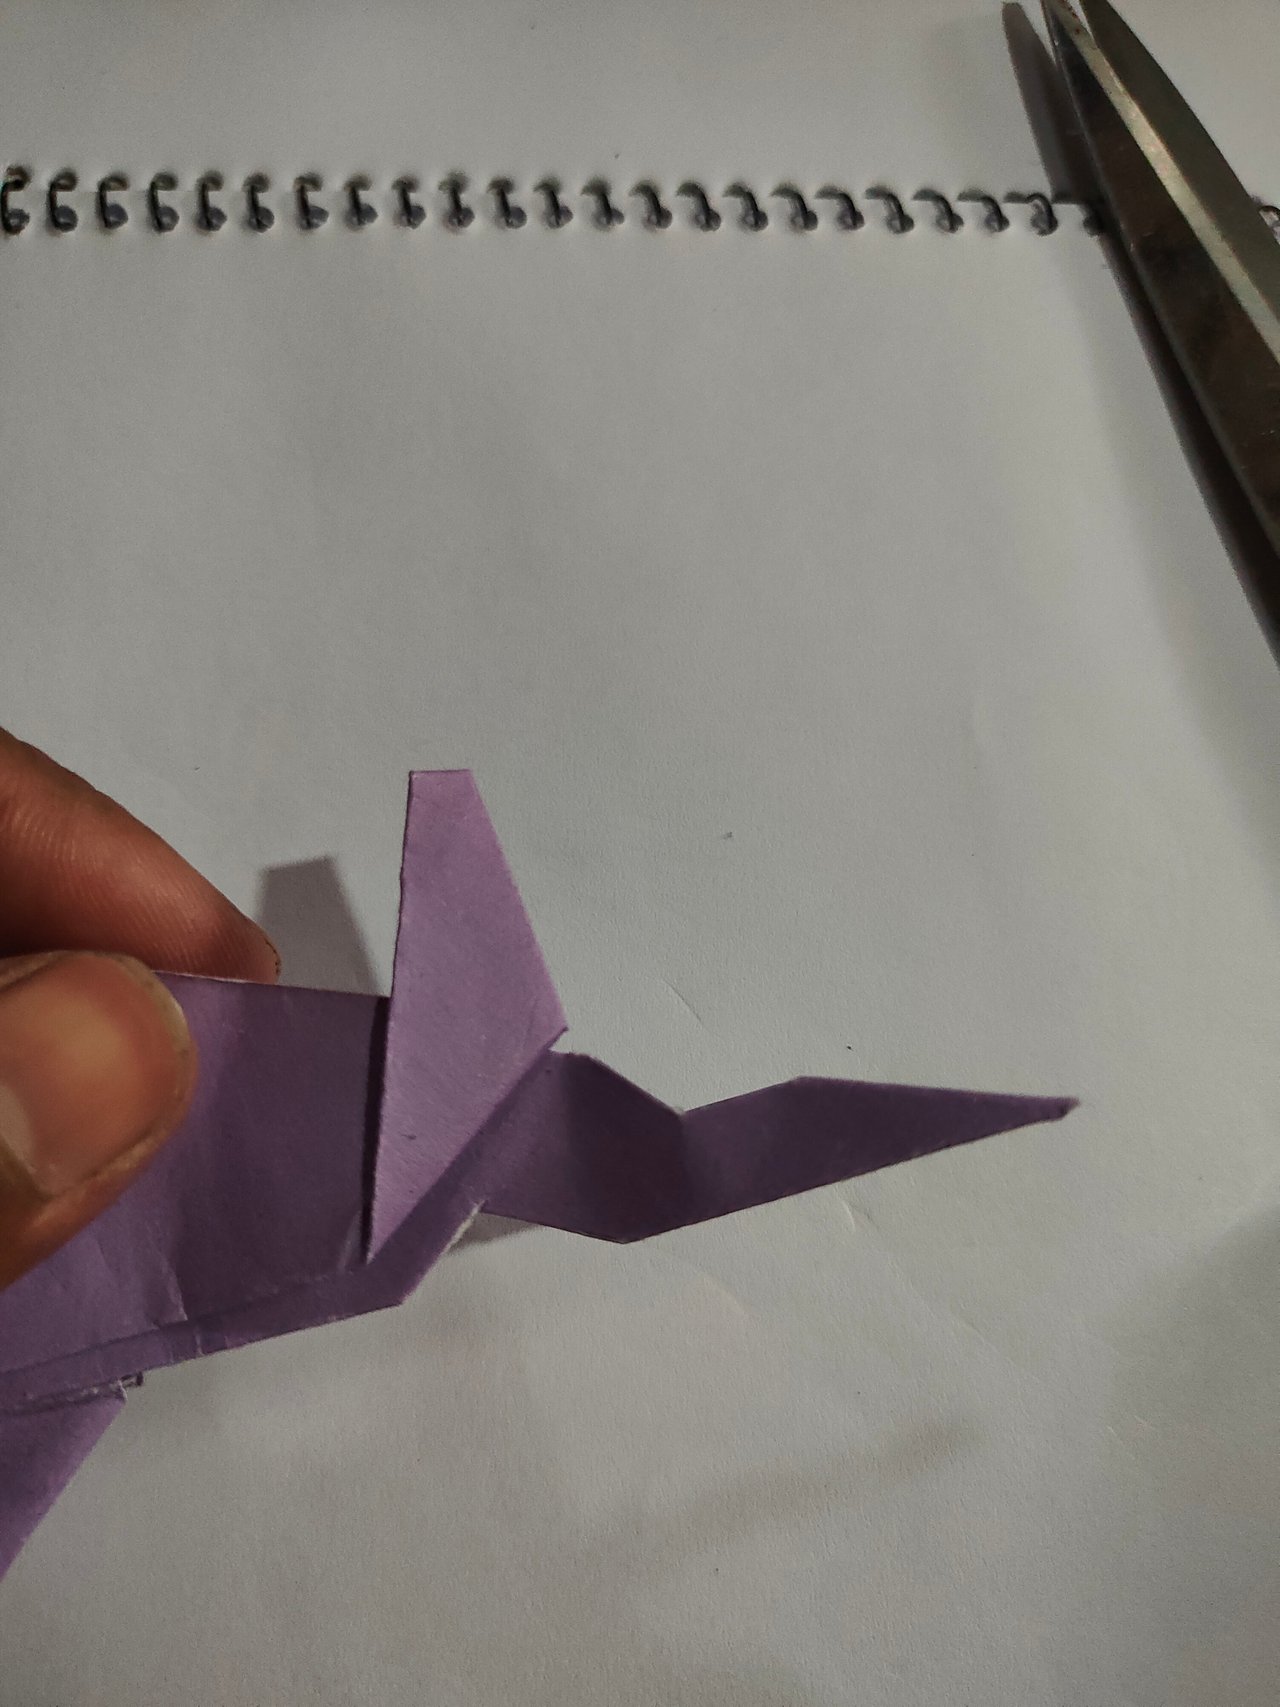
Step 14,
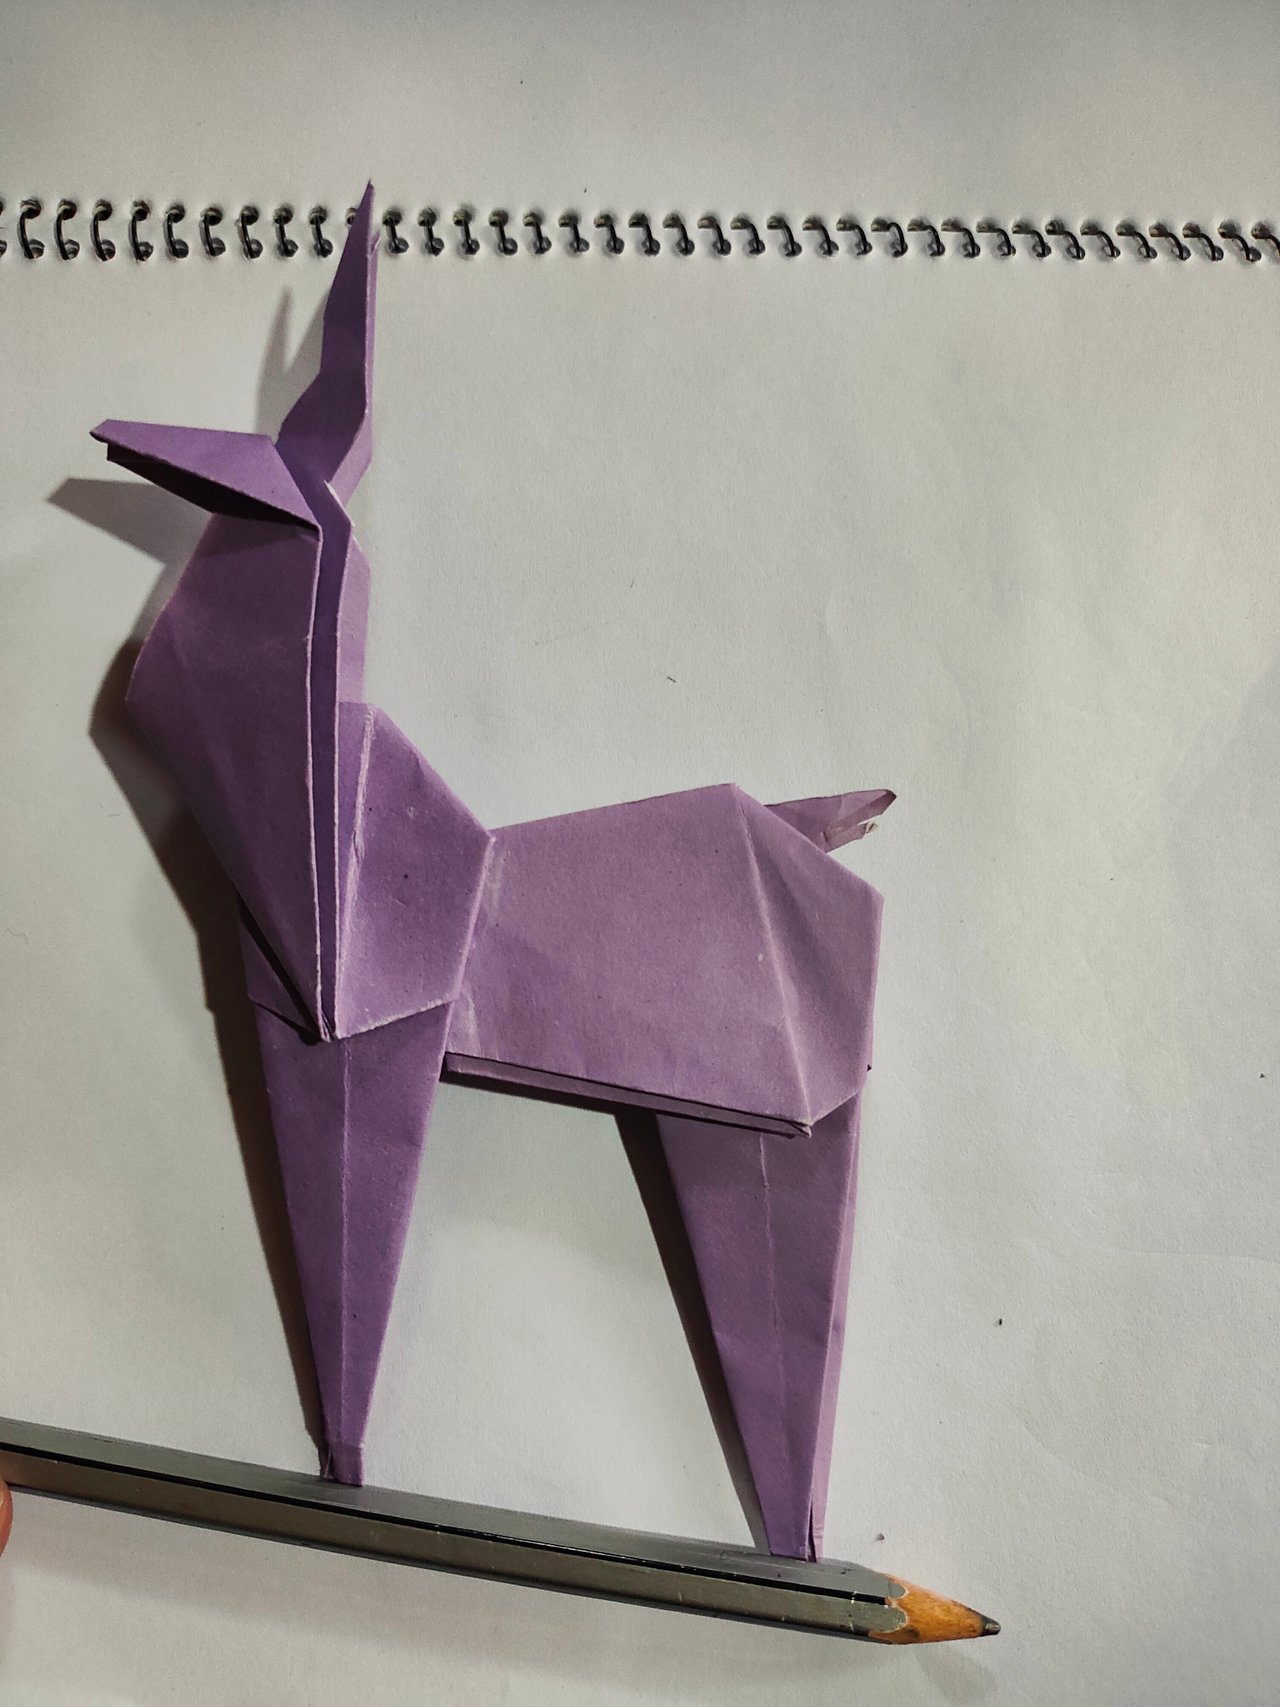
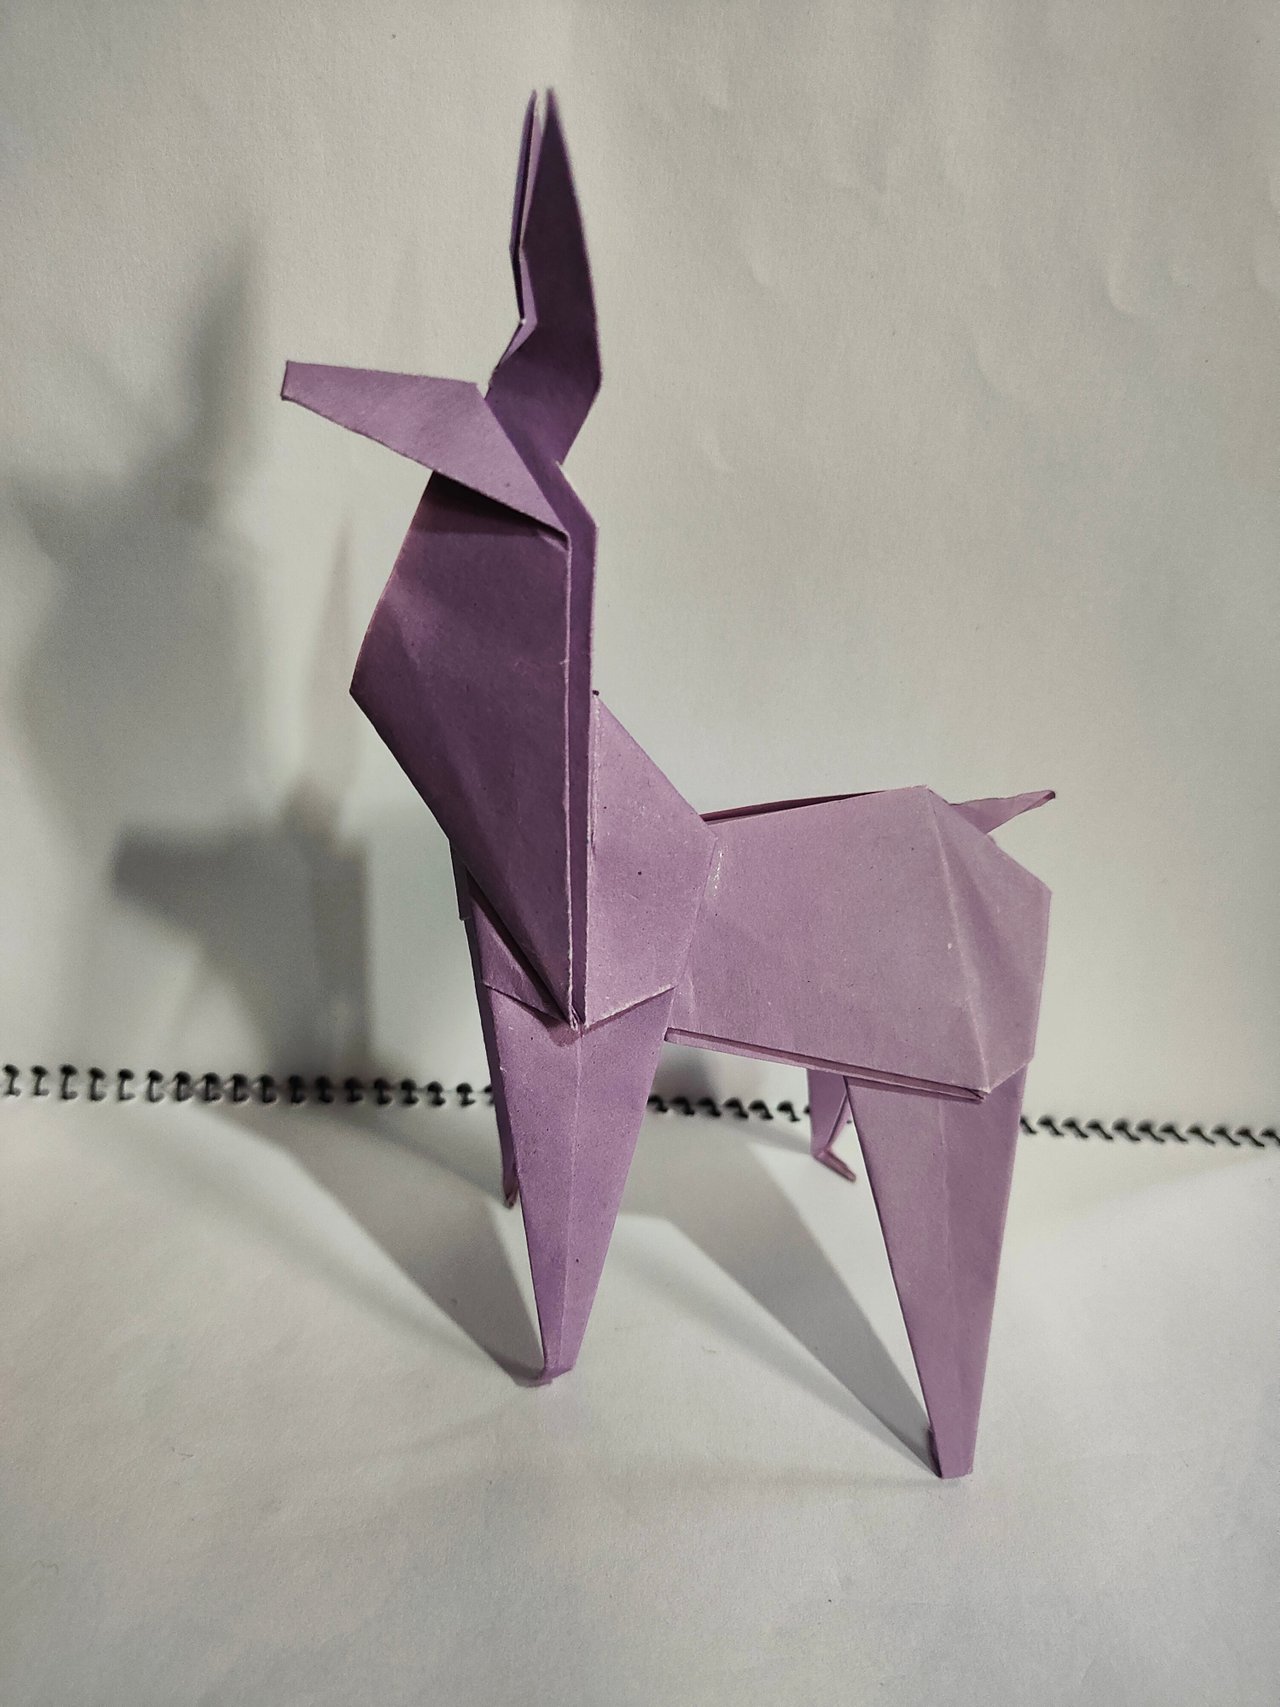
- Then I attached the 1st part to the 2nd part well with glue and our origami deer was made.
 |  |
|---|
Hello friends, hope you all liked my today’s origami deer presentation.It's a very nice and good looking craft and we can decorate in our tabel or showcase by using it. This time bye my friends, Stay safe and Allah Hafeez. And I invite my friends @nishadi89, @mdkamran99 & @arshani.
CC-

Comments